Favorite Sourdough Pizza Crust Recipe
By Amanda Paa – Updated March 1, 2025
Jump to Recipe
This post may contain affiliate links. Please read my disclosure policy.
Use this sourdough pizza dough to make a crispy, chewy, delicious crust that can hold all your favorite toppings. The stand mixer does all the work for mixing the dough. The pizza bubbles as it bakes on the grill, or in the oven on a pizza stone. It’s a fabulous way to have a pizza party! Dough will last in the fridge for 2-3 days after you make it.


What makes this the best sourdough pizza crust:
I’ve been working on this recipe over the past few weeks, and I’m so excited to share it with you!
The naturally fermented crust bakes up crisp on the edges, with a pillowy, fluffy interior, making for the perfect bite. It’s my ideal thickness, enough for a bit of chew and holds up to some glorious toppings. You can make the sourdough pizza on the grill, in the oven, or an outdoor pizza oven! I’ve tested all of these ways and have lots of detailed instructions.
Besides a great dough recipe, the best pizza is made in the hottest oven possible; most commercial ovens used at pizza restaurants heat up 700-800ish degrees F. A grill or pizza oven is great for this. You can see how great this sourdough pizza crust works in an outdoor pizza oven, too!
When you cook pizza at the right temperature, the crust gets the correct amount of crispy texture, without being brittle or dry. Hot ovens also mean that your pizza stone inside stays hot consistently, and retains heat so each pizza will literally take 5 minutes to make.

Using a Grill to Make Sourdough Pizza
And here’s where my Twin Eagles Gas Grill comes in clutch – it can get up to 700 degrees F, much much hotter than my kitchen oven will ever get.
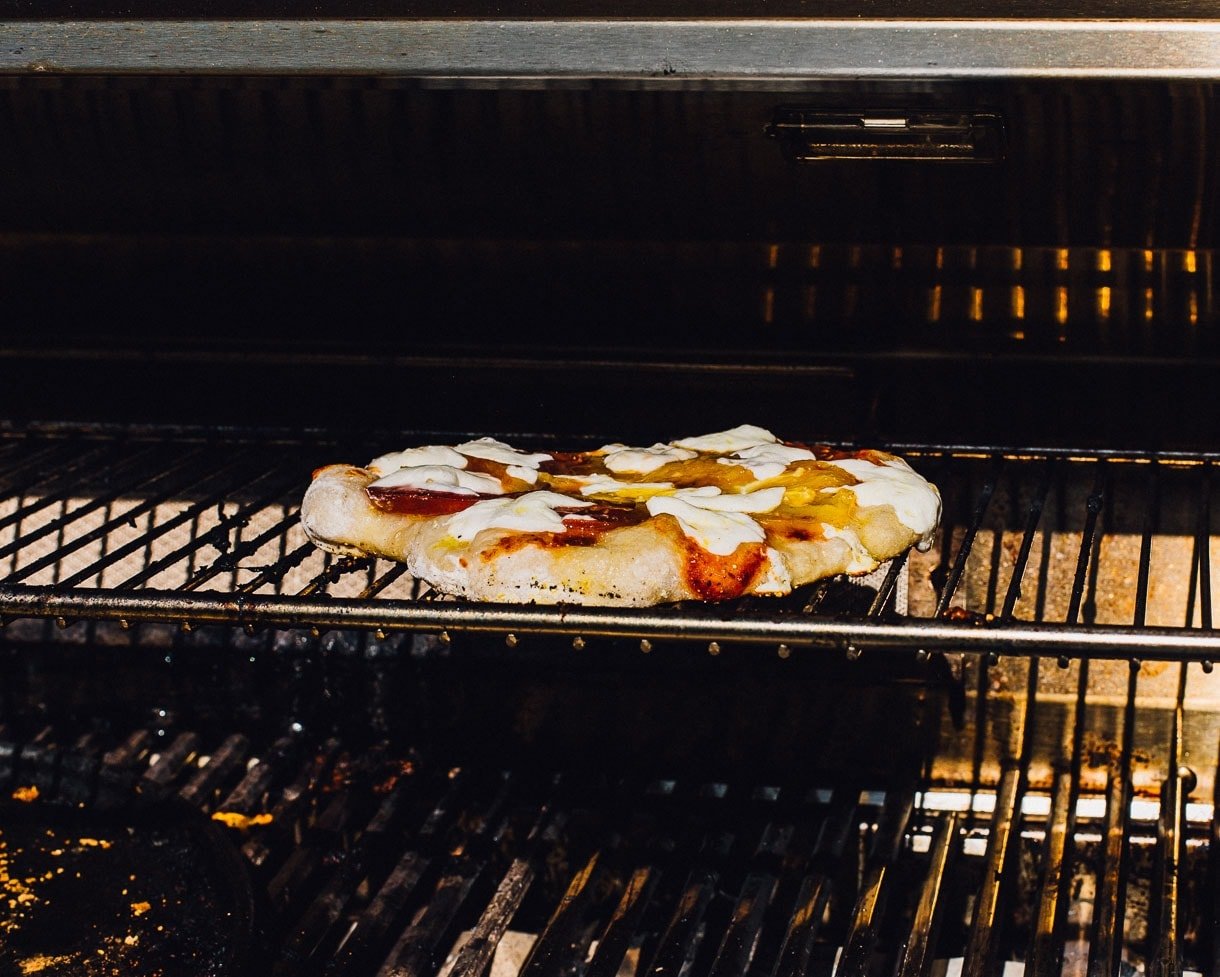
In effect, it acts like one of those fancy pizza ovens, but it’s a GRILL. That blazing heat means a crisper bite, bubbly toppings, and those deliciously charred spots on the bottom of the crust.
Through trial and error, having zone dividers on the grill was a significant piece of the puzzle. While the two burners on the left side of the grill were responsible for cooking the crust, the right side of the grill was off so I could move the pizza to the top cooking rack, close the lid, and let it finish “baking” without burning the crust.
Another important topic: organization. Now, I wouldn’t consider myself a super organized cook, but it’s an essential part of this pizza making situation.
You want to be able to work quickly after the dough is on the pizza peel, so it has less time to possibly stick to the parchment paper. This was my #1 issue when testing.
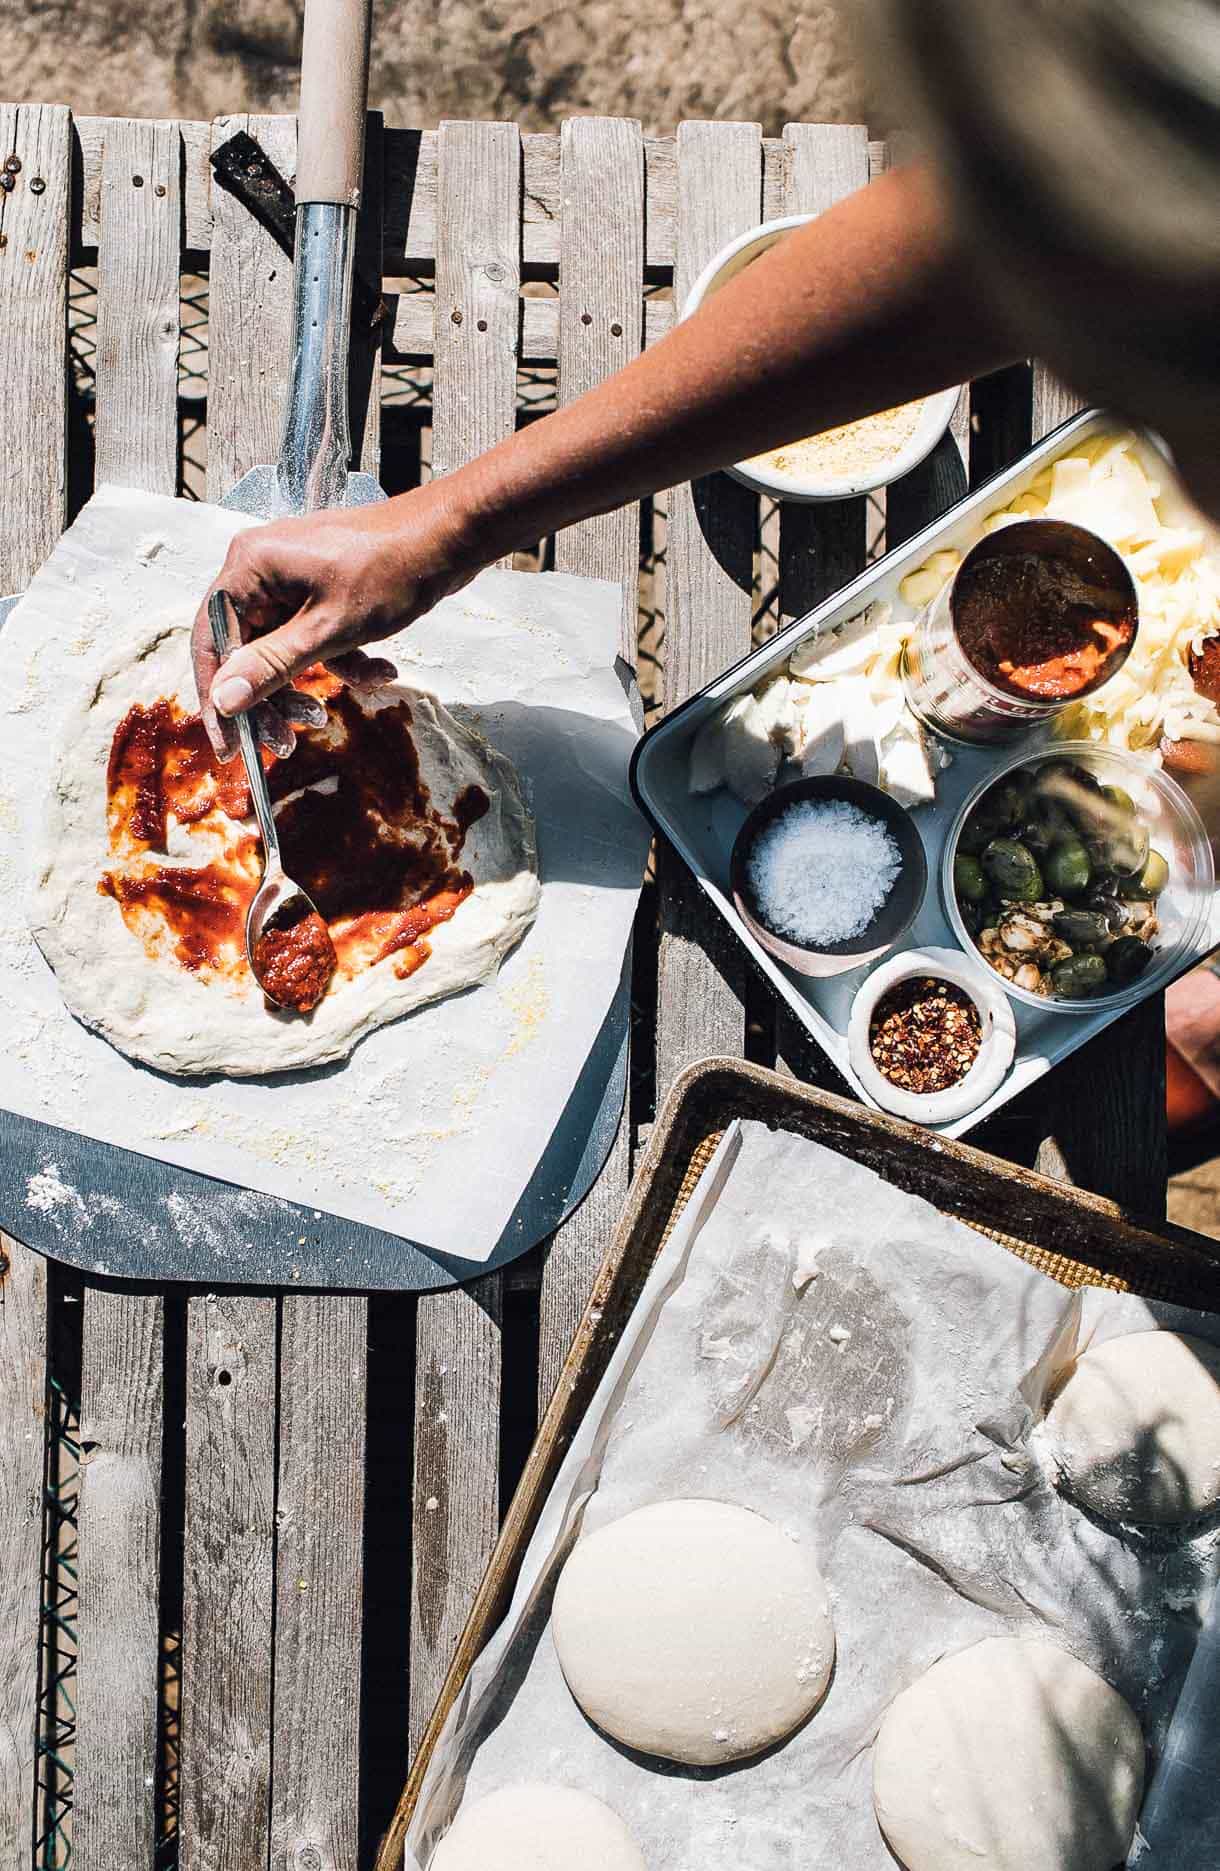
What You’ll Need to Make Sourdough Pizza Crust
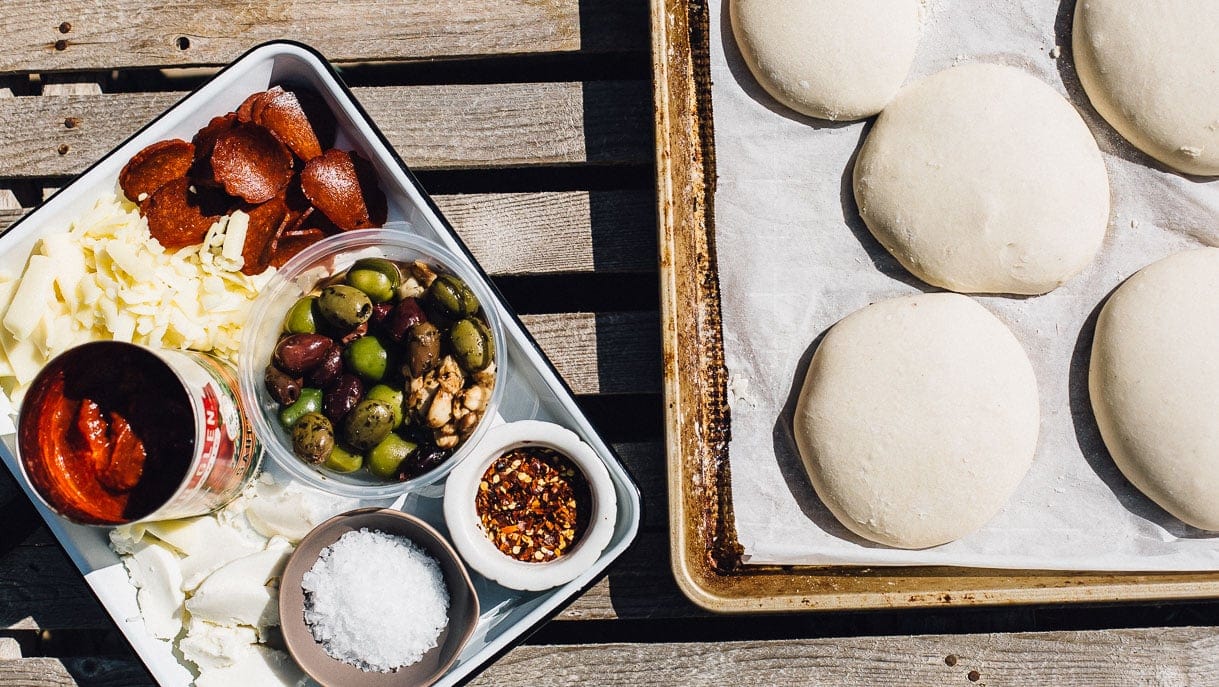
- toppings, with veggies cut up if needed and cheese shredded or torn
- sauce and olive oil at the ready
- a pastry brush and several spoons
- parchment paper sheets
- extra flour and cornmeal for stretching the dough and coating the parchment
- a large cutting board
- a pizza peel with long handle (that’s the one I have, which is less than $9) – don’t try it without this, the grill is way too hot for any part of your body to be exposed to!
Also to note, all grills are different. Consider your first attempt at grilled pizza as a sacrifice to learning just how to control your grill temperature, and trust me – it might not be perfect but it will still be delicious.
How to Make Sourdough Pizza Crust
- Unlike making sourdough bread, sourdough pizza dough is mixed with a stand mixer, then rises on its own with just 2 simple sets of stretch and folds to help it gain strength.
- After the bulk fermentation, you’ll use your bench scraper to cut the dough into equal balls of dough, usually about 160 grams. I don’t like to go much bigger than that because at the point, shaping into the crust gets more difficult.
p.s. — If you’re new to sourdough, here are my Top 5 Tips and Insight for Maintaining a sourdough starter!
- The dough balls can rest on the counter for about an hour for their second rise, or you can stick them into the refrigerator for as long as two days, then use when ready!
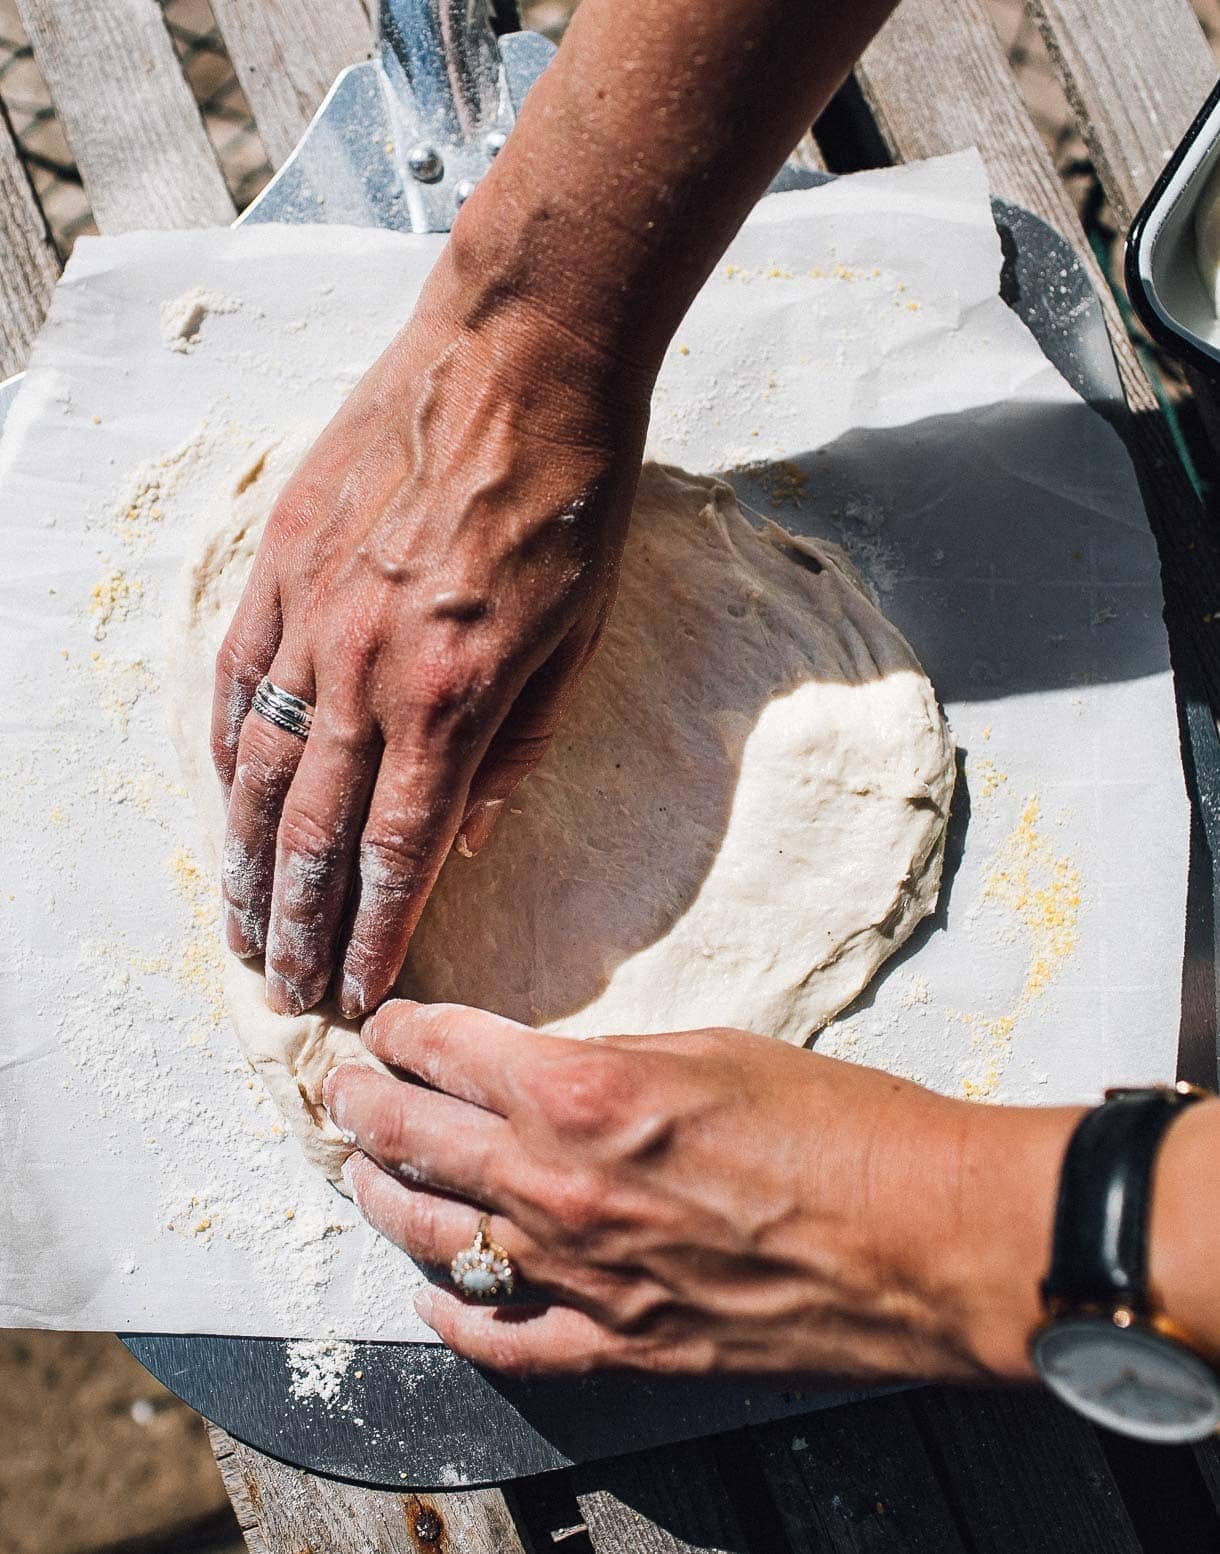
When you’re working the balls into the crust, the dough will be wet. And that’s okay! Just make sure your hands are floured and the pizza peel too. You’ll get the hang of it – it just takes a little practice.
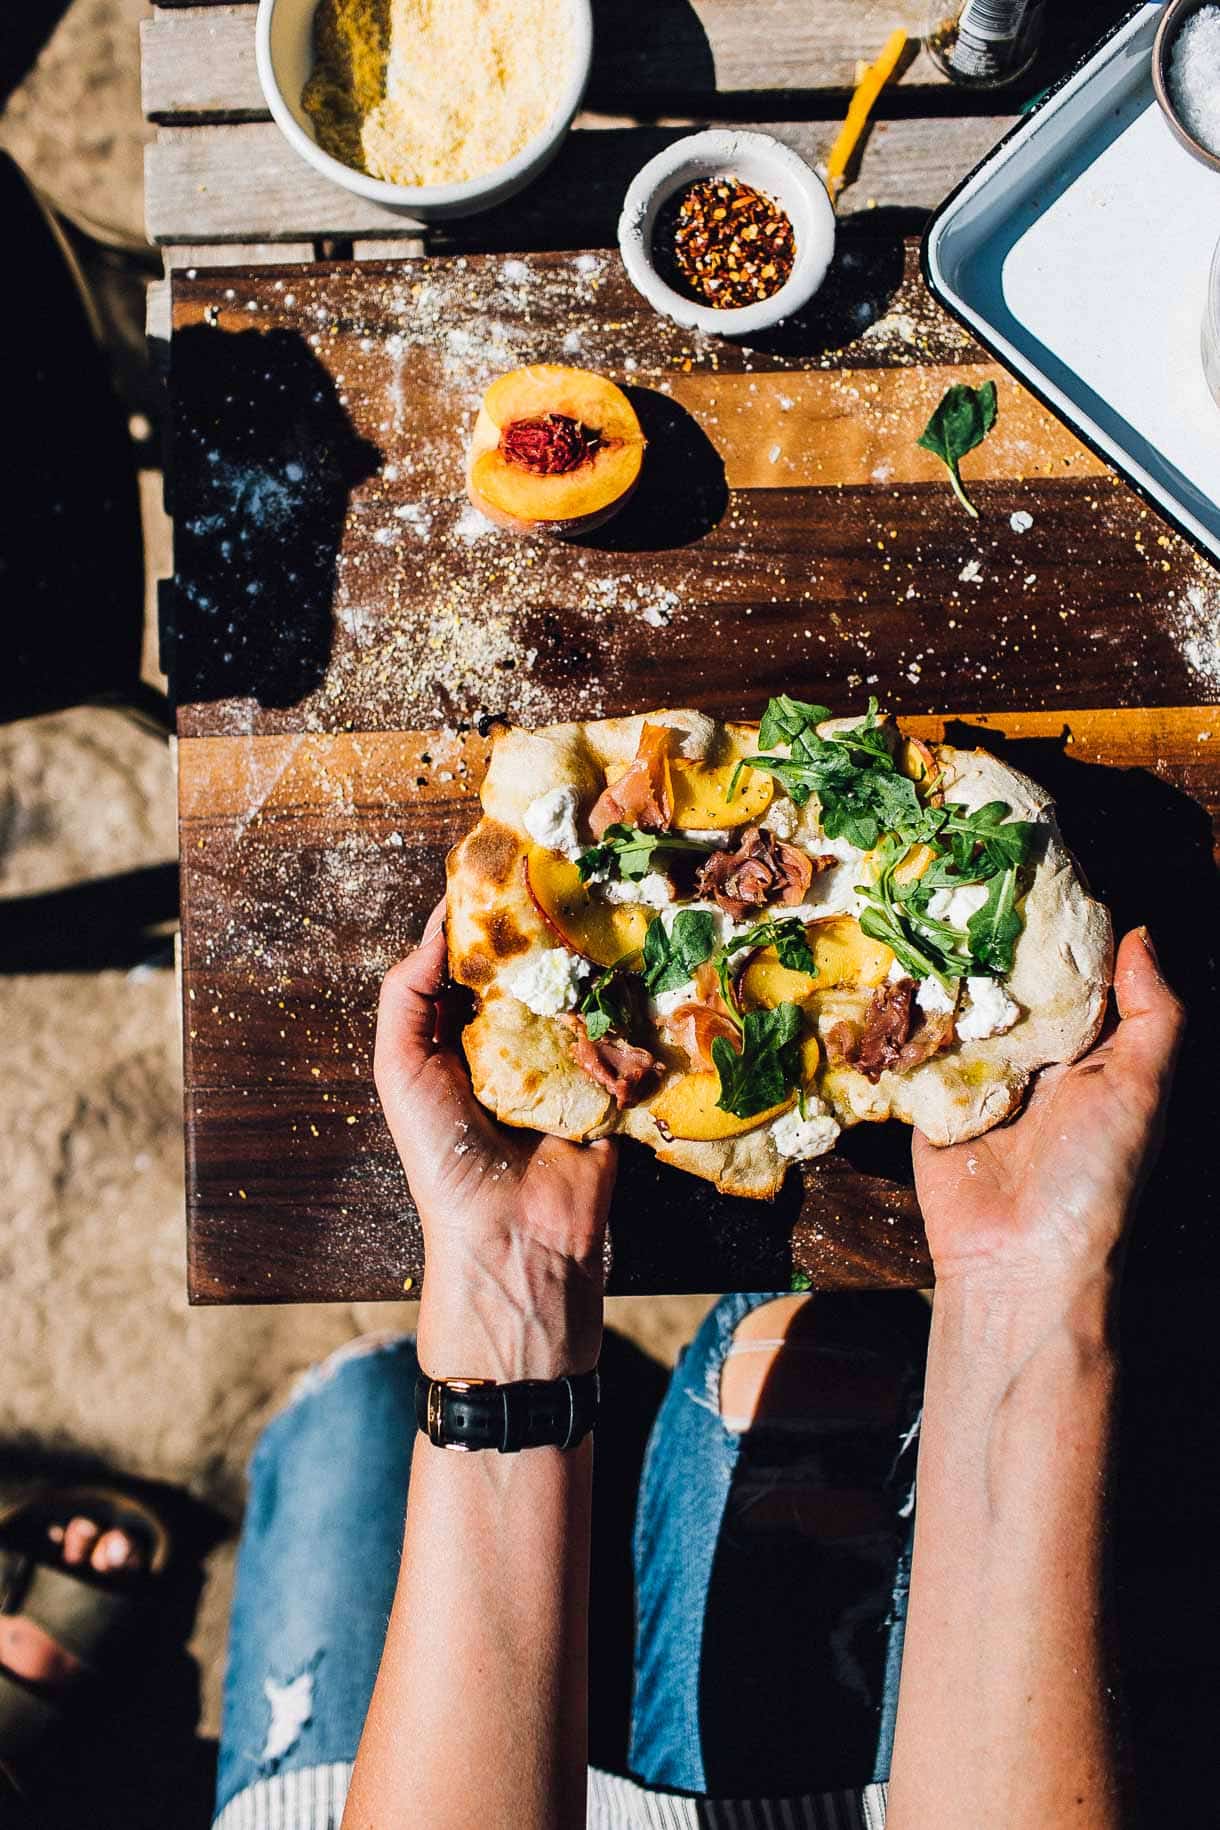
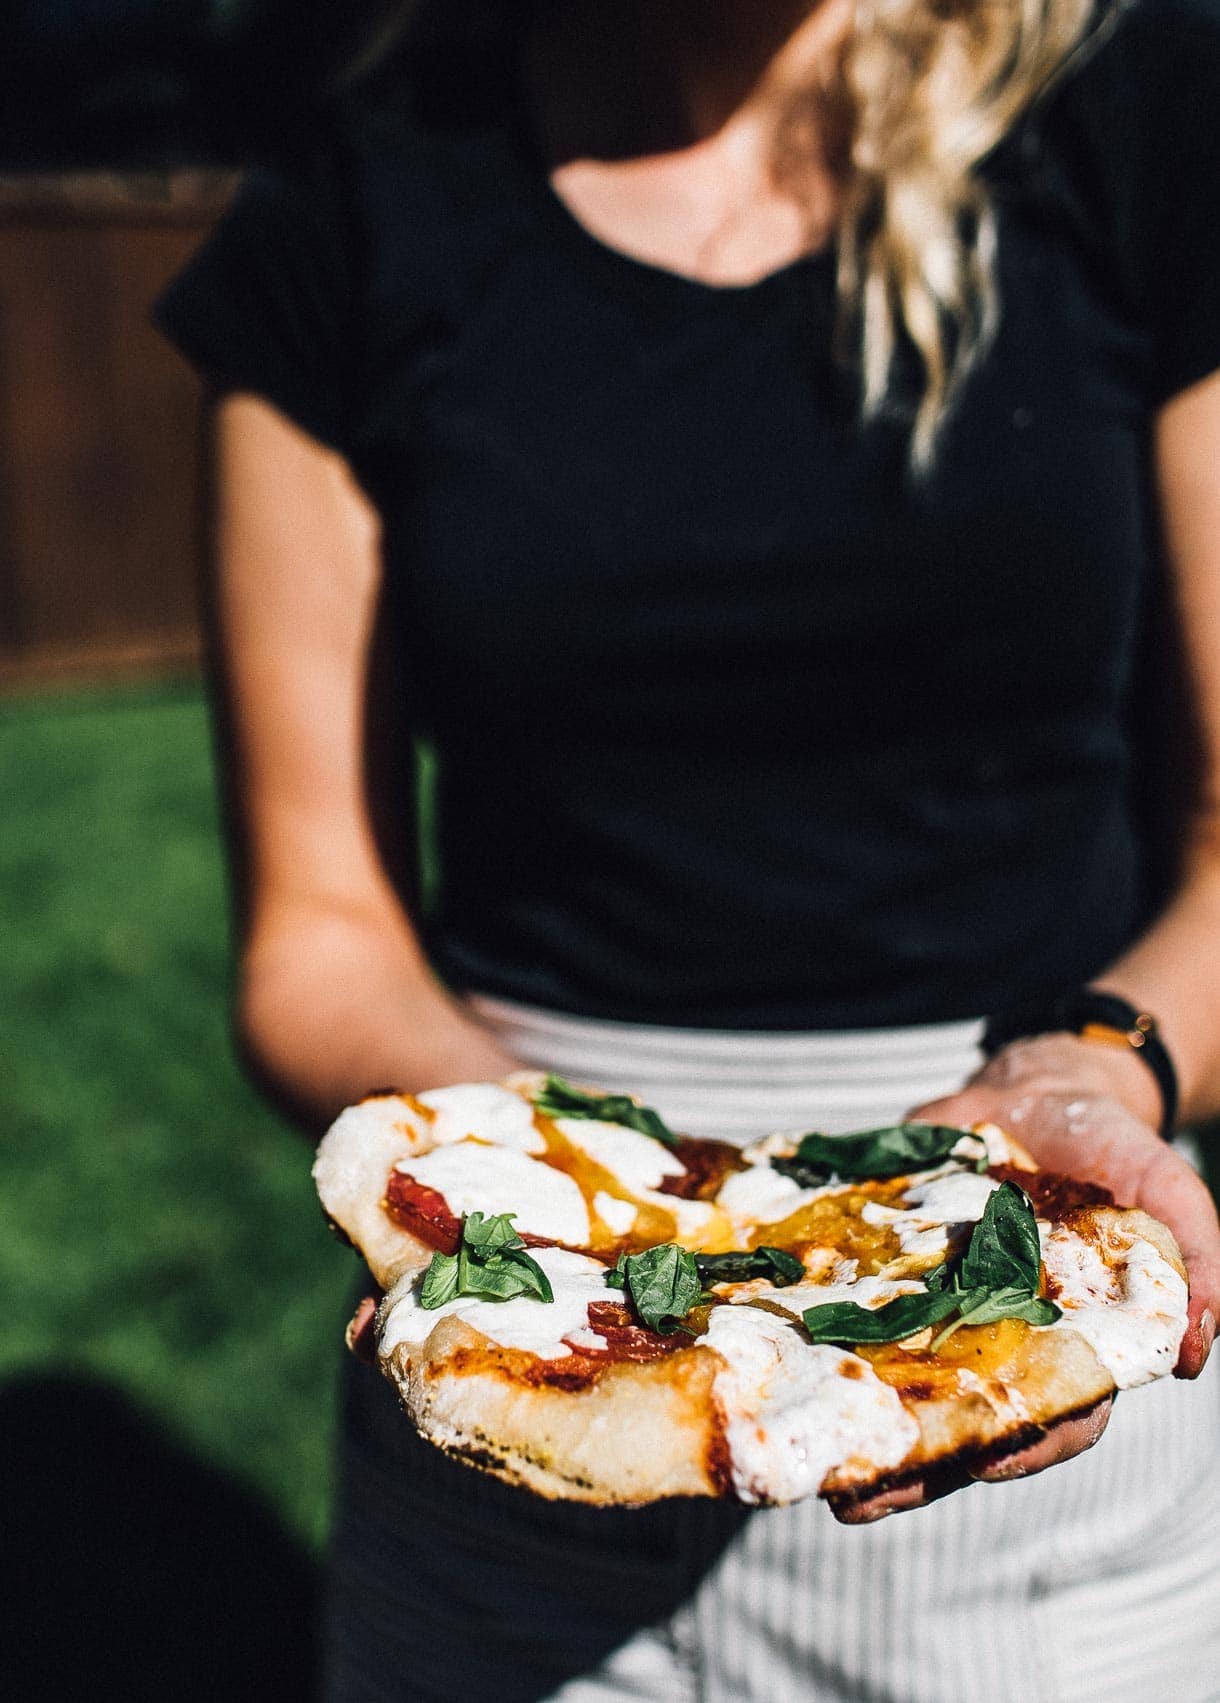
Sourdough Pizza Toppings:
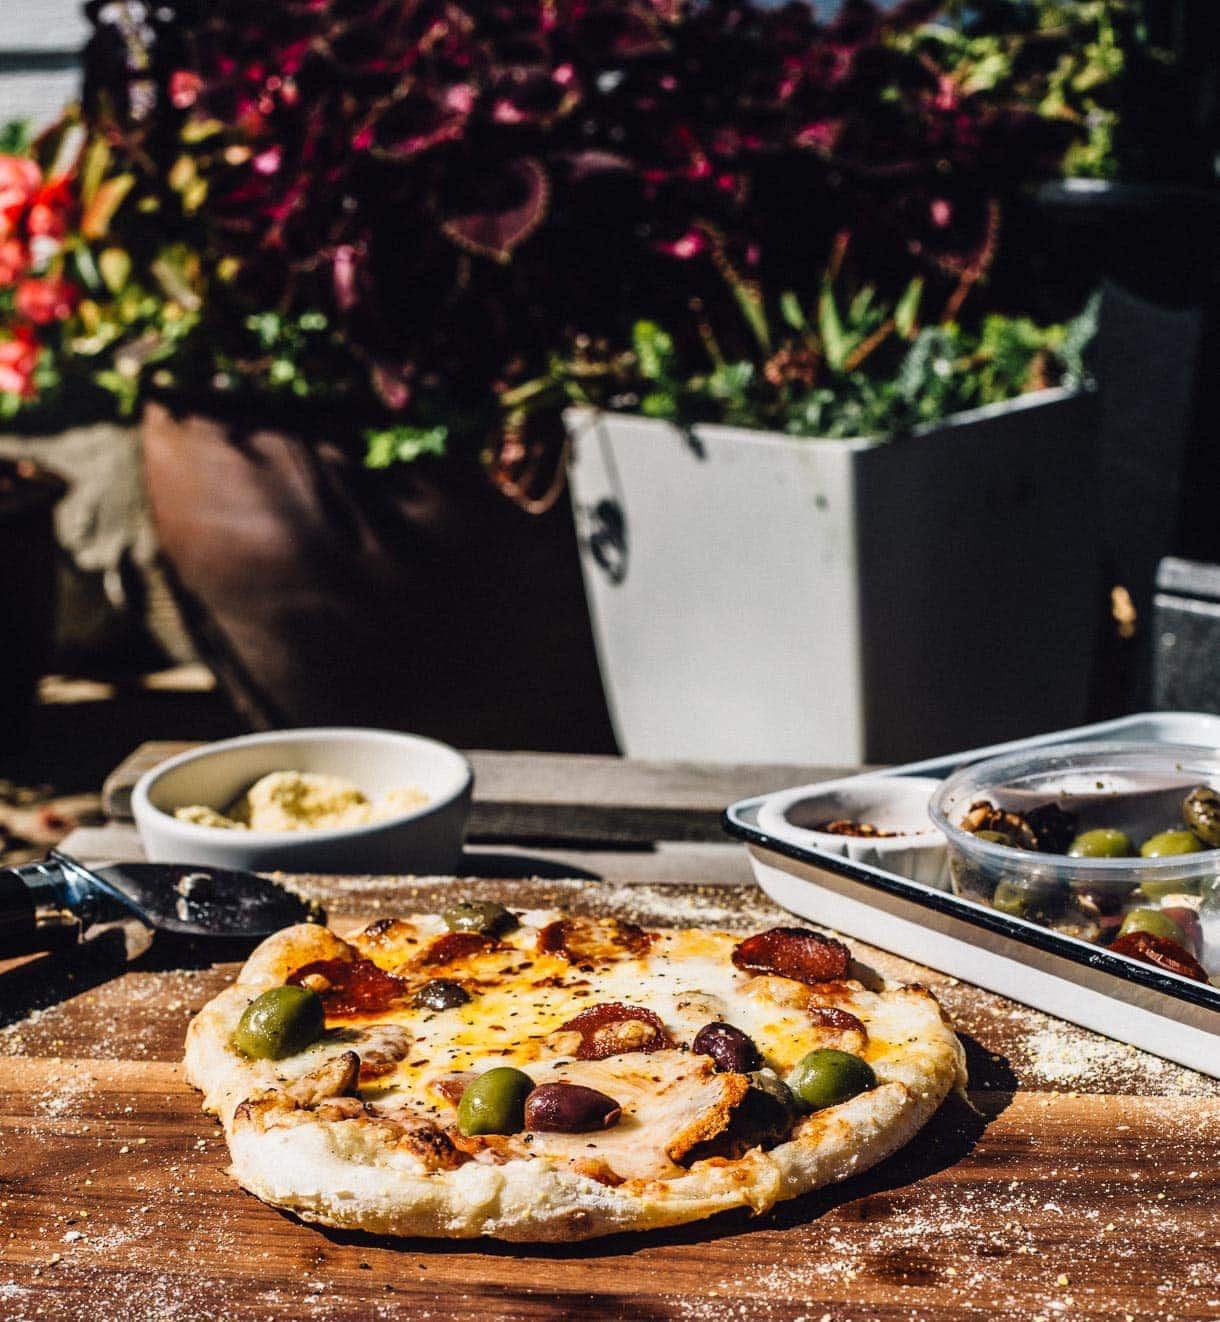
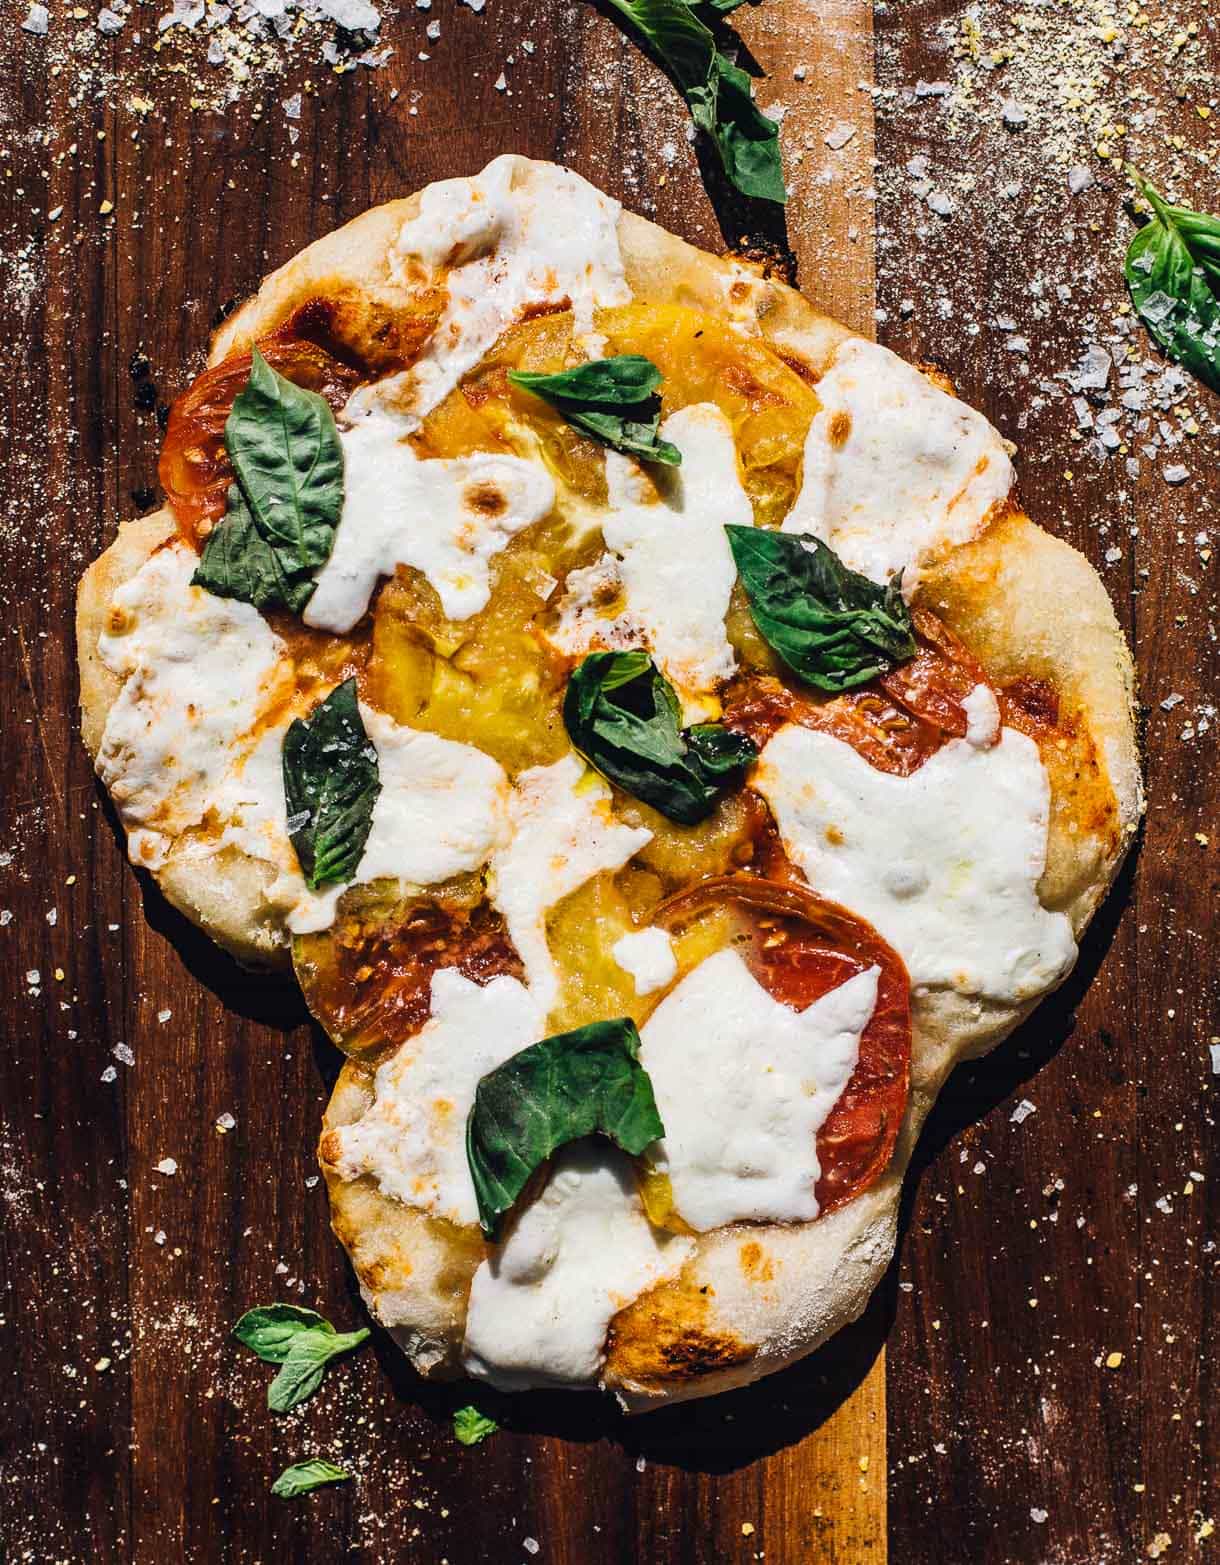
Are endless! On the day that we photographed, I made these three pizzas:
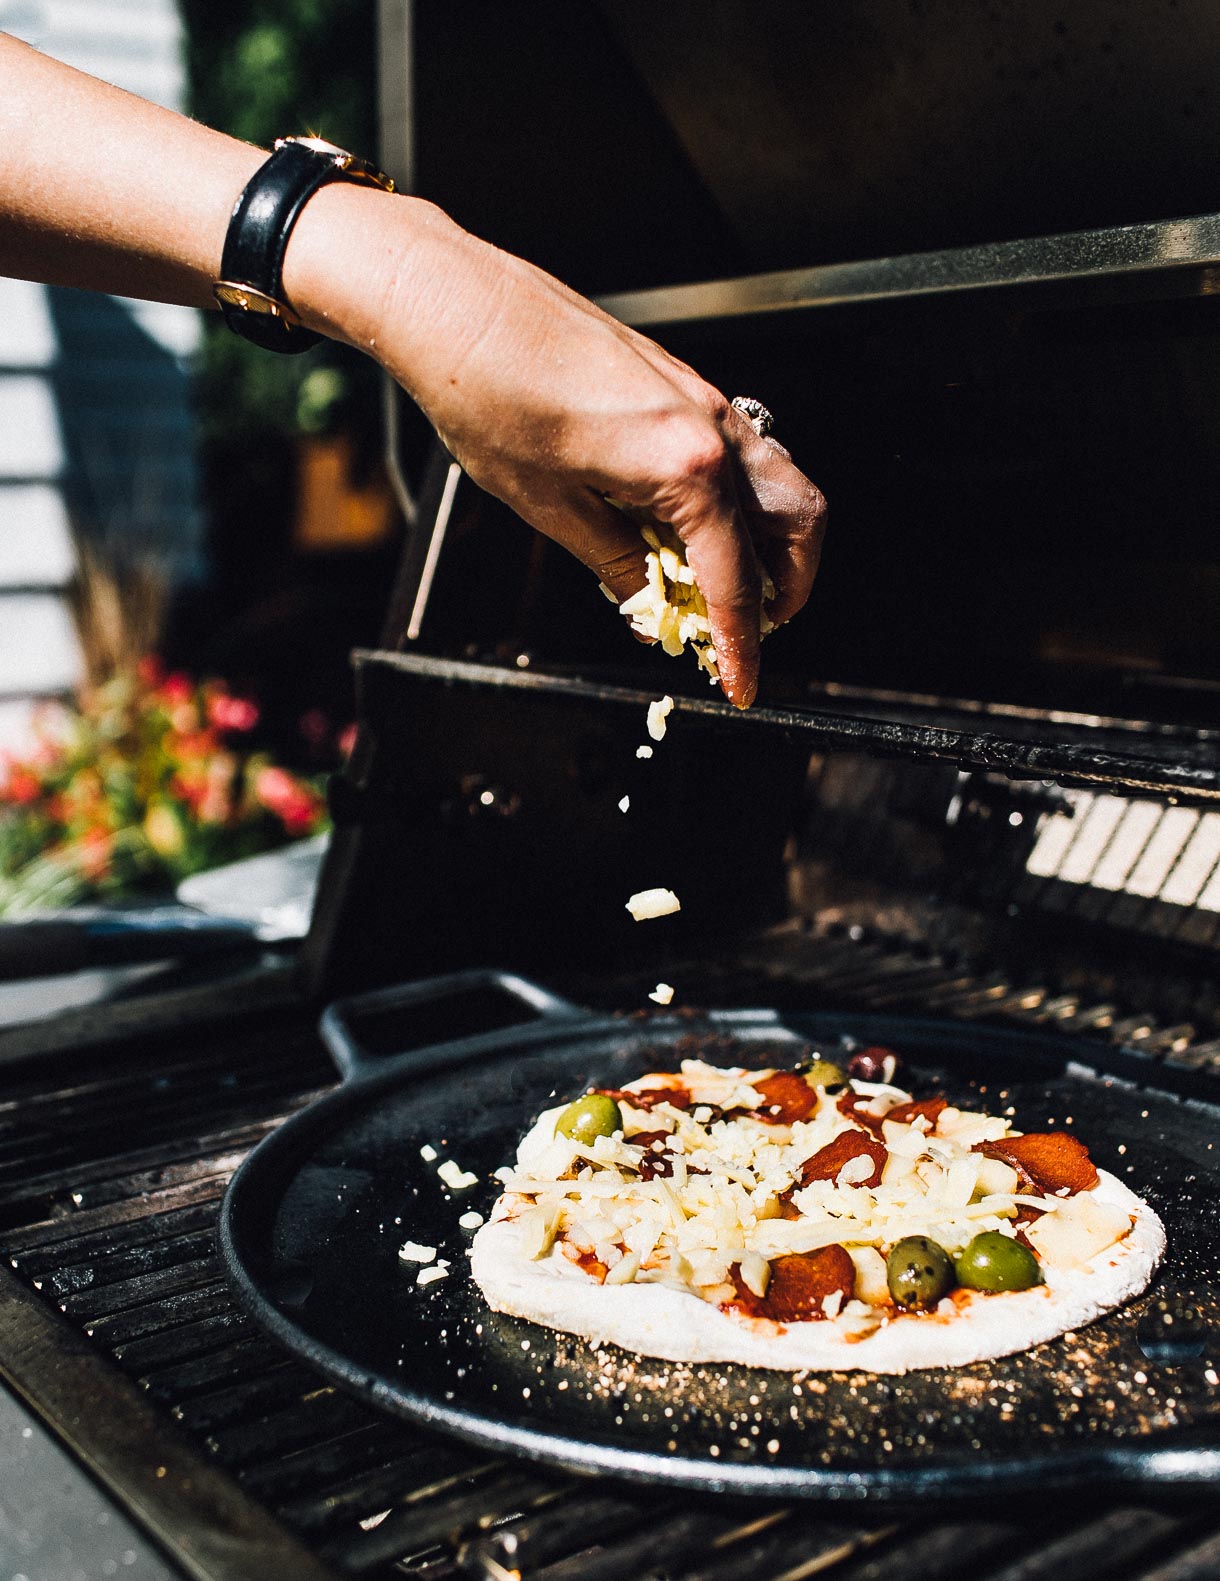
- red sauce, pepperoni, olives, and shallots with Tillamook white cheddar and fontina cheese
- margherita with tomatoes from my garden
- ricotta, arugula, prosciutto, and peach


More Sourdough Recipes:
- Rustic Rye Sourdough Bread Recipe
- How to Make Sourdough Focaccia: a Step-by-Step Tutorial
- Delicious Everyday Sourdough Bread
Yield: 5 medium pizzas
Equipment
Ingredients
- 115 grams sourdough starter, fed and at its peak
- 385 grams slightly warm water (about 85 degrees F)
- 525 grams King Arthur Bread Flour
- 30 grams all purpose flour
- 8 grams olive oil
- 13 grams fine sea salt
- cornmeal and all-purpose flour for dusting
- pizza sauce
- toppings
Instructions
- Add starter and water to the bowl of a stand mixer. Stir with a fork to loosen starter and disperse starter.
- Add flour and olive oil. Stir with a spatula to incorporate flour, then mix on low speed for about 20 seconds to further incorporate and no dry streaks remain. Add salt to top of dough and let the dough rest, covered, for 30 minutes.
- Attach dough hook to stand mixer and secure bowl. Mix on medium low, speed 3 of KitchenAid stand mixer for for 8 minutes. *This is a very wet dough, and that's okay.
- Remove bowl from mixer and cover with a towel. Let dough sit for 30 minutes, then do 2 sets of stretch and folds around the bowl. Let dough rest for another 30 minutes, then do 2 sets of stretch of folds around the bowl. Cover, and let dough bulk ferment about 4ish more hours if your house is at 70 degrees F (will take less time if it is warmer in your home), until dough is just short of doubling in size.
- Once doubled, place parchment paper on large baking sheet and spray with non-stick spray such as olive oil.
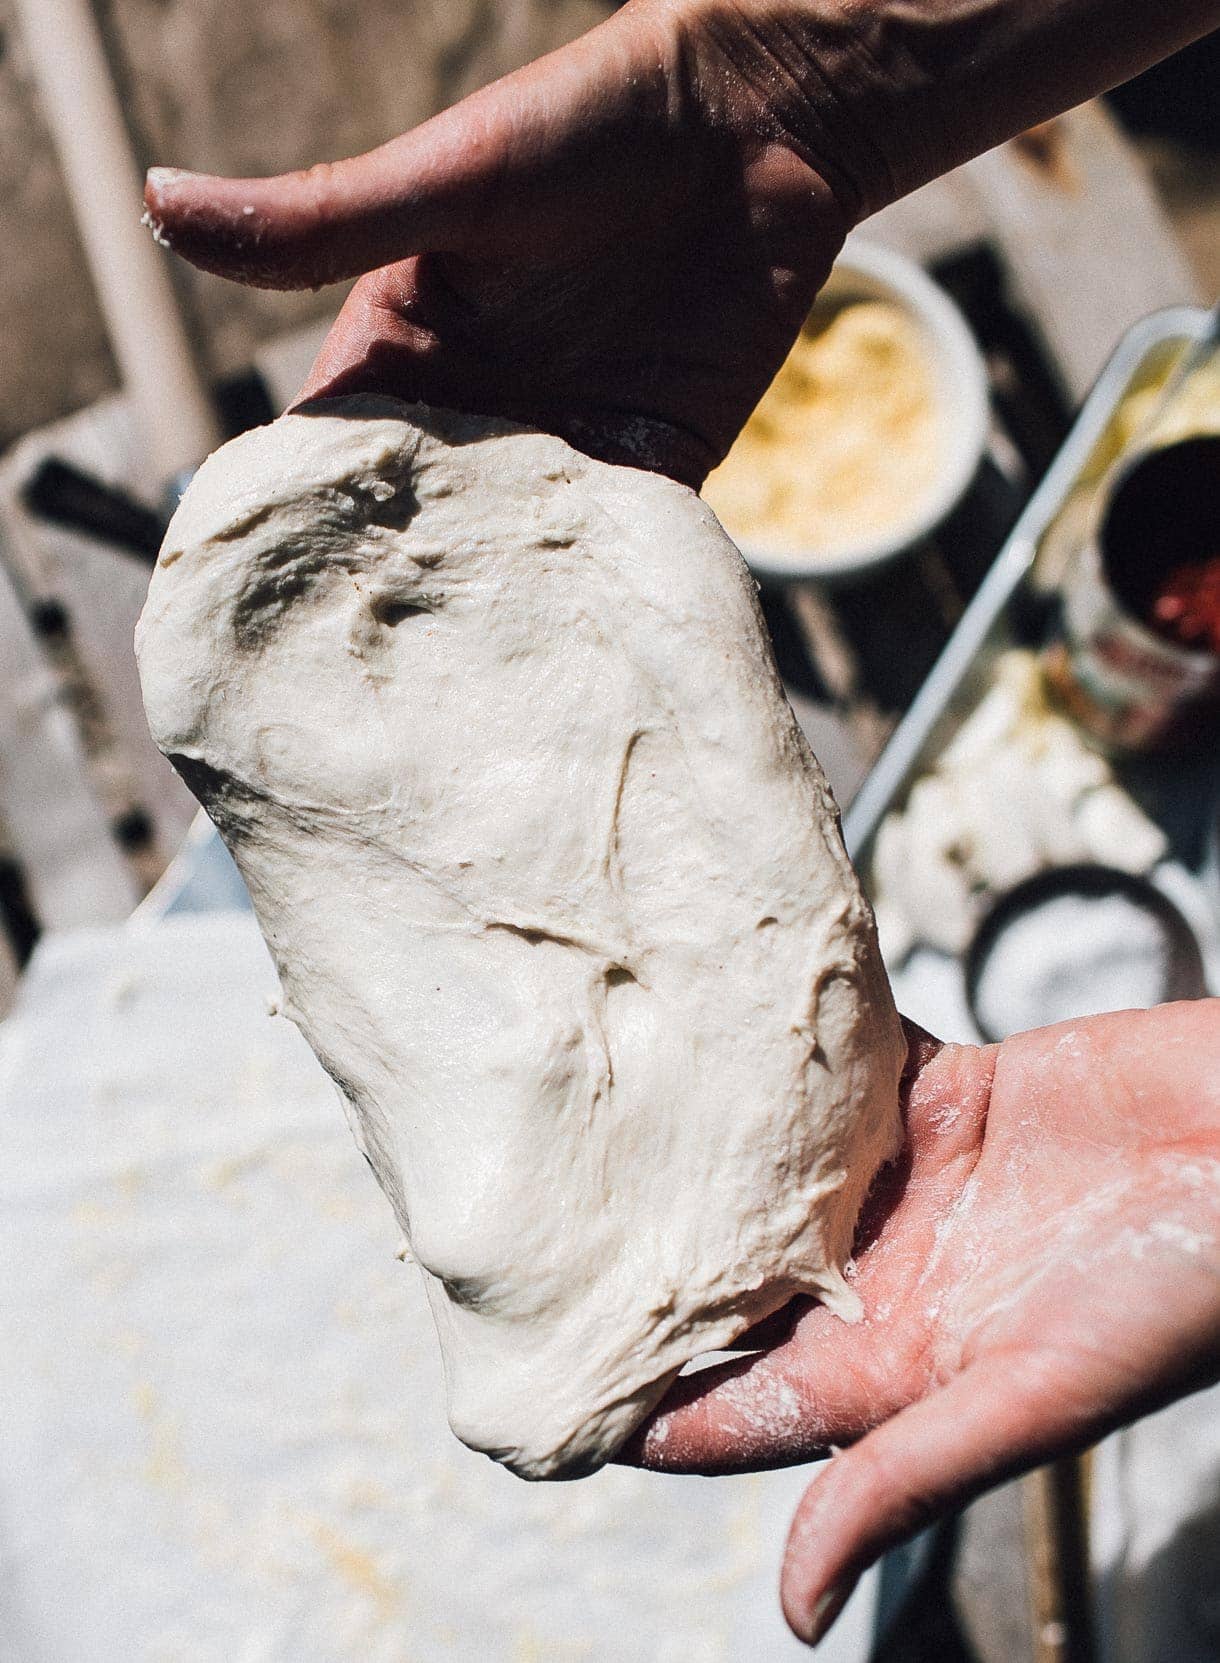
- Turn dough out onto floured surface and let rest for 15 minutes. The dough will be sticky and that is okay!
- Dust the top of the dough with flour and use floured hands to press dough out slightly.
- Using a bench scraper, cut the dough into pieces weighing about 210 grams each. Flour your hands generously, and stretch a corner of the dough out and bring it back to the middle, doing this with each corner of the dough so you're forming a ball. Use a bit of tension on the surface to make the ball a bit tighter, and close the bottom.
- Place dough on a greased baking sheet. And repeat with all dough balls.
- At this point you can let the dough rise on the counter for 45 minutes, for its second rise, until it has grown a bit and is puffier. Or you can put the pan with dough balls straight into the refrigerator, covered, and leave them in for 6 to 48 hours, and take out an hour before you want to make the pizza.
- 1 hour before you're ready to grill or bake the pizza, lay out all of your ingredients at a station so you can work quickly once the dough is pressed out.
- 30 minutes before you're going to grill the pizza, turn on the grill, with cast iron pizza pan on one side, over two flames turned to medium high. Leave the right side burner off. You'll want the interior temperature of the grill to be 650 degrees F. Or, preheat a pizza stone in your oven to 500 degrees F for an hour.
- Lay a piece of parchment paper on your pizza peel and liberally dust with cornmeal and flour.
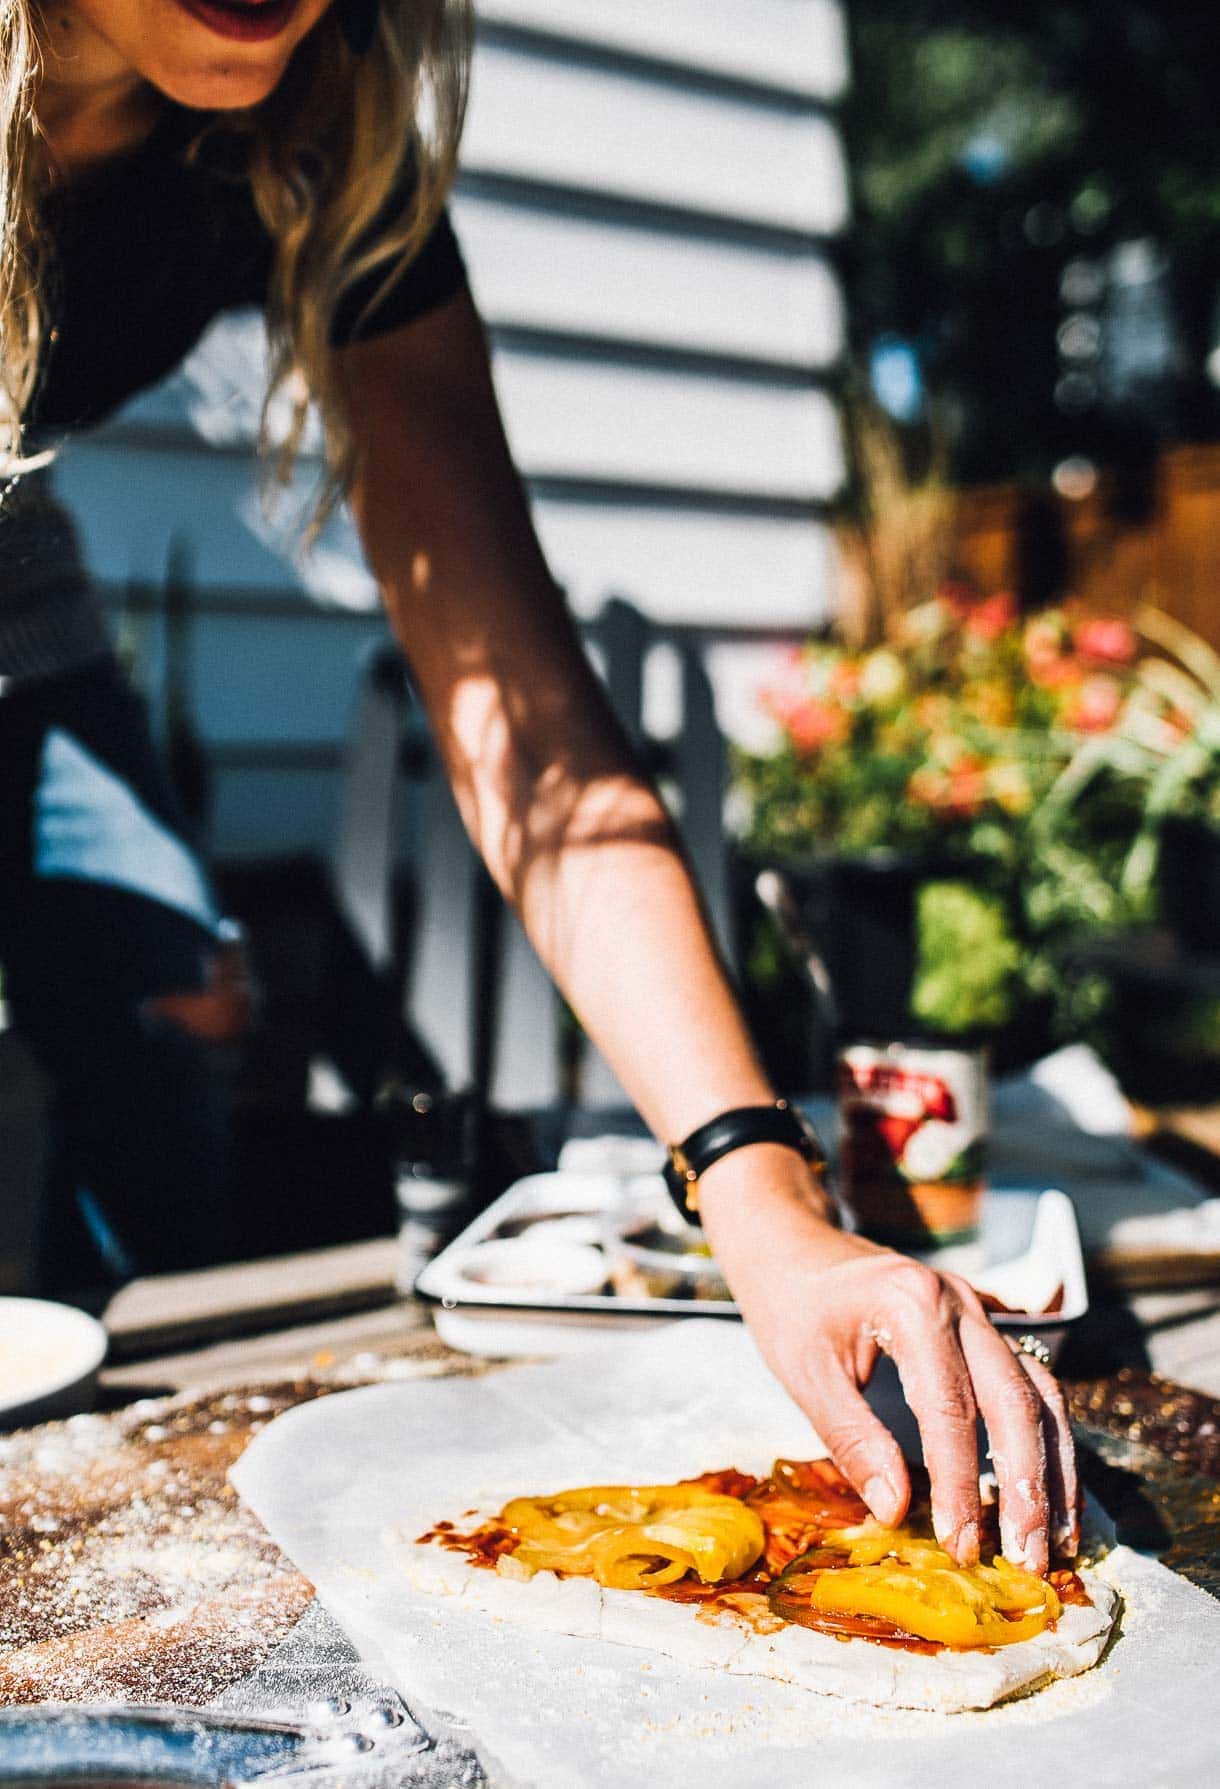
- Dust top of dough ball with flour. With floured hands, pick up a dough ball and hold up with two hands on corners of the dough. The dough will start to droop downward with gravity, and you’ll rotate the dough clockwise, like you’re turning a steering wheel. And it will be a bit sticky. That’s okay! Bring it down to the parchment paper, and lightly press out into a circle, stretching the corners. Do NOT use a rolling pin. This will make the dough too thin, resulting in a tougher crust. You’re aiming for each pizza to be around 7-8 inches in diameter. Don’t try to make the biggest pizza. Keeping it smaller will result in the fluffiest baked dough. Stretch and adjust the dough a little more, aiming to position one edge of the pizza all the way at the front edge of the peel.
- Spread with a light amount of sauce, and put the the rest of your toppings on, including cheese. Error on the side of less toppings that piling it super full, to be sure the crust can handle the weight.
- Shimmy the pizza onto the cast iron pan or pizza stone, without the parchment. Close the lid of grill, and let cook for 3 minutes on the pan/stone. Then open the lid, transfer the pizza to the right side, top rack, and close lid for another 4-5 minutes to finish cooking. OR If baking in oven, bake at 500 degrees for for 8-9 minutes, until bubbly and golden brown.
Notes
*this is a WET dough, and that’s okay! use flour as you need while working with the dough after it’s bulk ferment, to keep it from sticking to your hands or surface.
Did you make this?
tag @heartbeetkitchen on instagram and hashtag it #heartbeetkitchen
September 27, 2019
Karen Craig
June 20, 2026
If I forgot to feed my starter can I use unfed starter and yeast?
Amanda Paa
June 22, 2026
Hi! I haven’t tested this with unfed starter.
Diane
March 19, 2026
Amanda,
Is it possible to freeze the pizza dough? I can’t use this much crust at one time.
Diane
Gail Robinson
September 6, 2025
Hi Amanda. I must say I have followed you for 2 years and need to comment on so many of your creations. So, for today, I will promote this pizza crust and all the fun toppings. Most important is how it brings my friends and family over for pizza night. Blessings, Gail Robinson Surf City, NC
Kaitie
February 7, 2025
I made this and it was incredible! I’m wondering if I can use all-purpose flour instead of bread flour? I more regularly have AP flour on hand. If I adjust the hydration amounts would it turn out?
Amanda Paa
February 7, 2025
Hi Katie! Yes, you’d need to lower the hydration for all-purpose flour. I haven’t tested it that way so am unsure of exact amounts. To note, the dough won’t be as chewy and bubbly with all-purpose flour.
Cindy mays
November 11, 2024
I’m making this pizza dough for the first time and I’m surprised how amazing it came out. All I have is my oven, I will use this method even more in the summer time. You’re right! Keeping them smaller works really well!
Elise
August 8, 2024
If I could give it more than 5 stars, I would!! So soft and so pillowy (not to mention easy). I used 00 flour instead of bread flour and only made 2 larger pizzas instead of 5 medium. I baked them in the oven as directed (heat cast iron x 1 hr @ 500, then bake for 9 mins) and they turned out fabulously. I was unable to remove the parchment from under the pizza and that was just fine. Will definitely make again!!!
Amanda Paa
August 8, 2024
Oh i’m so glad to hear this, Elise! Love the idea of making two large pizzas and thank you for your oven notes. Happy pizza-ing!
Maritza
May 23, 2024
So excited to try. Have had phenomenal failures with our gas pizza oven. Learning curve. Hopeful with your recipe! I have lots of 00 Caputo pizzeria (blue package) flour. Can I sub for the AP?
Amanda Paa
May 23, 2024
Gas pizza ovens are definitely a learning curve! Yes, no problem to sub the Caputo for the AP here.
Kathryn F
November 18, 2023
Is a stand mixer the only way to mix? Would a Cuisinart with a dough attachment do just as well?
Candice
August 8, 2023
This is the best pizza dough! I love that it uses bread flour and all purpose flour since I always have those on hand. I did the second rise in the fridge for 18 hours. The result was perfect. Dough shaped and handled well and baked up into a fluffy chewy crust – I cooked in my pizza oven and made 4 pizzas.
Amanda Paa
August 8, 2023
Loved seeing your photos of it on Instagram!
Diane
January 21, 2023
This dough was amazing! I’m a novice baker and it turned out perfect. Love that there is a process to put it in the fridge, which makes it so easy to work with.
Amanda Paa
January 22, 2023
So glad this resulted in a delicious pizza night for you!
stacy k
June 19, 2022
If I refrigerate the dough balls the day before using, how long should they sit out before shaping, topping and baking?
Amanda Paa
June 19, 2022
hi stacy! you can let the dough balls sit out about 45 minutes before shaping them.
Liesel
April 6, 2022
Great recipe, very versatile to make it the day before, shape into individual dough balls and store for the next day’s pizza
Liesel
January 25, 2022
Great! Chewy and yummy and wonderful. We par-baked the crust and then built wonderful pizzas.
Amanda Paa
January 26, 2022
Yay, so glad you all like the sourdough pizza crust!
Rebecca
January 18, 2022
Thanks for the great recipe Amanda! This is really, really good! The crust turns out so fluffy but with the perfect crisp. I used an oven with a preheated pizza stone with no issue. Another hit!!
Laura
February 6, 2021
Hi Amanda! Thanks for your great sourdough recipes. Can you freeze the dough? If so, at what point in the process can it be frozen?
Amanda Paa
February 7, 2021
Hi Laura!
I haven’t tried freezing this dough yet. If I had to guess, I would do so after portioning the dough, then freeze. And when you want to bake, remove from freezer and let thaw at room temp (takes about 6ish hours), then proceed with recipe.
Jada
May 7, 2025
I’ve been regularly freezing this pizza dough and it works great. I put it in the fridge overnight to defrost and then pull it out an hour or two before it’s time to prep.
Cynthia
October 21, 2020
Wow! I love your blog! Your photos are stunning and your instructions are so thorough. I don’t normally subscribe to blogs but definitely am subscribing to heartbeet. Quick question: If I happen to have a large amount of starter can I substitute that for some of the flour/water in the recipe? My starter is 100% hydration by weight so it should be an easy calculation… Thanks so much!
Amanda Paa
October 21, 2020
Hi Cynthia! Glad you are here.
I have not tested this recipe using sourdough discard in place of some of the flour/water, so cannot confirm that it will work.
If you do try it, let me know how it goes!
Cynthia
October 22, 2020
I will let you know if I try, but I followed the recipe as written last night and it turned out so beautifully! I am loathe to experiment.
Kelly
May 31, 2020
Great recipe! We baked the pizzas on a pizza stone in the oven and it came out fantastic. I also used Turkey Red Heritage Pizza flour from Sunrise Mills .
Amanda Paa
June 1, 2020
I’m so glad you liked the sourdough pizza recipe, Kelly. We love Sunrise Mills too – in fact I drove up their a few weeks ago to get another 10 pounds! :)
Taty Martin
May 17, 2020
Could I use the same recipe for baking the pizza since I don’t have a grill?
Amanda Paa
May 17, 2020
Yep! I tested this in the oven last week. Prepare as directed, with oven and cast iron skillet or pizza stone preheated in your oven to 500 degrees F. Do not parbake crust.
Sauce and top the raw dough and bake.
Solana
February 8, 2021
Do you recall how long the pizzas took to cook when done in the oven and not on the grill?
Amanda Paa
February 9, 2021
Hi Solana!
They take about 6-9 minutes to bake in the oven. I usually just go off of watching them while they bake to get the timing right.
Cassie Autumn Tran
October 30, 2019
Oh me oh my, I LOVE sourdough, AND I love pizza. This is the perfect recipe for a nice dinner–I might even make it for Christmas!