Soft & Fresh Sourdough Focaccia Bread (beginner level)

By Amanda Paa – Updated April 14, 2023
4.63 from 239 votes
A delicious recipe for fluffy sourdough focaccia bread that is made with active sourdough starter. The pillowy texture is incredible, and the bread gets lovely flavor from the olive oil and the fermentation. Sourdough focaccia is a great recipe for beginners, with mostly hands off time for preparation. It's incredibly versatile for eating on its own, with soup, or as sandwich bread. You'll love the golden crust, and delicious chewy crumb with subtle tang.
Jump to Recipe

This post may contain affiliate links. Please read my disclosure policy.

How to Make Sourdough Focaccia Bread - naturally leavened

If you are just beginning your sourdough journey and need to acquire a starter, I’d be happy to share mine with you! You can ORDER Sourdough Starter HERE, cost is $12 and includes shipping.

Find more sourdough troubleshooting and tips weekly, here!

Save This Recipe Form

Want to save this recipe?

Enter your email below & we'll send it straight to your inbox. Plus you’ll get more great recipes and tips from us each week!


What makes sourdough focaccia special, and so delicious?

After starting my sourdough baking journey and feeling mostly confident in the vitality of my starter plus the resulting breads, it was time to experiment beyond the basic sourdough recipe. We love this sourdough pizza crust, english muffins, and the latest – sourdough focaccia.

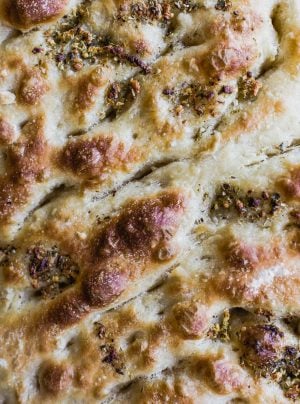
Puffy and fluffy. Bubbly holes throughout. And a golden brown exterior that rose through the dimples left behind by pressing fingers into the dough, just before baking.

Experimenting with different techniques and water ratios, I settled on this recipe that encompasses a high hydration dough, and a lengthy, hands off bulk fermentation. In short, it looks like: stir dough, long rest & rise, a shorter rest & rise, dimple. Bake. DEVOUR.

sourdough starter in a mason jar

There have been a few relatively inexpensive, well-engineered tools that I’ve added to my kitchen as I’ve dove head first into sourdough baking, beginning with my Everyday Sourdough Bread recipe. My Rye Sourdough is another favorite! These tools make certain steps much easier, and ultimately reproducible and accurate. You don’t need all of them right away if you’re just getting started, but the one you MUST have is a digital scale.

Why using a scale is important for sourdough baking:

The reason why using a scale is so important in sourdough is because volume doe not equal weight. For visualization purposes, 1 cup of water does not weigh the same as 1 cup of flour. The water would weigh a lot more than the flour, so when we’re looking to make recipes work, we want to make sure everyone is using the same measurement. Grams don’t lie! :)

Since sourdough baking is a game of ratios and percentages dictated by grams, you won’t be able to work without it. Using a digital scale is one of my top tips in my 5 Sourdough Starter Tips for Beginners.

How to Make Sourdough Focaccia Bread - naturally leavened

How To Make Sourdough Focaccia Bread

1. Two days (or more) before you want to start the process, feed your starter each day, 60 grams each of flour and water, discarding about 30 grams right before re-feeding. The goal is to build up the quantity of your starter. You’ll need 135 grams for baking.

I keep my starter in mason jars and find the OXO jar spatula to be perfect for getting around all the edges of the jar, scooping, and handling wet dough.

2. When your starter has risen on the day of baking and is ready to go (here are more tips on when to know it’s ready), get out your stand mixer bowl.

Set bowl on digital scale, and zero out so that it equals 0 grams. This scale features a pull out display for easy reading so it won’t get covered up by the bowl – so helpful!

Mix the starter with the water, pressing zero after each addition so that the measurement goes back to 0 and you can properly weigh/measure.

How to Make Sourdough Focaccia Bread - naturally leavened

3. Add flour and salt, and incorporate using hands and spatula. Put the bowl on your stand mixer and mix for about 1 minute on low speed, just so there are no dry bits of flour left. Then mix on speed 4 of your Kitchenaid stand mixer for 7 minutes.

It will be loose and wet, that’s okay and exactly how it should be. This is my preferred method. Let dough rest again for 45 minutes minutes. Now stretch and fold four “corners” of the dough, basically on top of itself. Do this 3 to 4 few times around the bowl.

If you don’t have a stand mixer, you could also knead by hand for 10 minutes, but I don’t recommend this option unless you are an experienced baker. Eventually, you should feel the dough tighten and acquire resistance, pulling away from the sides of the bowl as you work with it.

4. Now it’s time to rest! Cover the bowl with a very damp cloth and set in a place ideally around 70 to 75 degrees. Let rise until dough doubles in size and is puffy, jiggly, and a bit glossy. You should see some small bubbles on the surface.

5. At this point, brush a 7×11 or 9×13 pan with olive oil, distributing so that dough is about 1 to 1/12 inches tall. You don’t want to spread it out too thin.

6. Using lightly oiled hands, gently scrape dough out onto baking sheet. It will look like a big blob, and that’s okay! Using your hands pull the edges out to gently stretch them. Dough should be about 1 1/2 inches tall. Don’t stretch any further than that. Let rise in a warm spot, covered with another sheet pan that’s upside down (so it has room to rise) for 2-3 hours hours until it is puffy and very bubbly. You should see bubbles emerge to the surface.

7. Preheat oven to 425 degrees F. I can’t stress how helpful it is to use an oven thermometer at this point instead of the built-in reading your oven gives you. Mine runs 40 degrees high! Having an accurate thermometer ensures the same results every time, and with something like baking where temperature is so crucial, you want to be able to trust it.

How to Make Sourdough Focaccia Bread - naturally leavened

8. Drizzle top of dough with olive oil and press your fingertips using your whole hand into the risen dough. Your fingertips should go all the way down through the dough, hitting the pan.

9. Put pan in oven on middle rack and bake for 15 minutes. Remove and brush with melted butter, garlic, and oregano. Turn oven down to 400 degrees F and bake for another 10ish minutes, until crust is golden brown and bounces back slightly when you press down on it. Let cool for 15 minutes and eat.

And there you have it!  Garlic butter sourdough focaccia that will fill your house with the most tempting smells, and your mouth with bread heaven. Soft and chewy, the texture is undeniably a favorite, along with the sourdough flavor thanks to the lengthy bulk fermentation.

Why did my sourdough focaccia turn out dense?

The dough should be at least an inch thick in your cake pan, before the final rise. After the final rise and the dough has doubled, this will give you sufficient dough to press your fingertips in, resulting in bubbly focaccia.

Not doing the stretch and folds could cause your focaccia to be flat and dense when you bake it. This kneading process develops the gluten structure. It will make the dough more soft and elastic. This elastic structure will help trap any air that is released by during the fermentation process.

Finally, if you overproof the dough, your focaccia will not rise, and turn out dense.

More Sourdough Recipes:

Sourdough focaccia recipe
How to Make Sourdough Focaccia Bread - naturally leavened

Soft & Fresh Sourdough Focaccia Bread

A delicious beginner recipe for homemade sourdough focaccia bread that is made with active sourdough starter. The soft, pillowy texture is incredible, and the bread gets lovely flavor from the olive oil and starter.
4.63 from 239 votes
Prep Time :1 hour
Cook Time :25 minutes
Wait Time :15 hours
Total Time :18 hours
Yield: 1 large loaf
Author: Amanda Paa

SCALE:

Ingredients

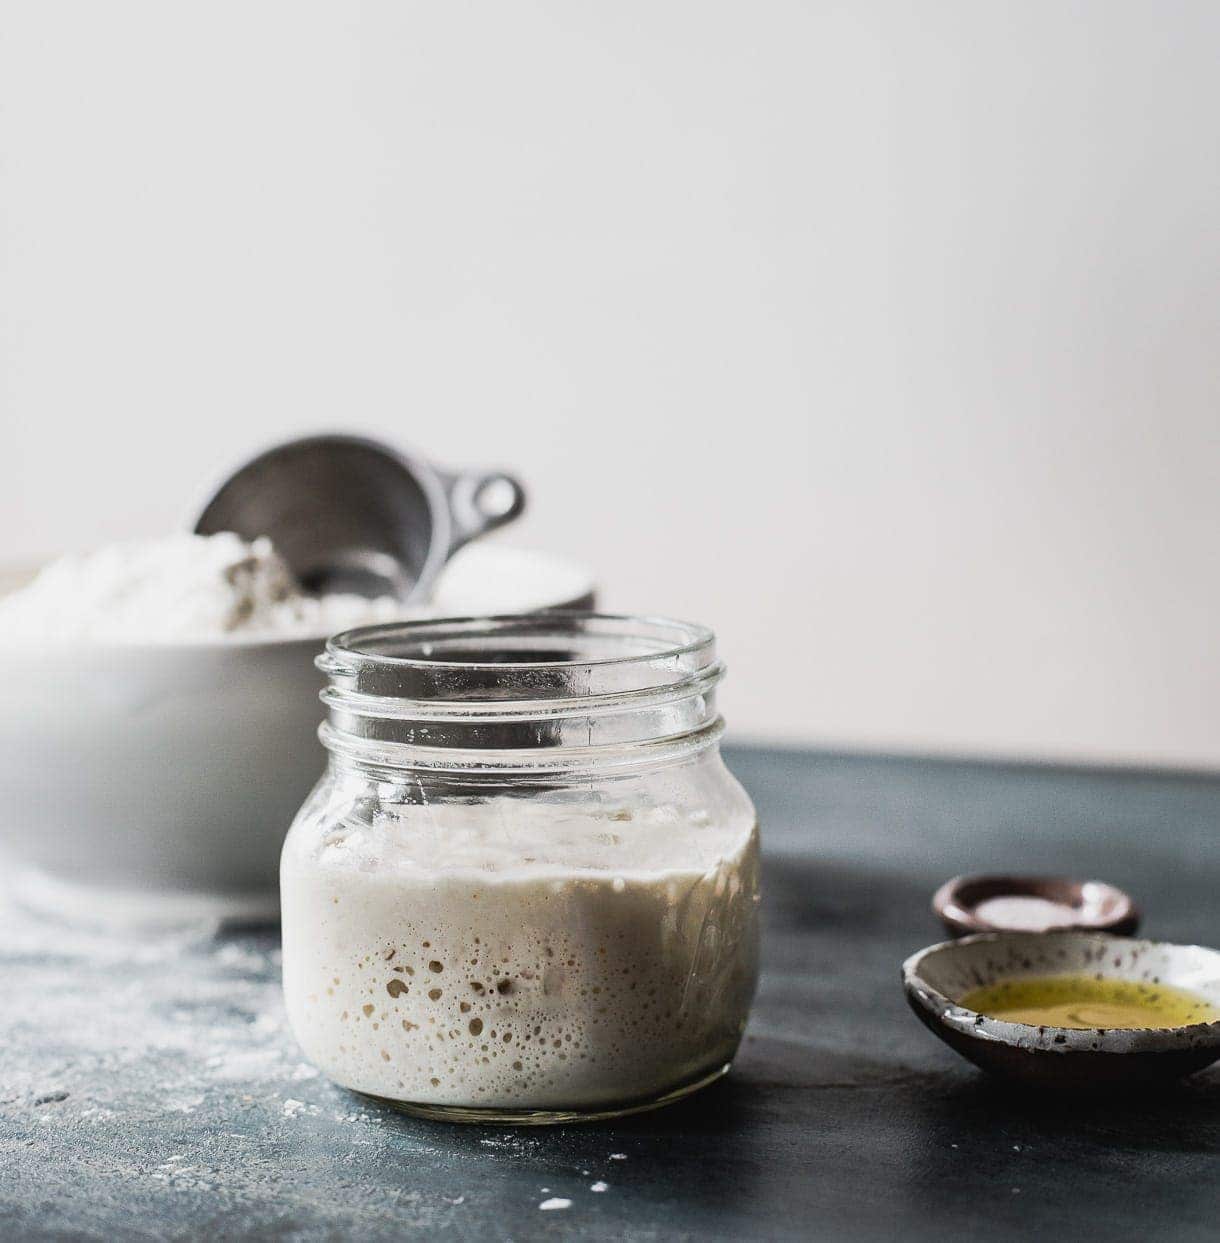
  • 115 grams [active starter] at its peak – NOT discard
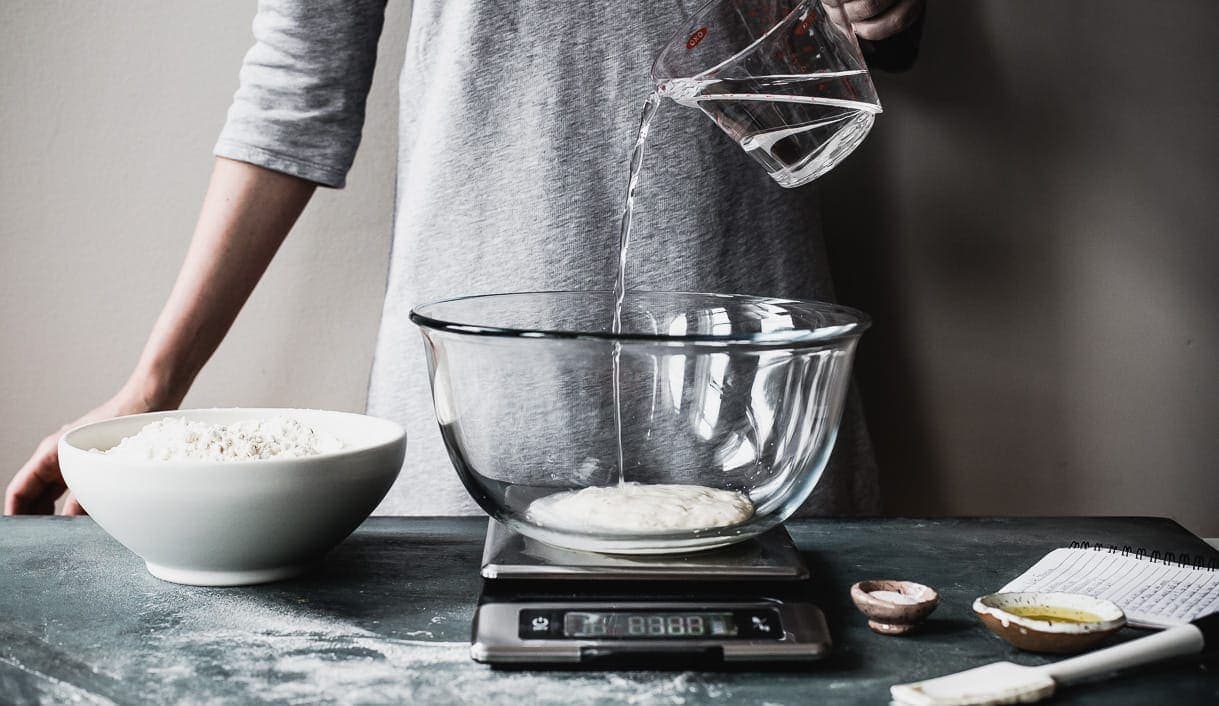
  • 350 grams slightly warmer than room temp water
  • 175 grams all-purpose flour, preferably King Arthur brand
  • 300 grams bread flour
  • 10 grams fine sea salt
  • olive oil
  • 2 tablespoons melted butter
  • 2 cloves garlic minced
  • 2 teaspoons dried oregano

Instructions 

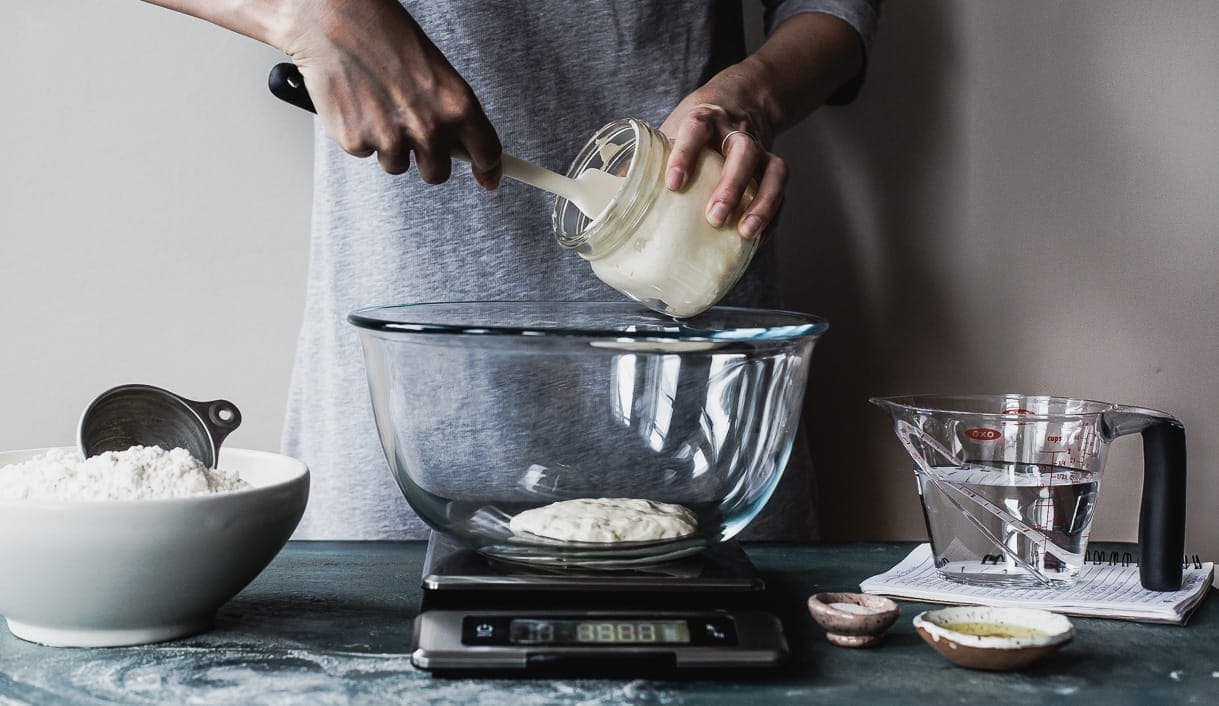
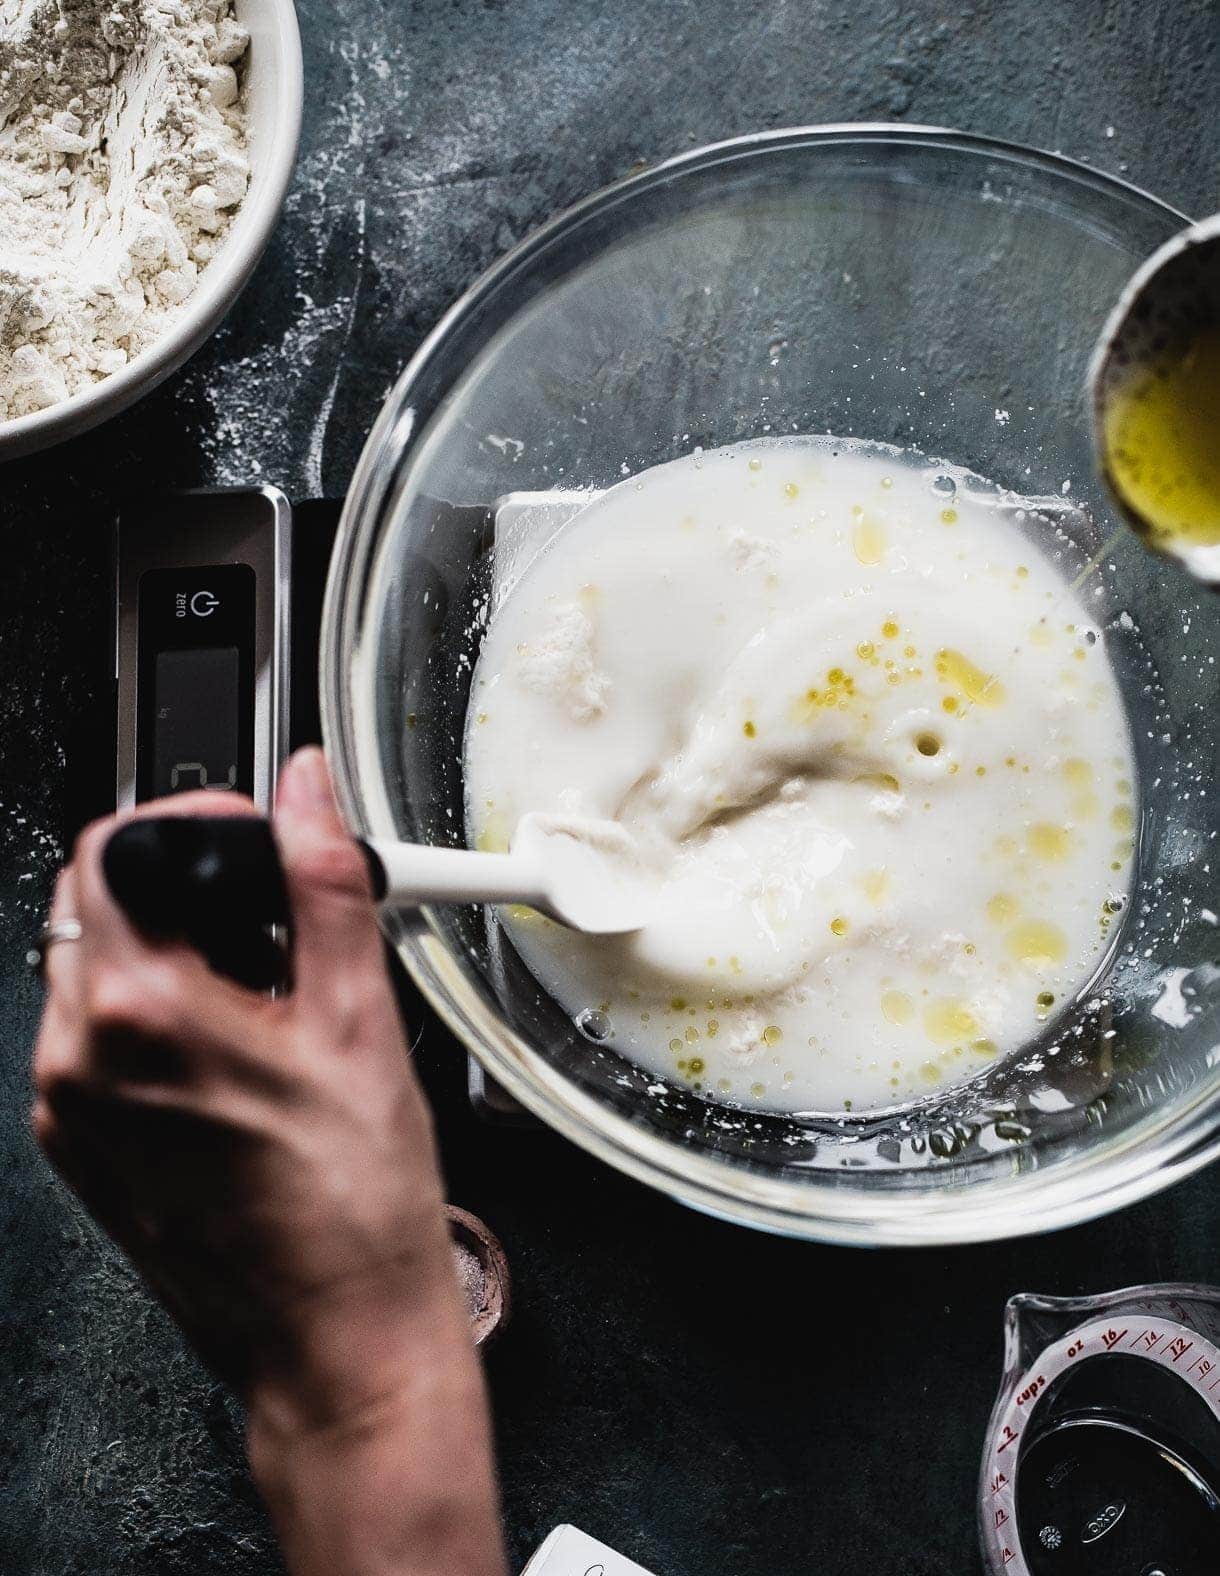
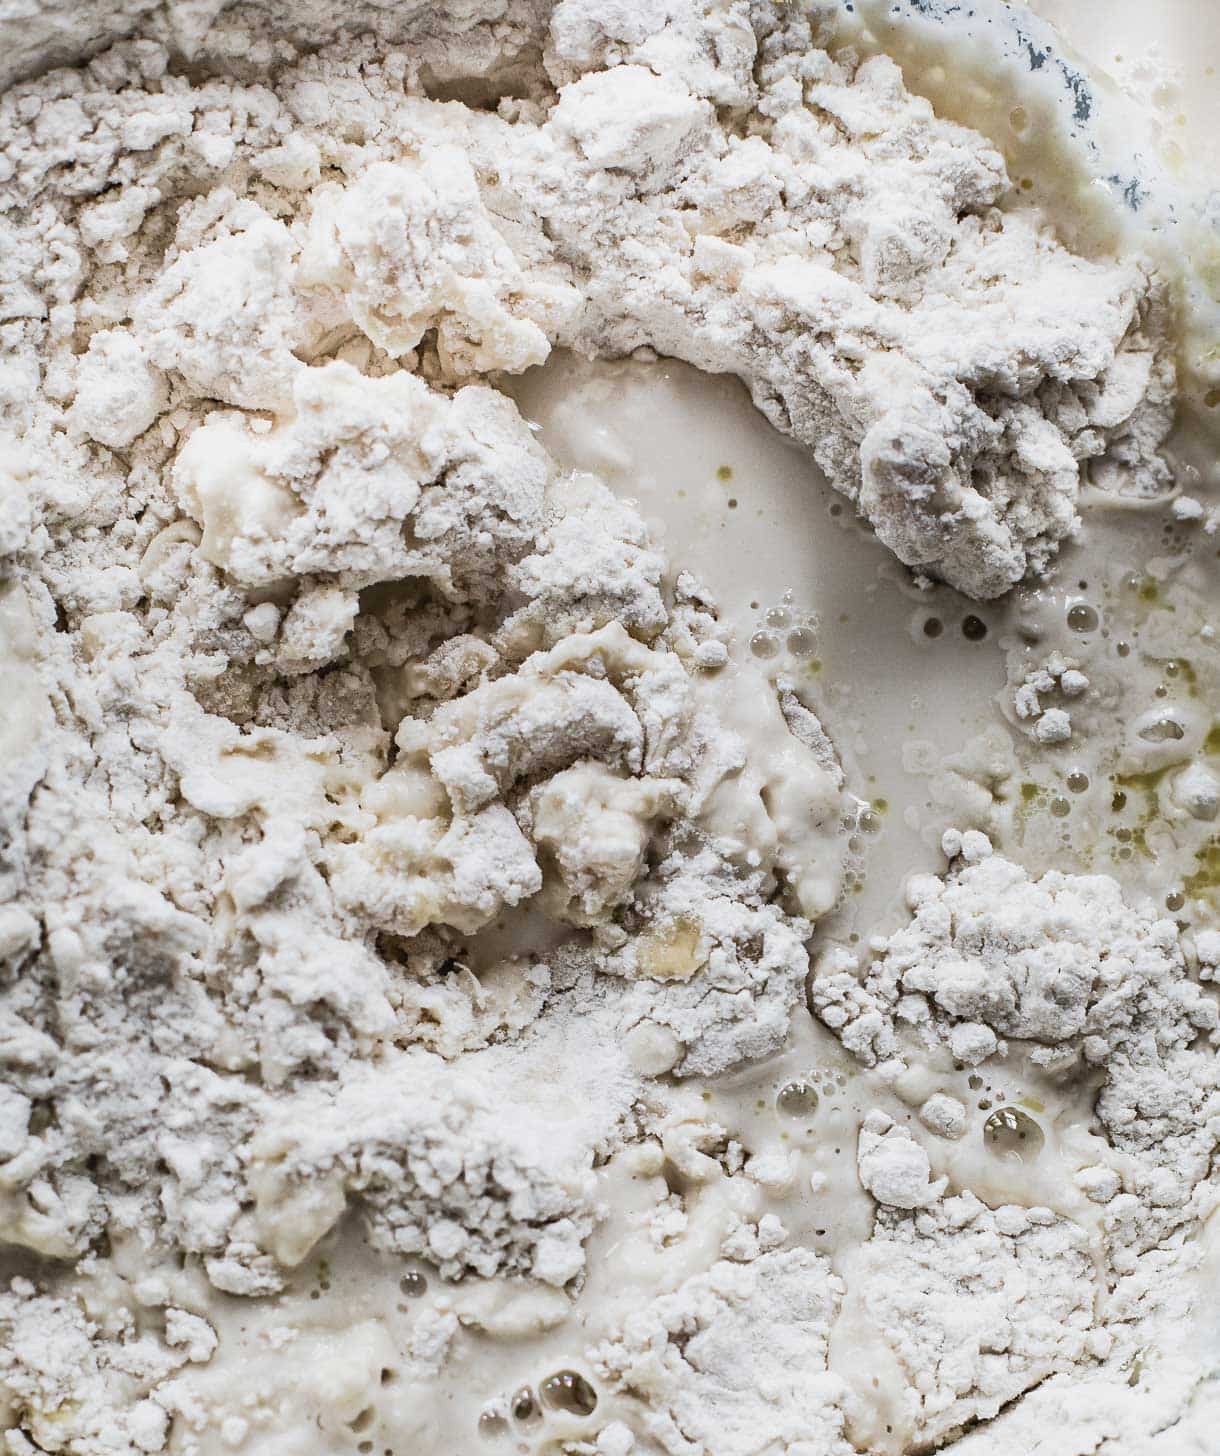
  • In a large bowl, use a fork to whisk the starter with water until incorporated.
  • Add flour and salt, and incorporate using hands and spatula. Put the bowl on your stand mixer and mix for about 1 minute on low speed, until there is no dry bits of flour. Cover bowl with towel and let sit for 30 minutes.
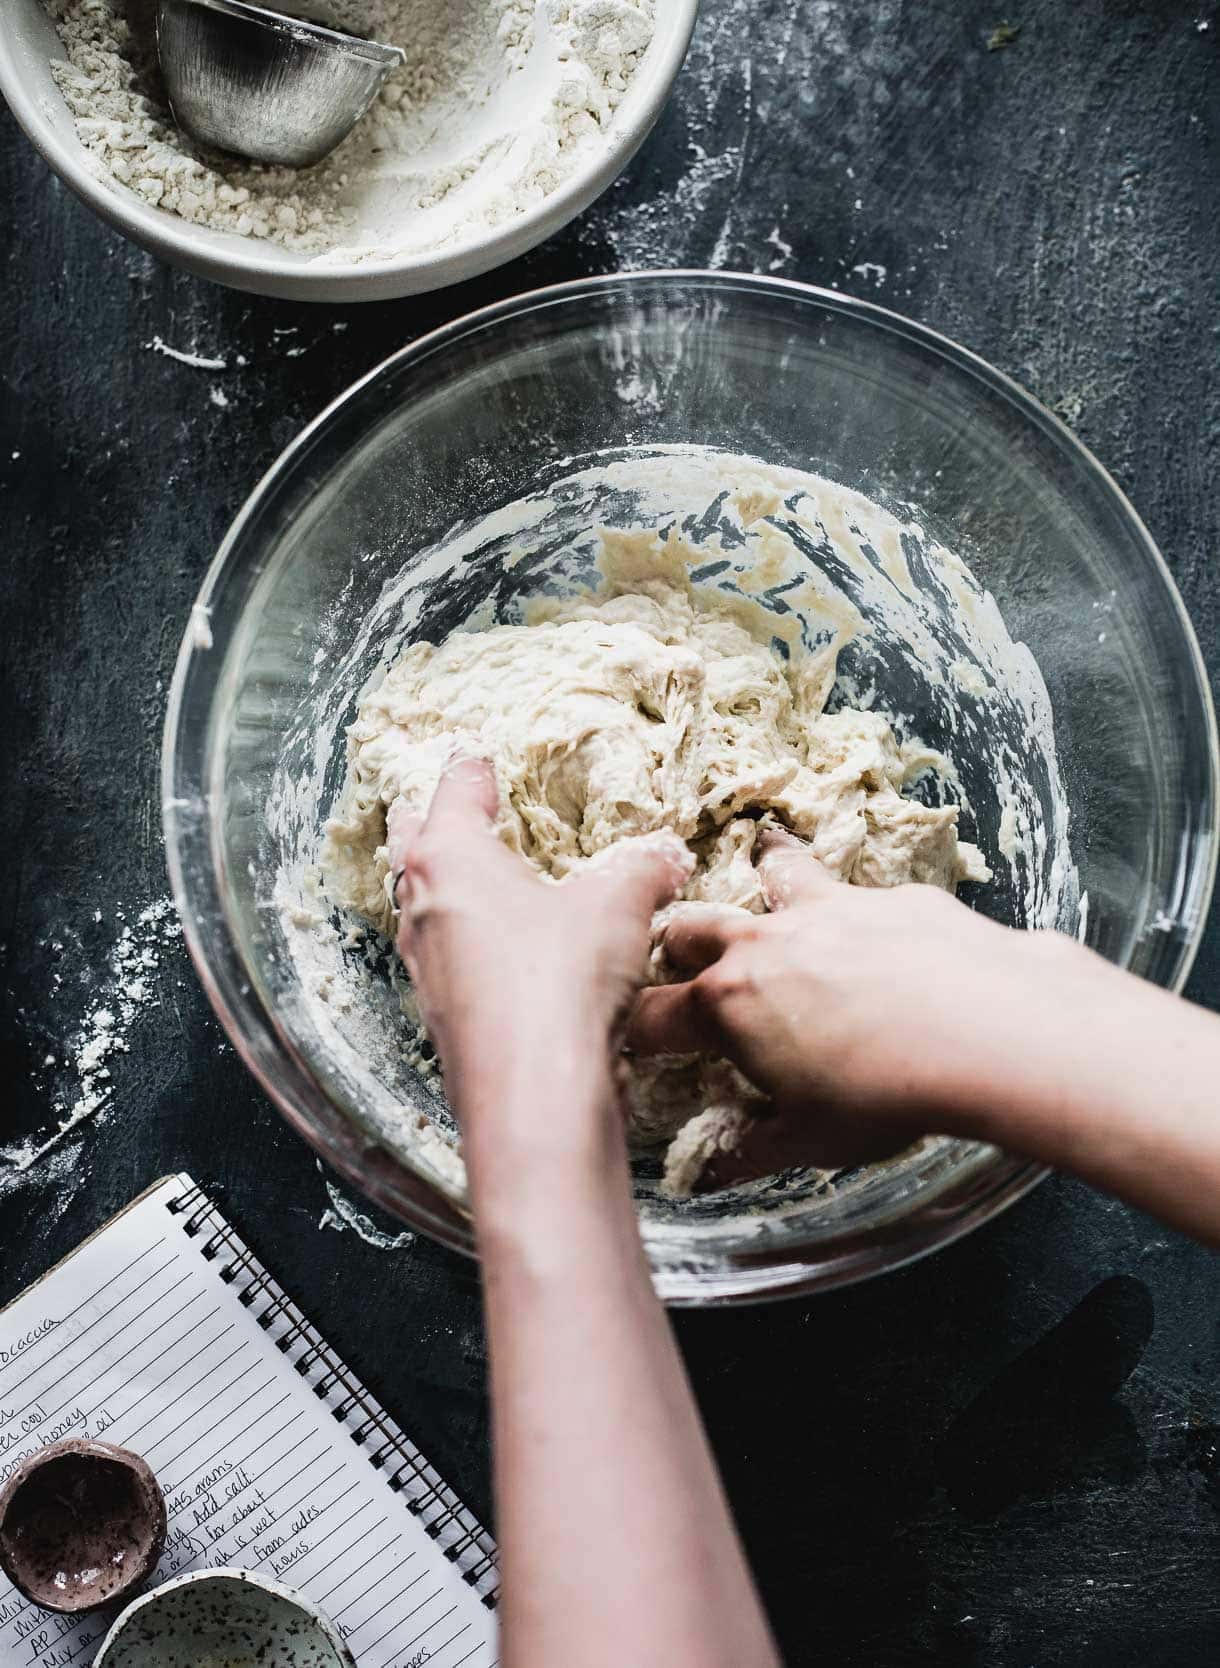
  • Then mix on speed 4 of your Kitchenaid stand mixer for 7 minutes.
    It will be loose and WET, that's okay and exactly how it should be. This results in a light and airy finished bread. Drizzle 1 tablespoon olive oil evenly over dough. Let dough rest for 30 minutes with a damp cloth over the top of bowl.
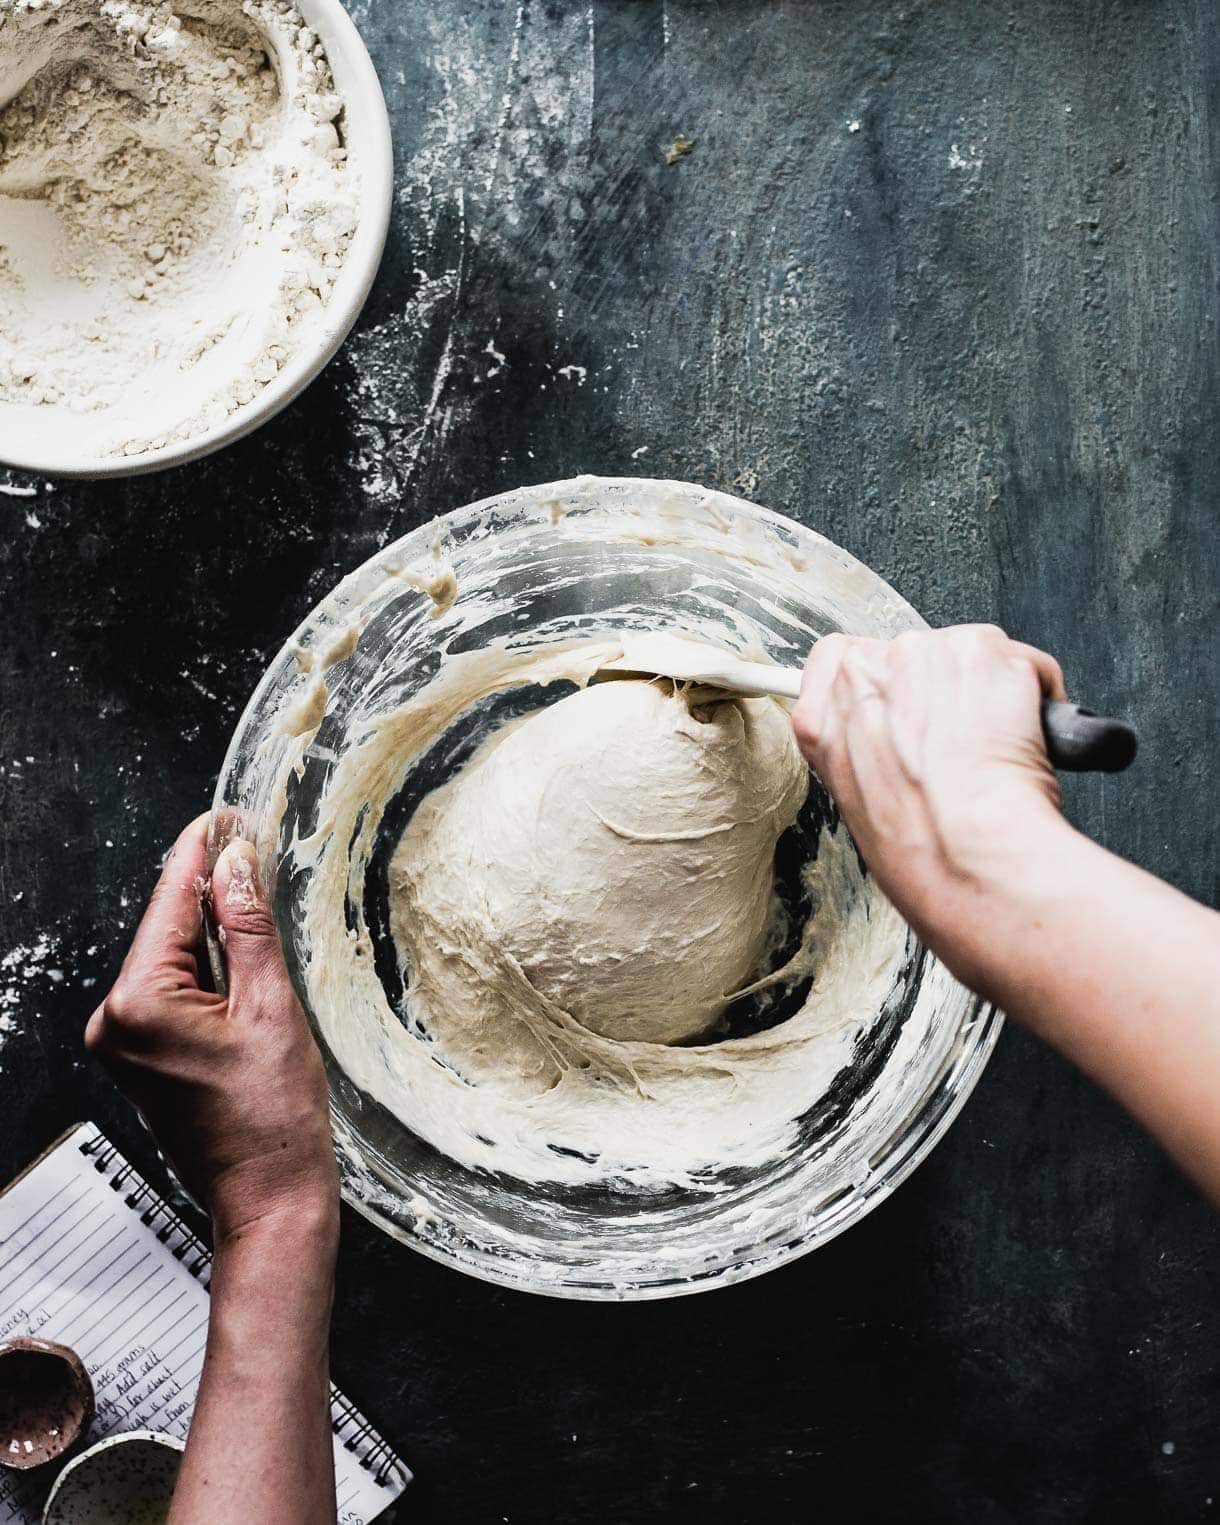
  • Now stretch and fold four “corners” of the dough, basically on top of itself, just like you would do normally when making sourdough. Do this 3 to 4 few times around the bowl (no resting in between).
  • Cover bowl and let rest several hours at room temperature until dough is just short of doubling, (using a straight sided vessel helps gauge growth SO much) has a few bubbles on top, has a glossy finish and is jiggly if you nudge the bowl. This usually takes another 5 hours if the temperature is around 72 degrees F in your house, quicker if temperature is warmer, longer if the temperature in your house is cooler. But how the dough looks is truly how you should tell when its done with bulk fermentation, rather than time.
  • Brush a 7×11 or 9×13 non-stick cake pan (do not use glass) liberally with 1 1/2 tablespoons olive oil, distributing all the way to sides of pan.
  • Using lightly oiled hands, gently scrape dough out into your cake pan. It will look like a big blob and be somewhat wet, and that’s okay! Using your hands gently stretch the the dough, leaving dough alone when it's about 1 to 1 1/2 inches tall. You don't want it to be thin. It will continue to spread out towards the edges of the pan as it goes through its final rise. Let rise in a warm spot, covered with a sheet pan that’s upside down (so it has room to rise) for about 1 1/2 to 2 hours until it is quite puffy, jiggly, airy, and has a few bubbles that look like they are on the surface. This amount of time will depend on how warm your house. Warmer will rise faster, cooler it will rise slower, so use the time given as an estimate.
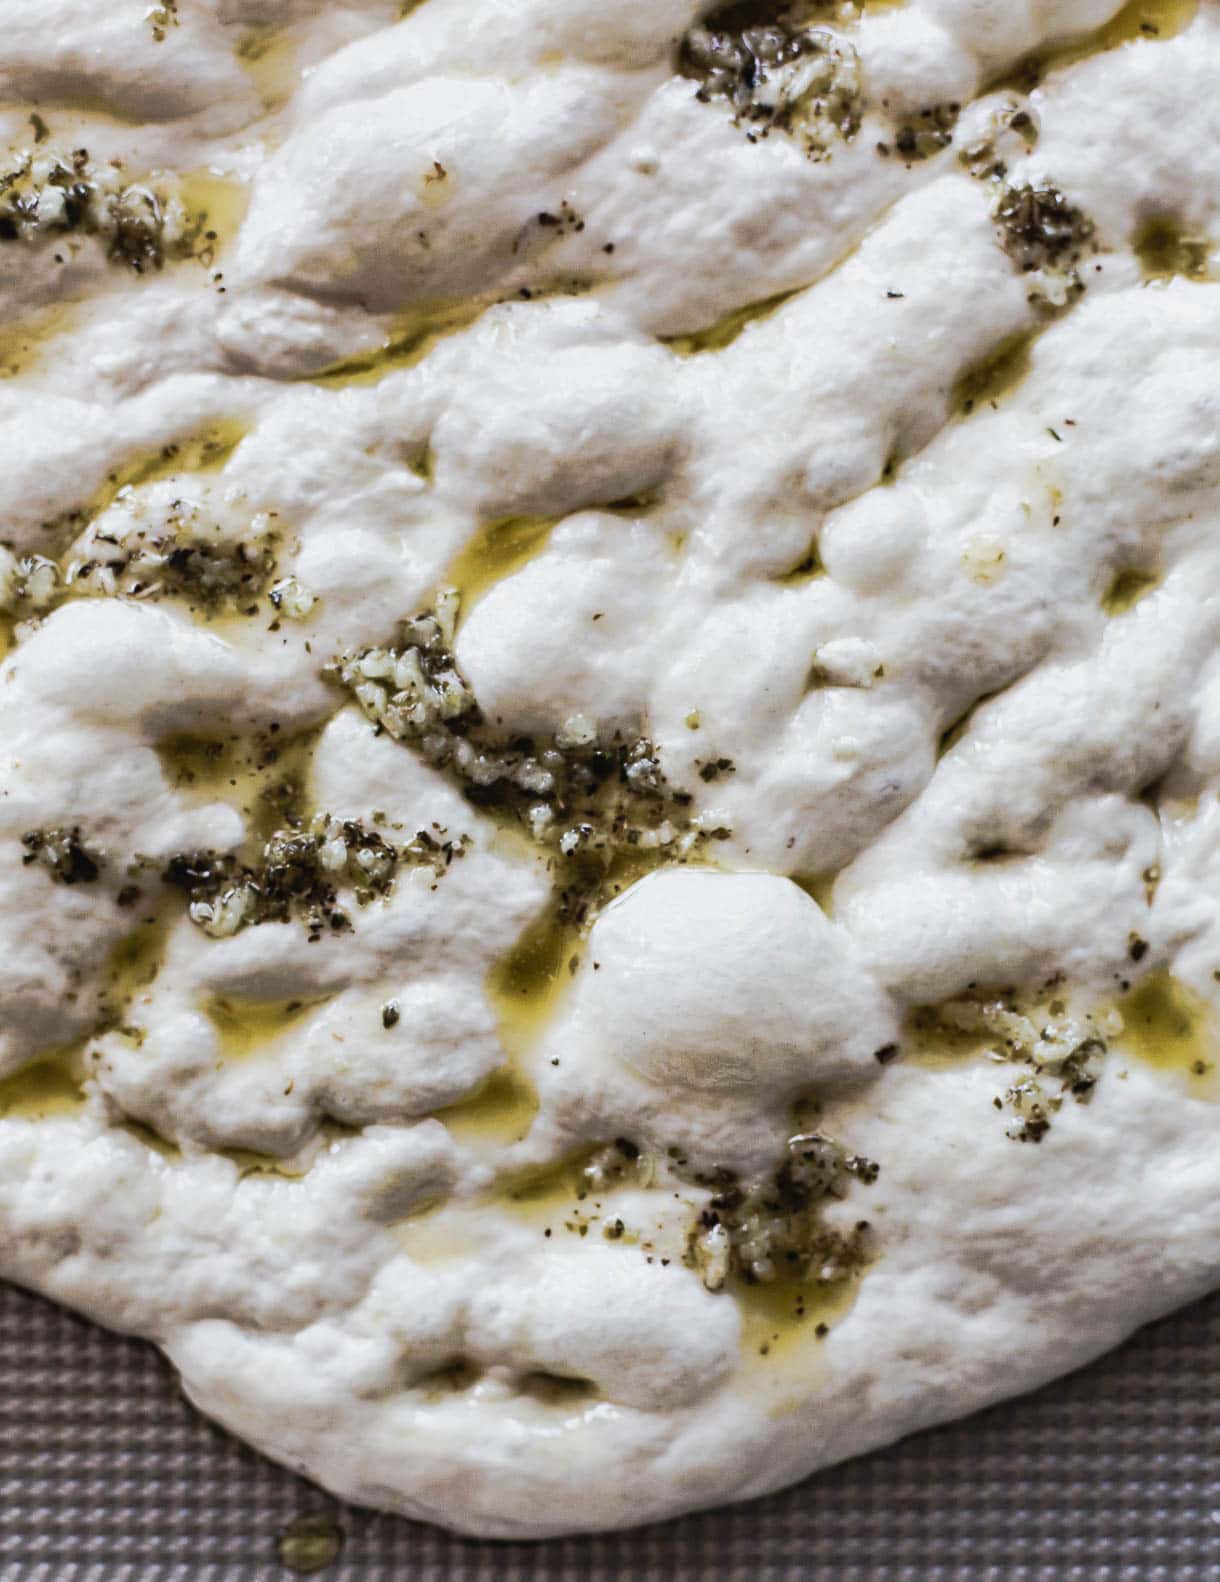
  • Preheat oven to 425 degrees F. Drizzle 1 1/2 tablespoons olive oil (don't be shy) onto the bread, rub some oil on your hands, and press your fingertips using your whole hand into the risen dough. Your fingertips should go all the way down through the dough, hitting the pan.
  • Put pan in oven on middle rack and bake for 15 minutes. Remove and brush dough with melted butter, oregano, and chopped garlic if desired. Turn oven down to 400 degrees F and bake for another 10 minutes. If you aren't not adding the melted butter topping, do not turn down the oven and simply continue baking at 425 degrees for another 10 minutes. Let cool for 15 minutes and eat.

Notes

*This is a very WET DOUGH. And that’s okay! Be patient, it will come together. :)
Adapted from the Artisan Sourdough Made Simple cookbook. 

Did you make this?

tag @heartbeetkitchen on instagram and hashtag it #heartbeetkitchen

June 29, 2018

COMMENT & RATE

Your email address will not be published. Required fields are marked *

Recipe Rating


This site uses Akismet to reduce spam. Learn how your comment data is processed.

107 comments

  1. Olivia

    5 stars
    I’ve made this recipe so many times and it’s become my only focaccia recipe I follow. I usually make it with rosemary, garlic and cherry tomatoes. My newest version is with butter, brown sugar and cinnamon, then topped with cream cheese frosting. Become the most delicious cinnamon roll focaccia, and gets all caramelized with my cast iron pan. Thanks so much for all the tips and instructions!

    • Amanda Paa

      omg, that cinnamon roll version sounds AMAZING. i’m going to try it!

  2. Shay

    How many calories is this loaf?

  3. Maui

    5 stars
    Made this and I absolutely love it.

    • Amanda Paa

      so glad to hear that!

  4. Kat

    Can I make this without bread flour?

    • Amanda Paa

      Hi! You’ll need bread flour for the strength and the amount of water this recipe calls for. If you use only ap flour, it will be way too wet.

  5. CARMEN

    I am confused on which step I can let slow rise in fridge overnight a d how long do i need it to rise at room temp. Is the cold rise after the stretch and folds, after it’s doubled and jiggly, after it’s in the pan or something else? I’ve been reading the instructions in the article and in the recipe and looking through the comments over and over and I’m still confused. Can you please clarify?

    • Amanda Paa

      Correct! You can do the cold rise after the stretch and folds, after it’s doubled and jiggly, after it’s in the pan. Then you’ll need to let it come to room temp and get bubbly and jiggly before baking, which usually takes about 2 to 3 hours.

  6. Maui

    5 stars
    Great recipe. Use it all the time. Added melted butter herbs, garden tomatoes and shredded mozzarella. A winner!

    • Amanda Paa

      Oh, that sounds amazing!

  7. Denise

    5 stars
    I’ve made this several times now. Changed up toppings etc. It comes out great every single time. Thanks for sharing!

    • Amanda Paa

      So glad you are enjoying the sourdough focaccia, Denise! Right now, in summer, I’m loving it with cherry tomatoes pressed into the top.

  8. Diane

    5 stars
    This turned out so great! Can’t wait to make it again and play around with toppings. Thanks for making baking so easy!

    • Amanda Paa

      The picture you shared of your bake on instagram was beautiful. Yes, one of my favorite toppings is tiny mozzarella balls and cherry tomatoes!

  9. Liesel

    5 stars
    So good! Soft, squishy, buttery 🫶🏼

  10. Darlene Kong

    5 stars
    Tried this recipe twice this week. It’s great! The first time, my starter wasn’t quite ready, but the second time I got a soft open crumb that was delicious fresh, but also delicious toasted. I can’t wait to make it again (as I eat the enitre loaf)

    • Amanda Paa

      so glad you’re enjoying the focaccia!

  11. Hank

    Can I ask about final rise can I place in the cool room at the second ride in the cake pan and take it out on the morning and let it come to temp and final rise and Gothenburg bake Timing is my problem

  12. Hank

    5 stars
    Just made this recipe of focaccia It’s a very easy recipe to follow and being here in the Philippines the rise and fermenting times were halved all the better as got to sample the result in short time

    I do you sourdough rye as well you are an artist
    Thank you

    • Amanda Paa

      Great work on adjusting for heat and humidity! So glad you like the recipe.

  13. Sue

    5 stars
    Love this bread! Second time making it. Added cut grape tomatoes and kalamata olives.

    • Amanda Paa

      That sounds delicious, Sue!

  14. Amy

    5 stars
    Hi there! Quick question: why do you discard a portion of the sourdough starter? Thank you!

    • Amanda Paa

      Hi Amy! I actually made a short video answering this specific question, “Do I have to discard my sourdough starter every time I feed?” Hope that helps!

  15. Claire

    5 stars
    This recipe is incredible! Best focaccia I’ve ever had and the instructions are so easy to follow!

    • Amanda Paa

      Your photo on IG of the focaccia was beautiful!

  16. Chris

    5 stars
    What an amazing so yummy focaccia! Loved making it and even better devouring it! Thank you for this recipe🥰

    • Amanda Paa

      Love to hear it!

  17. Samantha Florence

    5 stars
    Focaccia heaven! Absolutely amazing! We also named the first loaf of focaccia I have ever made after my daughter Chloe, Chlocaccia!🤣
    Thank you for developing such a wonderful recipe!

  18. Cathy

    5 stars
    Simply thrilled to be able to bake like this !!!
    Everyone who tastes this bread is taken away
    to that fantastic freshly baked bread land!

    • Amanda Paa

      So glad to hear it, Cathy!

  19. Rachel

    5 stars
    I made this for my family and it was such a big hit. So good every bite!

  20. Laura

    5 stars
    I’ve made this recipe 2 times now because the first time was sooooo good.

  21. William Moore

    I’ve been baking sourdough breads for years using a starter I received as a gift in 1976. This starter has served me well over the years. Living in San Francisco, the sourdough capital of the world, to us in San Francisco at least, I obtained a sample of a local San Francisco sourdough starter from a guy who told me it’s been in his immediate family family since the 1890’s and was started by the maternal grandmother. Although the two starters I already have bake awesome sourdough bread, I recently started one with water from boiled potatoes and whole wheat flour that is somehow much more sour than the others I have for some reason I can’t figure out.

    My next projects, the sourdough focaccia made with the old San Francisco starter and the sourdough rye made with the whole wheat starter. The great thing about sourdough, it’s unpredictability as you get different results each time and no 2 loaves are exactly the same

  22. Maria

    5 stars
    This is a fantastic recipe!! Definitely my go-to for foccaccia.
    Ps. Did you change the rest timing in the recipe recently?

  23. Bailin Xie

    5 stars
    Have made this sourdough focaccia a few times and it’s a new favourite recipe! Highly recommend 😊. Thanks!!

    • Amanda Paa

      yay, so glad you are enjoying the sourdough focaccia!

  24. KHam

    5 stars
    Made this with fire roasted chilies and cotija cheese. Delish! Might need to try a big sheet pan instead of the cake pan as mine turned out a bit taller and puffier. Will make it again for sure!

    • Amanda Paa

      that sounds SO delicious, with the chilies and cheese!

  25. Jasmine

    5 stars
    I think this might be my new favourite sourdough recipe! Mine turned out so fluffy and perfectly moist. I baked it in an 11 inch cast iron skillet and it was about 2.5 inches thick in the centre. Topped with fresh herbs from my garden and jalapeño garlic stuffed olives. Would highly recommend this recipe, can’t wait to make it again! Thanks Amanda!

    • Amanda Paa

      so glad you liked the recipe, Jasmine! i can’t wait to try it with the olives.

  26. MX

    5 stars
    I tried this recipe for the first time, added cherry tomatoes and minced garlic at the end – and loved how it turned out!!

    • Amanda Paa

      wonderful, so glad to hear you liked the recipe and the tomatoes are a great summery addition!

  27. Natalie Davis

    5 stars
    Delicious recipe! Pretty easy to follow but a little more complicated than the normal recipes I try. I had to dust the top when I pressed my fingers in. The first time I got stuck and knocked a bunch of air out in a corner, but it still baked up well.

  28. Hazlina

    5 stars
    I live in the tropics so temperature hovers around 30degrees all year long. So i had to play with the timings. I prove for just 2hrs before I do a fold and dump my dough into the fridge overnight. The next day I bf outside for abt 4hours or so. I wasn’t really paying attention to the time. But once it doubled, I baked it and it was soooo full of flavour. A better success this time round with a sd foccacia! Great, easy recipe and tips!

  29. Yvette

    5 stars
    Just made this and it’s SO GOOD! I also sliced basil and tomatoes thin before brushing the garlic butter :) wish i could post a picture its so pretty

    • Amanda Paa

      so glad you enjoyed the focaccia!

  30. Ellie

    Hi!
    In the middle of making this – how long does it keep?
    As in does it need to be eaten immediately?

    • Amanda Paa

      Hello! The focaccia is absolutely amazing on the day it’s made, and will stay good for another two days in a plastic bag or closed container.

      • Donna

        I take some and wrap it in plastic wrap, then in foil and freeze it. When I want it, I thaw and remove the plastic wrap, but rewrap in the foil, then warm in 350 oven for about 15-20 minutes. Yummy!

  31. Matthew

    Hi,

    I currently have a firm sourdough starter to use – one made with 100:60 ratio flour to water. – I.e 60% hydration. What is the hydration ratio of your starter? Is it 100%? I need to adjust the proportions of the main recipient, flour/water take into account my drier starter and could do with help!

    Matthew

    • Amanda Paa

      hello! my starter is 100% hydration.

  32. Monica

    Hi Annette,
    My family are focaccia mad after tasting your recipe. I am making two focaccias. I will double the recipe but when do you recommend l separate the dough into two portions? 
    Thanks in advance!

    • Amanda Paa

      hello! if you’d like to make a double batch, you’d separate the dough equally after the bulk fermentation is complete. let them do their final rise in separate pans.

  33. Annette

    I really want to try this! I’m confused about the starter though! When I bake a sourdough rye bread I take 250 g of the refrigerated rye starter then add 200g rye flour and 200g water and combine these. The next day I remove 250g from this active starter and put it into a jar in the fridge for the next time I’m baking it. I didn’t notice anything mentioned like this in your recipe. If I use up all of my starter I won’t have anything left for next time,is this correct? As you can tell I’m new to this sourdough starter made from white flour. Please help! Thanks so much! Annette.

    • Amanda Paa

      Hi Annette! You’ll just build up your starter so that you have some leftover when you remove 170 grams for the recipe. For instance, if you had 25 grams of starter in your jar, you’d feed it 90 grams flour and 90 grams water. Then let it rise to its peak and mix the dough using 145 grams. That would leave you with extra starter to continue feeding and use as your mother.

      • Annette

        Thanks so very much for your reply and your help!!
        Can’t wait to try it,it does look so good!
        Thanks again!
        Annette.

      • Jen

        5 stars
        Hi Amanda! I feed my starter practically daily so I fed it a 1:3 ratio to get 145 g per the recipe,so I wanted to confirm the amount to use. Ours just came out of the oven and I can’t wait to dig in! Thanks!

  34. Aida

    If i only have 30g of starter, do i still feed it with 60g flour and 60g water? on the day of baking, how do i know that it is ready for use?

    • Amanda Paa

      Hi Aida! You’ll need to build your start up to 145 grams for this recipe. You should mix the dough when it’s at its peak and is puffy at the top, has at least doubled, and has active bubbles.

  35. mari

    Do you think I can leave it in the fridge for 24 hours? so one full night, one full day and bake next day?

    Thanks

    • Amanda Paa

      Hi Mari! I haven’t tested it this way, so I’m not sure how it would turn out.

    • Judy

      Mari—-did you wait 24 hours? I’d be interested I. Your outcome.

  36. Amar

    This was absolutely amazing! After step 6, I cold proofed dough in the fridge overnight as it was too late at night to bake. It turned out perfect with great rise and a very nice tang. I can see making again and again at family gatherings!
    Thank you so much!!!

    • Amanda Paa

      I’m so glad you liked the sourdough focaccia, Amar! We make it almost every week. Thanks for the kind note!

    • Erin P.

      I’m so glad you mentioned this as I’ve been struggling when to feed my starter to then start this process, as I don’t want to eat this at midnight. What is your method for cold proofing?

  37. Myrna

    I had a wonderful success with this today! I used my discard, but mine is quite active and bubbly, even in the fridge discard. When I looked at it this morning after resting overnight, it was huge! I followed your instructions. I put it in the pan with lots of olive oil on the bottom and it rose for about 2 hours. In that time I melted the butter and sauteed the garlic in it slightly. I drizzled a bit more olive oil on top, sprinkled an herb de Provence mix on top and the garlic butter, pushing my fingers into it all over. I also checked my oven temperature, am low by about 40 degrees F! Good to know. Also need to heat up to temperature more than when my oven thinks it’s hot enough! The house smelled like an Italian restaurant, we enjoyed the focaccia dipped in olive oil and balsamic vinegar, just tremendous. This will be a do over, quite simple. Thanks so much!!

    • Amanda Paa

      Yay! Amazing that it worked with sourdough discard too!

  38. Anna

    Hi there! I am wondering for this recipe, do you have to feed your starter and then wait until it peaks or can I use a starter that has been fed a bit longer ago

    • Amanda Paa

      hello! you should use active starter that is at its peak for best results.

  39. Reggie Carroccia

    Wow!!! This recipe simply amazing!!! It was definitely worth the wait!!! It was light, airy, chewy and I topped it off with Pizza Sauce , black olives , sun dried tomatoes. Once it was baked I added shredded mozzarella cheese and turned the oven on broiler for 5 more minutes!!! Fabulous!!!!

    • Amanda Paa

      I’m so glad you enjoyed the recipe, Reggie! That combination sounds amazing. Like a focaccia pizza!

  40. Sharlene

    I do not have a scale, could you convert your measurements to cups?

    • Amanda Paa

      Hi Sharlene! For sourdough recipes, grams are the standard measurement used across the world. So for ease of making recipes, I’d suggest adding one to your kitchen. They are rather affordable. This one is under $20.

  41. Aleksandra

    Excellent recipe, thanks! We added some dried tomatoes and it was amazing, next time we shall add a few black olives too!

    • Amanda Paa

      oh, i’m going to try it with sun dried tomatoes next time, too! so glad you liked the recipe.

  42. Tanya Wilson

    This was amazing!! I did the overnight proof after the proof and fold. For the topping I finely chopped 2 whole BULBS of garlic (Never enough/too much garlic), and sautéed with fresh rosemary, 1 TBS of a onion/chili paste/oil that I have in the olive oil and butter on medium/low heat until the garlic was semi soft, maybe 10 minutes. I poked the dough well then topped and brushed out the cooked garlic mixture and then I topped the dough with 1/4 c Romano Pecorino. I then re-poked the focaccia so all the goodies went in really well. Then I followed your baking instructions and except I covered during the hotter portion of cooking and uncovered during lower temperature cooking so the cheese and garlic (there is a lot) don’t over brown. It turned out EXCEPTIONAL. Everyone is raving and I will be expected to make this frequently now. Thank you! I have been searching for a good focaccia recipe and have been practicing and I think I have found the winner! I think the WET dough is the trick. :)

    • Amanda Paa

      thanks, Tanya! love how you went extra on the garlic! yum.

  43. Angela

    Thanks so much for the detailed instructions and beautiful photos. I did the overnight proof and the focaccia turned out amazingly chewy, soft and delicious! I used garlic infused olive oil and it smells absolutely devine :D

    • Amanda Paa

      So happy you enjoyed the recipe! There can never be enough garlic, right? :)

      • Mica

        Hi, thanks for the recipe – I can’t wait to try it! is it possible to leave out the honey, or is it crucial for the sourdough to work properly? (My husband can’t stand honey..) Thanks!

        • Amanda Paa

          Hi!
          You won’t taste the honey, it’s just the little bit of sugar that helps the fermentation. You could use maple syrup instead if you wanted, in equal grams.

  44. Anne Shedddan

    My very first focaccia made with my first sourdough starter. Your step by step instructions were great. The bread turned our beautifully. Wish I could include photo. No yeast in shops so had to get creative. Now have 3 lots of starter on the go.
    I’m hooked. Thank you.
    Anne
    Brisbane, Australia

    • Amanda Paa

      So glad you liked the recipe, Anne! Sourdough is magic.

  45. Mika

    A bit confused at the baking step instructions – the long text says 20 min at 400, the short instructions say 10. I’m trying 15 to come in between, but which one did you mean?

    A. Put pan in oven on middle rack and bake for 20 minutes. Turn oven down to 350 degrees F and bake for another 15 minutes

    B. Put pan in oven on middle rack and bake for 10 minutes. Turn oven down to 350 degrees F and bake for another 15 minutes,

    • Amanda Paa

      I’ve updated recipe card and the written out instructions in post with even more updated recommendations – thank you for catching that!

  46. Sara

    I over did the first rise, under did the bulk, and rushed the final. I’m new to bread baking and still figuring out how to time things in around my schedule.

  47. Sara

    Mine didnt rise quite as well as i was hoping, but i probably rushed it. But the top of mine just isn’t getting the pretty browning that yours has, is there a secret? I left it in a few extra minutes trying to brown, but i didnt want to dry it out or over bake it. It still looks ok, just not as pretty.

    • Amanda Paa

      Hi Sara!

      This dough takes quite a bit of time to rise for the bulk, so if rushing that, you probably didn’t get the rise you wanted. And needs to be really bubbly at the 2nd rise. Then use your fingers to press in. You could try broiling for just a few minutes to help with the browning.

  48. Helisa

    Hi. So my question is if I leave it in the fridge, do you need to let it proof 2 1/2 hours to get it to room temperature?

    • Amanda Paa

      hello!
      i’m guessing you’re referring to these steps:
      Let rise for about 6 hours, until dough doubles in size and is puffy. You should see some small bubbles on the surface.
      Now stretch and fold four “corners” of the dough, basically on top of itself. Cover again and let rest for 2 1/2 hours at room temperature, or overnight in the refrigerator. You can keep it in the refrigerator for up to 12 hours if you’d like. — At this point, after you remove it from the refrigerator you would continue to follow the instructions, not waiting for it to come to room temp.
      Your next step would be: Using lightly oiled hands, gently scrape dough out onto baking sheet. It will look like a big blob, and that’s okay! Using your hands pull the edges out to gently stretch them, and work into any shape you’d like. Dough should be about 1 to 1 1/2 inches tall. Let rise in a warm spot, covered with another sheet pan that’s upside down (so it has room to rise) for 1-2 hours until it is puffy and bubbly.

      Yours will probably take at least 2 hours to get puffy and bubbly because it is coming out of the refrigerator.

      • Helisa

        Thank you I will try this

  49. Aramide Ogedengbe

    I used this recipe and it worked out perfect.Its a keeper

    • amandapaa

      Yay! I’m so glad you liked the recipe. Nothing beats fluffy focaccia dipped in olive oil!

      • Jan

        This recipe turned out perfect.
        So delicious.
        A wonderful way to use sourdough starter.

        • Amanda Paa

          great, i’m so glad you liked the recipe!

  50. Jessica

    LOVE this recipe! I made it this week & the texture was just perfect. I decorated mine with za’atar, oregano, chilli flakes & garlic. It was a huge hit!

    • amandapaa

      Oh goodness, that version sounds amazing. Thank you for sharing your success with the recipe, and new idea!

  51. Natalie

    Hi Amanda!! I tried this recipe, but my dough seems REALLY wet. How cool must the water be, I used room temperature water. As such when I reach step #3, it gets stuck to the bowl even though I’ve used the hook for 10 mins. Any tips??

    • amandapaa

      Hi Natalie! This is a very high hydration, 90%, so it will be very sticky throughout the process. The water should be cool, as in 75ish degrees. It could also be stickier if it is humid today in your area. Try adding 25 grams flour, and mix for 4 more minutes, then continue with directions. It should be okay. Also, are you certain you measured the flour/water ratio correctly? I know I’ve made mistakes before. Hope that helps! xo

      • Dennis

        5 stars
        I plugged it into a hydration calculator and with bakers math its actually more of a 73 percent hydration, having said that the recipe is great !

  52. Casey L.

    Really easy and delicious recipe for sourdough focaccia!! Amanda’s detailed instructions are super helpful. I opted for the overnight rest after bulk fermentation, and the finished bread was SO flavorful. This is my new go-to sourdough recipe!

    • amandapaa

      I’m so glad you liked the recipe! And thank you for sharing the photo on Instagram – so fun to see the joy in your son’s eyes while eating the focaccia!

  53. Sarah @ Snixy Kitchen

    I’m so obsessed with these photos and I feel like I’m right there making focaccia with you! I’ve had learning how to make gluten-free focaccia on my to-do list for awhile now, so I think I’ll use this as a starting point in my experiments! I also have and love that scale for the pull-out screen feature too!

    • Nikki

      What is your Gluten free Sourdough start? I can’t perfect it.

  54. Alanna Taylor-Tobin

    These photos slay me Amanda! Love all of your step-by-step details. OXO makes such great kitchen products – having major scale envy rn!