Easy, Soft Sourdough Dinner Rolls (no hand-kneading!)

By Amanda Paa – Updated April 3, 2023
4.88 from 58 votes
These sourdough dinner rolls are soft, pillowy, and literally melt in your mouth. Using an overnight rise, the dough will go through its bulk ferment without having to do any stretch and folds, or kneading. So simple to make! The sourdough rolls are the perfect addition to any meal, but especially the holidays. Baker's schedule included.
Jump to Recipe

This post may contain affiliate links. Please read my disclosure policy.

soft sourdough dinner rolls on a white plate

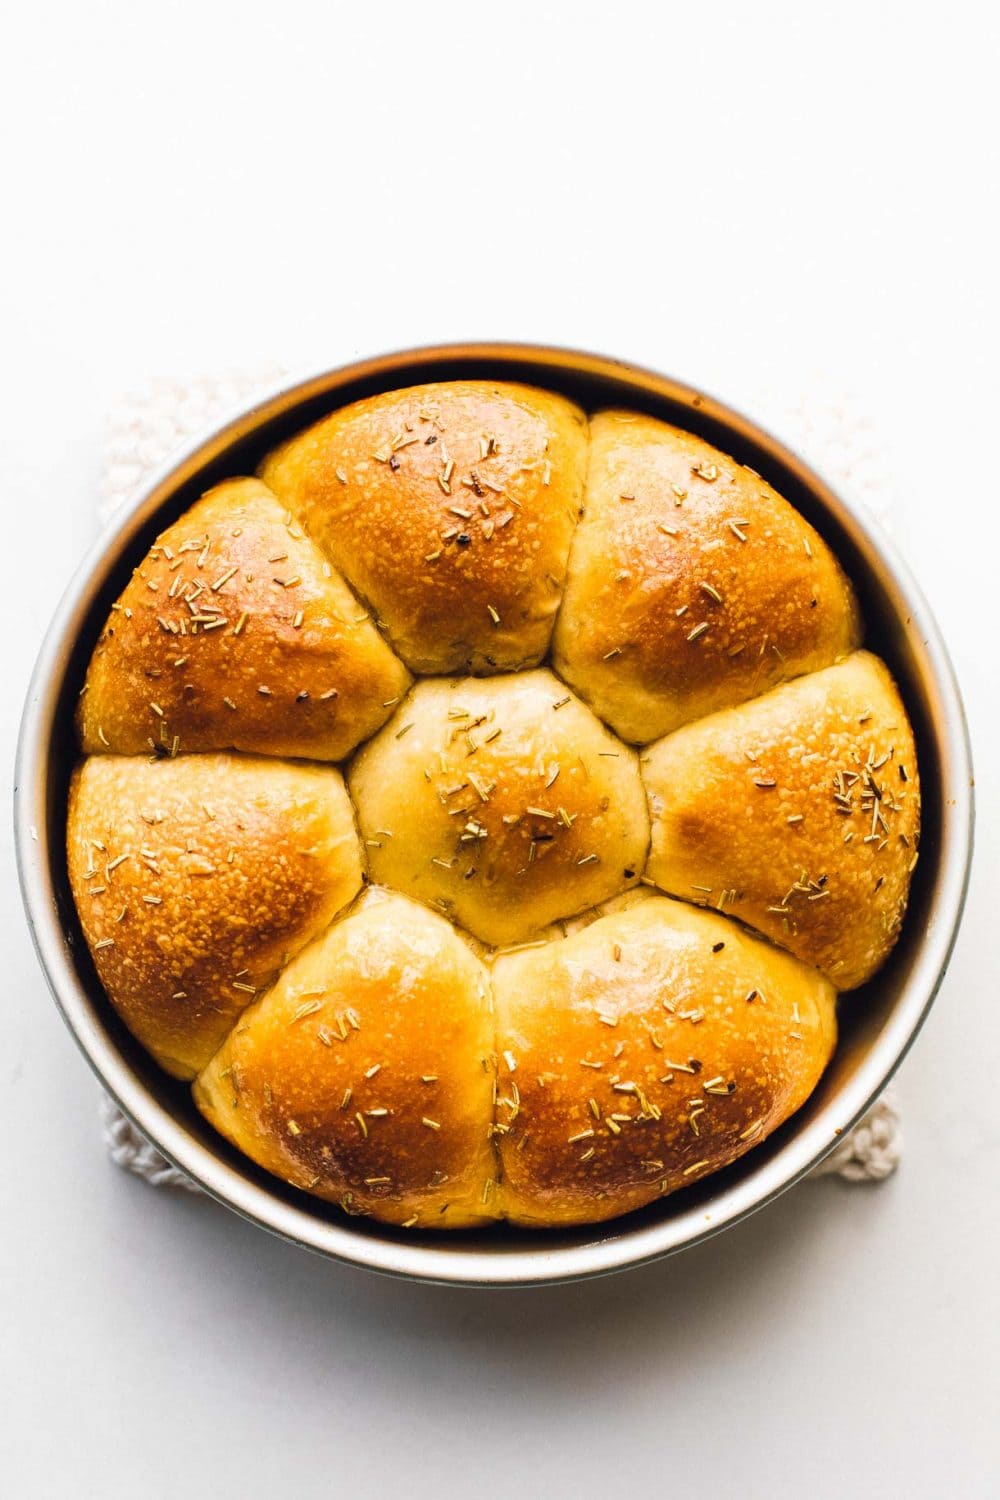
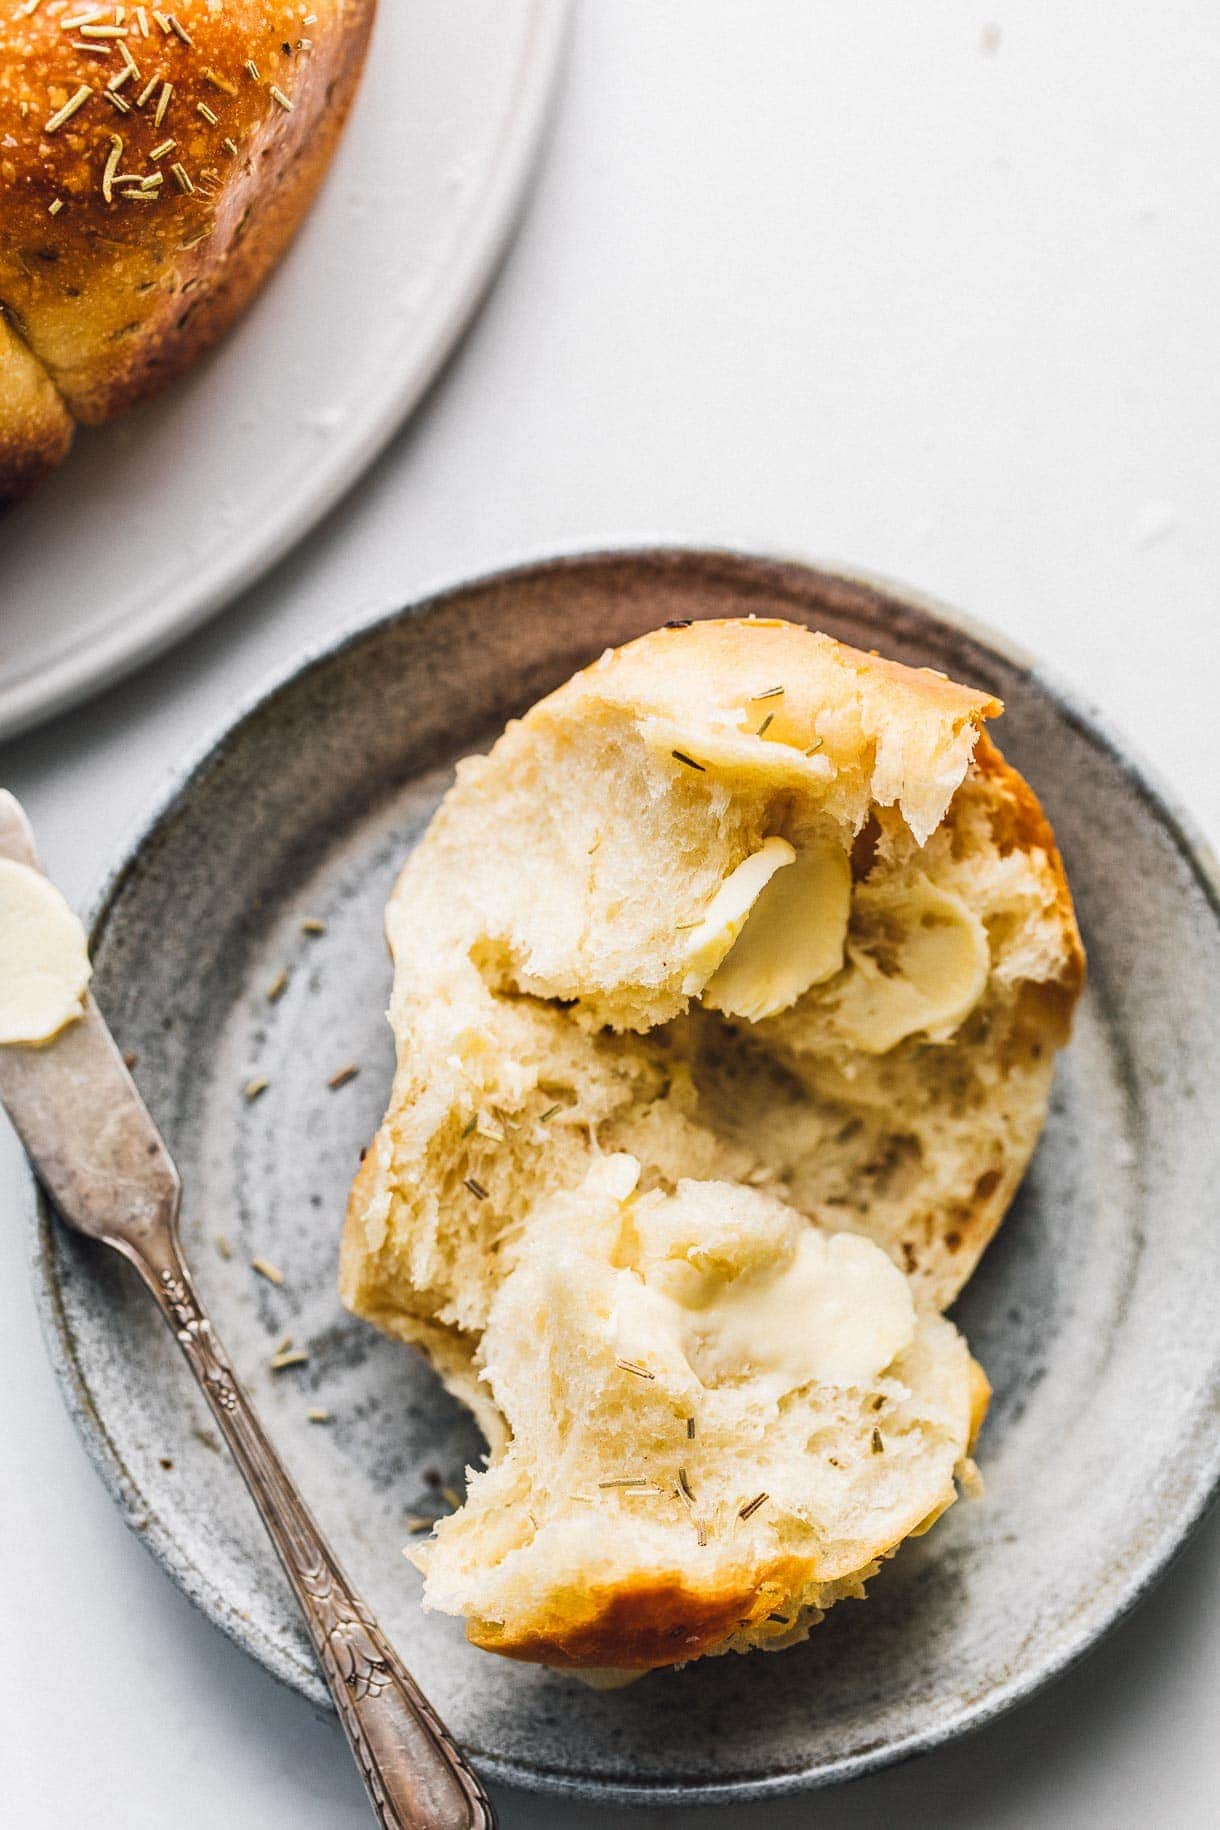
Delicious sourdough dinner rolls with an overnight rise.

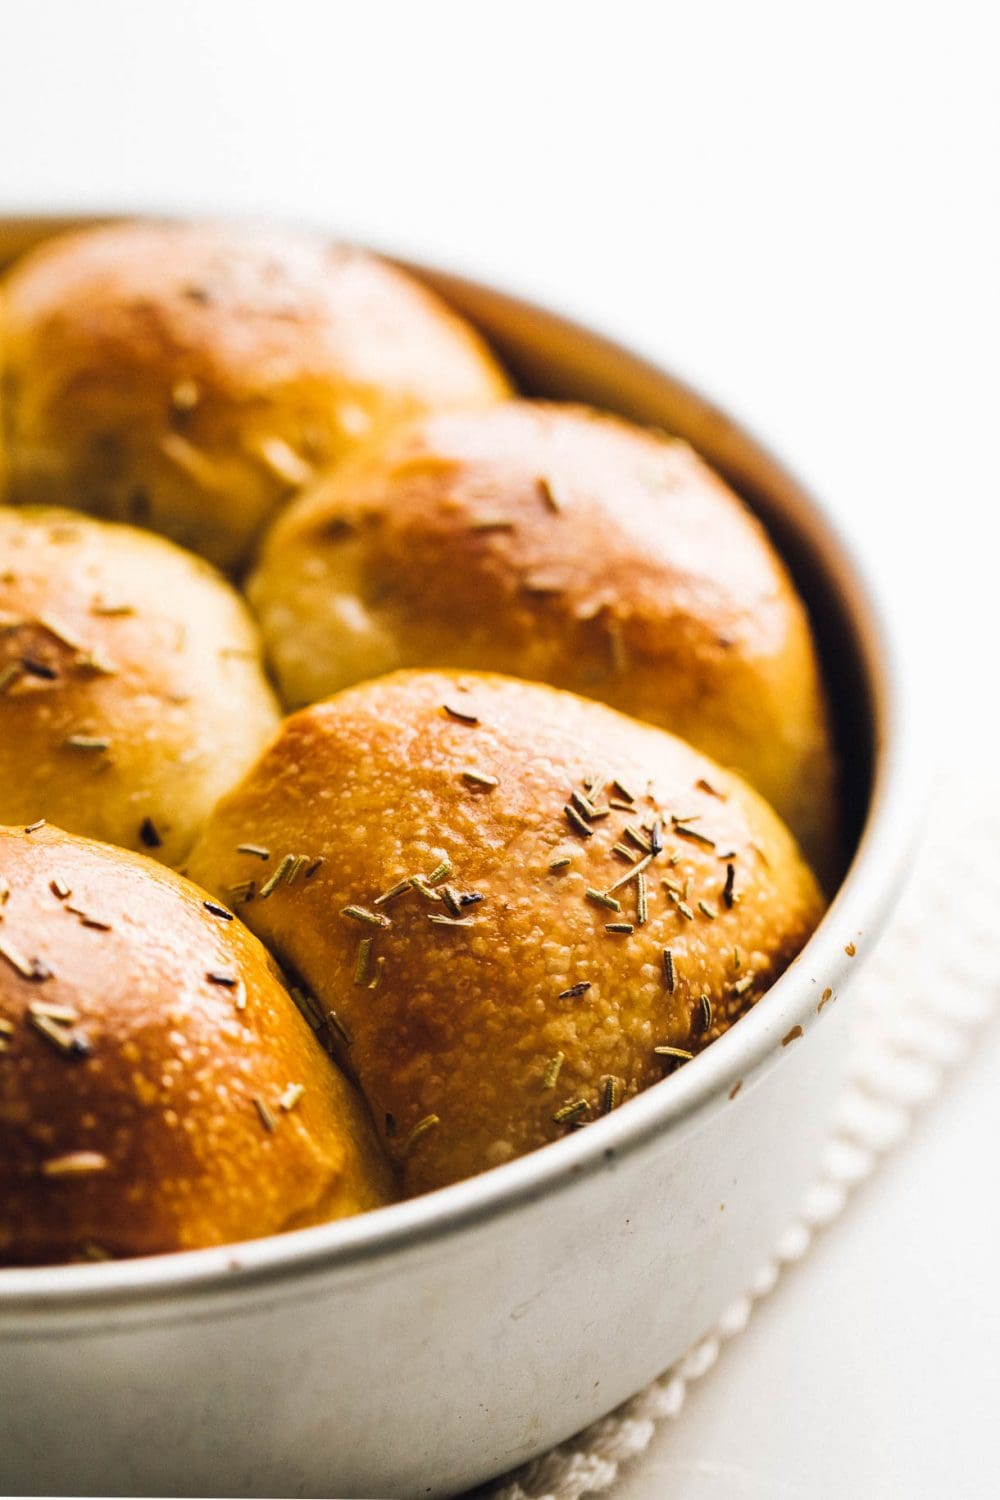
These homemade sourdough dinner rolls are a dream! They’re soft and squidgy, light as a feather, and even better tasting than the classic. Between the flavor and the texture, you’ll reach for a second before you’re done with the first.

I’ve been working on this sourdough roll recipe for weeks to achieve the best result with the most straightforward technique, and I think we’re there! It’s a great recipe for Thanksgiving, Christmas, and Easter dinners, when dinner rolls are one of the best parts of the meal.

sourdough dinner rolls in a round pan with spices surrounding the pan

Making Sourdough Dinner Rolls with a Stand Mixer

Much of my testing was centered around how the rolls turned out using a stand mixer compared to just using hands to mix the dough.

The stand mixer dinner rolls were much airier and feathery, with a texture that shreds apart beautifully. This is from the air that is incorporated into the dough from the strength of the mixer, which is extremely difficult to achieve by hand.

The hand mixed rolls took lots more effort to make because all of the kneading happens with your own elbow grease. They turned out good, but chewier than I wanted. I just couldn’t get the same airiness out of them. They didn’t seem to puff in the oven as much, either.

What do these Sourdough Dinner Rolls taste like?

And finally, I landed on these, with an easy overnight rise that allows the buttery brioche dough to lighten, and bake into pillowy buttery dinner rolls. Layers of flavor emerge from the dough itself, with the addition of rosemary and garlic (optional,but delicious). It’s always fun to take your taste buds on a tour of new flavors, even with classic foods. So that’s what we’re doing here.

And the texture….. is something I’ve dreamt about.
It’s an experience comparable to eating cotton candy, but in savory form.

Although these rolls are made with active sourdough starter, my goal was to keep the “tang” minimal: just enough to add to their uniqueness, without being abrupt. (If you’re looking for a recipe with more of that classic sourdough flavor, I’d suggest my Rye Sourdough Bread.)

brushing butter on sourdough dinner rolls
soft and fluffy sourdough dinner rolls in a pan

Here are the ingredients you’ll need:

  1. Active sourdough starter
  2. Bread flour
  3. All-purpose flour
  4. Milk
  5. Egg
  6. Butter

Baker’s Schedule with Overnight Bulk Fermentation:

  • 3:00pm – Feed starter and set butter out to soften
  • 8:30pm – Step 1 of mixing dough
  • 9:00pm – Step 2 of adding butter to dough, and salt, garlic, rosemary
  • 9:15pm – Cover dough with damp cloth, and let rise overnight on the counter
  • Next morning – Shape dough into balls and let rise another 2 hours
  • Bake!

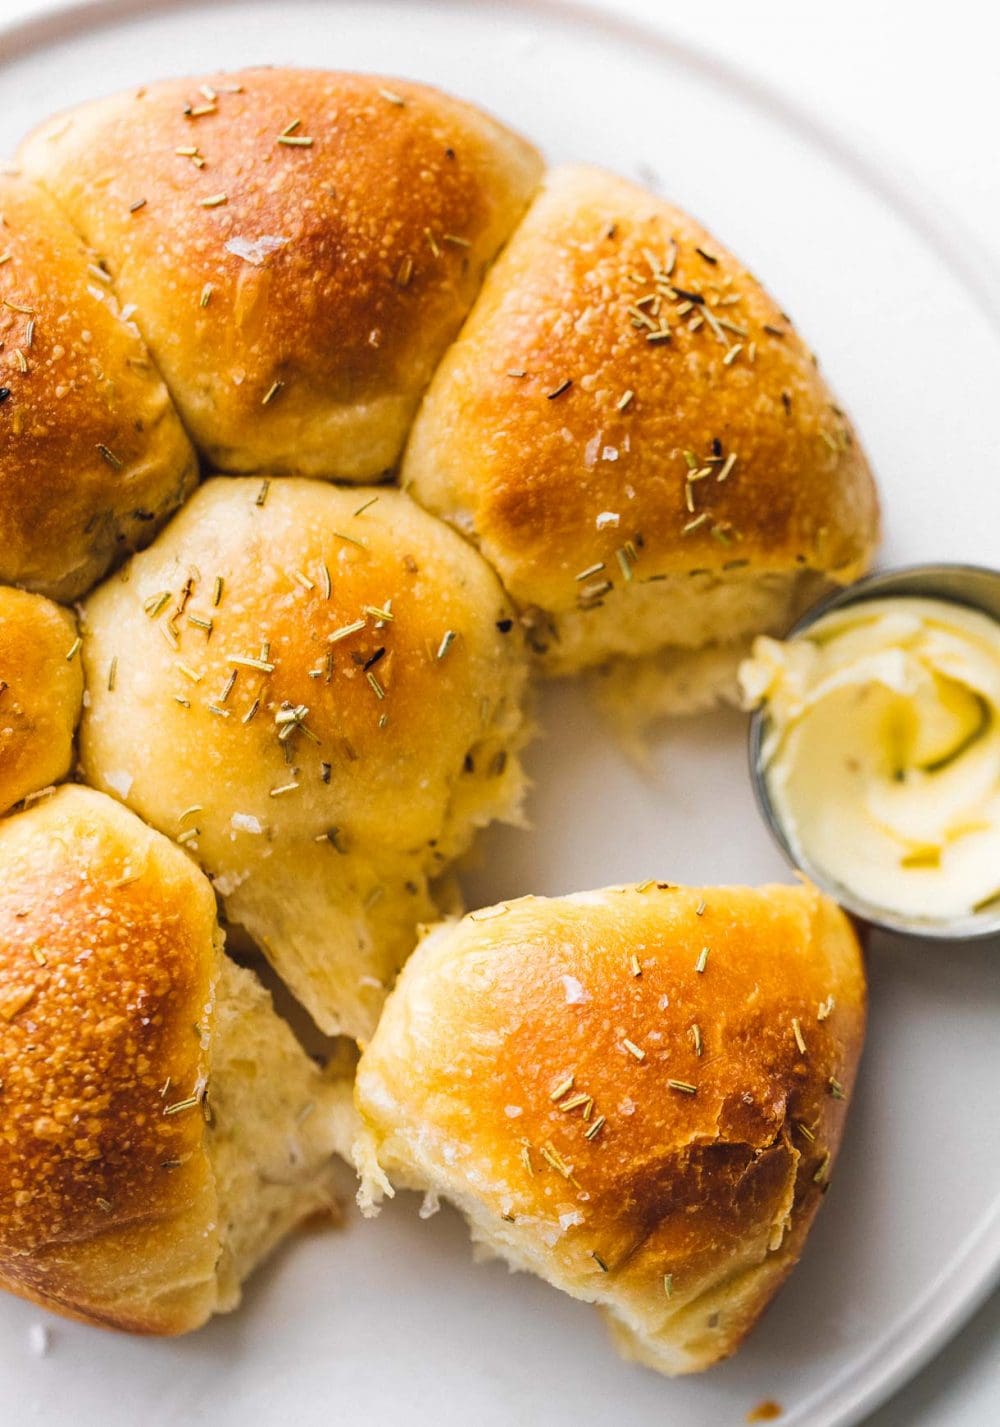
These will be the most talked about dinner rolls in your house. Share and tear, and enjoy so much flavor in one bite! They’ll be on my Thanksgiving menu every year from now on.

sourdough dinner rolls close up photo, in aluminum pan

Daytime Bulk Fermentation, Evening Cold Proof Baking Schedule

You can also time these so that the dough goes through its bulk fermentation during the day, then the rolls are shaped and refrigerated overnight, baked the next day. Here’s that schedule. All times are approximate.

  • 1pm: Mix dough.
  • Sometime between 7 and 9pm, your dough should have finished its bulk fermentation. Bulk fermentation is finished when the dough has risen about 80%, a bit short of doubling, is smooth on top, and is a bit domed. 
  • Shape the rolls and place into your greased pan. Cover with shower cap or plastic bag. Let sit on your counter for 30 minutes. Then place in refrigerator. 
  • The next day, take your rolls out about 3 hours before you want to eat them. They’ll need to come to room temperature which takes at least an hour, and then rise a bit so that they are puffy and soft when you touch them. Reference the photos in the post. When they look ready, preheat your oven. 
  • Brush with milk or egg wash and bake. 

How to Reheat Sourdough Rolls:

Preheat the oven to 300 degrees F. Wrap the rolls in foil and place in oven for 5-7 minutes (or for as long as it takes to heat them). Serve warm!

sourdough dinner rolls on a plate with butter
sourdough dinner roll cut in half with buttered knife

Other Sourdough Recipes:

Save This Recipe Form

Want to save this recipe?

Enter your email below & we’ll send it straight to your inbox. Plus you’ll get more great recipes and tips from us each week!

sourdough dinner rolls on a plate with butter

Soft & Buttery Sourdough Dinner Rolls

Buttery and fluffy homemade sourdough dinner rolls made with active sourdough starter. No stretching and folding, and an overnight rise makes this recipe a breeze!
4.88 from 58 votes
Prep Time :10 minutes
Cook Time :25 minutes
Additional Time :14 hours
Total Time :14 hours 35 minutes
Yield: 8 rolls
Author: Amanda Paa

SCALE:

Ingredients

  • 195 grams organic bread flour
  • 65 grams organic all-purpose flour
  • 100 grams active sourdough starter, at peak
  • 1 large egg, room temperature
  • 115 grams lukewarm milk
  • 10 grams honey
  • 6 grams fine sea salt
  • 45 grams softened unsalted butter, cut into 1/2 inch chunks
  • 1 teaspoon (3 grams) Watkins Organic Garlic Powder (optional)
  • 1 teaspoons (3 grams) Watkins Organic Rosemary (optional)
  • extra butter for brushing

Instructions 

  • Around 8:30pm, add the flours to the bowl of a stand mixer. 
  • Add the milk, starter, honey, and egg to a large bowl. Whisk until combined. 
  • With hook attachment, set mixer on low speed (speed 2 of my Kitchenaid) and pour in the liquid in 3 additions, waiting about 20 seconds before each addition. Increase speed to medium (speed 4 of my Kitchenaid), for 30 seconds. Dough will be somewhat lumpy, but that’s okay.
  • Bring together into a ball using your hands, and let dough rest, covered for 30 minutes. 
  • Adding salt and butter: Turn on mixer to low (speed 2 of my Kitchenaid) and add salt. Then add one piece of butter at a time, waiting until butter is dissolved into dough to add the next. Don’t be worried if your dough still looks a little bumpy and lumpy. It will come together! When all butter is added, turn mixer to medium (speed 4) and mix for 7 minutes. This will strengthen the dough and it will pull away from the sides of the mixer. *If you are adding the dried herbs, do so in the last one minute of mixing.
  • Cover the dough with a very damp tea towel and plastic grocery bag if you have, and let rise overnight on the counter in a cool spot, around 65-68 degrees F.
  • In the morning around 7am, your dough should look doubled or just short of doubling, and smooth on the top. If not doubled, wait for it to do so. You will now shape the dough, into 8 equal pieces. Lightly flour a clean surface and turn the proofed dough out onto it. Separate the dough into 8 pieces, using a scale to weigh them so that they are nearly equal. Generously grease an 8 or 9 inch round baking pan, with butter.
  • Shaping: Take each piece of dough and gently pull each side outwards, then bring together in the middle, and start to roll the dough onto itself, making a ball. Rotate, repeating the motion, until a ball has formed. Pull the dough across the surface to create some tension, and cup the ball with your hands. Using floured hands, use the outer edge of both little fingers to rotate the ball counterclockwise. This will help the roll to form a skin on the outer layer so that it keeps a nice shape when rising and baking. Repeat this until all of the rolls are shaped, placing each roll into the baking dish as you go.
  • Cover the rolls with a damp tea towel and set them aside to rise at room temperature for 2ish hours, or until risen another 50%, puffy and light to the poke. The dough balls should be touching other. 
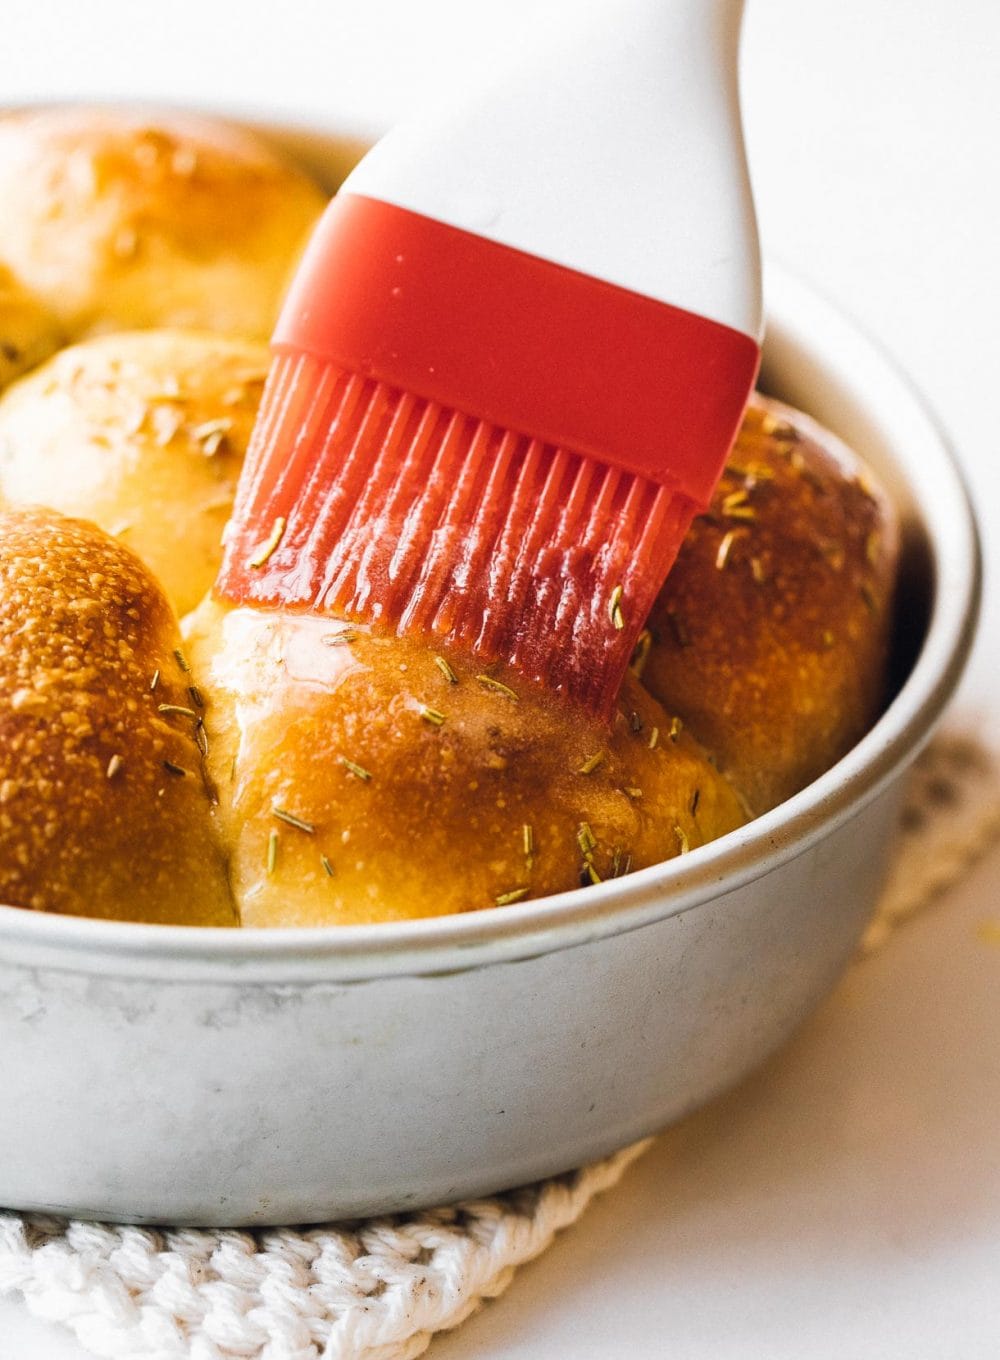
  • Preheat oven to 400 degrees F. Brush rolls with milk or egg wash, and when oven is preheated add pan to oven. Bake for 23 to 26 minutes, until rolls are golden brown. Brush generously with about 2 tablespoons of melted butter when rolls are done, and serve warm. 
  • Best eaten day of making. If you have leftovers, store in a plastic bag on counter. You must warm up the roll in microwave before eating, for 10-12 seconds to soften it.

Notes

You can also time these so that the dough goes through its bulk fermentation during the day, then the rolls are shaped and refrigerated overnight, baked the next day. Here’s that schedule:
All times are approximate.
  • 1pm: Mix dough.
  • Sometime between 7 and 9pm, your dough should have finished its bulk fermentation. Bulk fermentation is finished when the dough has risen about 80%, a bit short of doubling, is smooth on top, and is a bit domed. 
  • Shape the rolls and place into your greased pan. Cover with shower cap or plastic bag. Let sit on your counter for 30 minutes. Then place in refrigerator. 
  • The next day, take your rolls out about 3 hours before you want to eat them. They’ll need to come to room temperature which takes at least an hour, and then rise a bit so that they are puffy and soft when you touch them. Reference the photos in the post. When they look ready, preheat your oven. 
  • Brush with milk or egg wash and bake. 
*To reheat rolls: Preheat the oven to 300 degrees F. Wrap the rolls in foil and place in oven for 5-7 minutes (or for as long as it takes to heat them). Serve warm!

Did you make this?

tag @heartbeetkitchen on instagram and hashtag it #heartbeetkitchen

November 19, 2020

COMMENT & RATE

Your email address will not be published. Required fields are marked *

Recipe Rating


This site uses Akismet to reduce spam. Learn how your comment data is processed.

100 comments

  1. Moriah

    5 stars
    Crowd pleaser-
    I was traveling and didn’t have a hand mixer, so I flowered up a table and needed the old-fashioned way. It was a good kick in the butt to remind me that hand heating isn’t so bad after all!

    • Amanda Paa

      so glad you enjoyed them, and got a good arm workout in! :)

  2. Lou

    5 stars
    My rolls turned out wonderful- so soft and light! I tried something different since I do not have a mixer and did not want to do the mixing by hand. I decided to use the dough setting on my bread-
    maker. I added all liquids and then flour on top. It formed into a nice ball of dough. I placed it in a bowl and covered it as suggested- overnight. The next morning I formed the dough ( 2 pans with 15 rolls total), let them rise and baked them per directions. TY. TY. TY
    So easy and quick to assemble!!!

    • Amanda Paa

      Yay, love to hear that Lou! And thank you for your notes!

  3. Irina Stiles

    Hello, Amanda. Would you let me know how to access your Amazon store? I would like to purchase your Air Fryer.

  4. Dolly

    5 stars
    I love these rolls! The flavor is amazing, as is the texture. I’ll be making these again today.
    Thanks for the recipe!

    • Amanda Paa

      I’m so glad you like them, thanks for making the recipe!

  5. Pat Roberts

    5 stars
    I have made these sourdough rolls 4 or 5 times. They are delicious! This Thanksgiving, my guests enjoyed so much they asked to take some home. Glad I made 1.5 times the recipe! So nice to get the main work done the night before for easy finishing day of your dinner.

    • Amanda Paa

      So wonderful to hear, Pat! Thank you for making the recipe.

  6. Katie

    5 stars
    These were so easy and turned out great! Loved how buttery and soft they were. Perfect for Thanksgiving! Thanks for another great recipe!

    • Amanda Paa

      Yay, thanks for making them!

  7. Susan Braidwood

    5 stars
    These are really good! They did take a little longer to bake than I had expected, and I wonder if they would have been a bit more brown if I used an egg wash instead of milk. There are only 2 of us and we ate 2 of them before freezing the rest. This recipe will definitely be in my rotation.

    • Amanda Paa

      So glad you enjoyed them! Yes, they will get more golden if you use egg wash, I just know some people hesitate because of the leftover egg wash and they don’t want to waste, so that’s why I suggest milk. But go forth with the egg wash, you will be rewarded with shiny buns! :)

  8. Haylie

    5 stars
    Was worried about mak8ng these but after getting started it was great and easy, I made plain no rosemary or garlic and they were so good. I’m making more for tomorrow’s second thanks giving

    • Amanda Paa

      So glad you enjoyed the rolls, thanks for making the recipe!

  9. Patti

    5 stars
    Made for Thanksgiving, bulk fermented overnight, a little nervous as they were slightly over double.. Weighted, shaped, let rise.. Perfect!

    • Amanda Paa

      Yay, so glad you enjoyed them! thanks for making the recipe.

  10. Irv Nachamkin

    5 stars
    Made these rolls today (double batch) with the garlic and rosemary, delish! Picture on my instagram @nachampion. My only comment is that it took longer than 20-25 minutes before the rolls were ready.

    • Amanda Paa

      I’m so glad you enjoyed them! Your oven may run lower in temperature that it reads, an inexpensive oven thermometer really helps to be able to adjust that if you’re interested!

  11. Beth

    Can these be made dairy free with almond milk and margarine? Any suggestions are welcome.

    • Amanda Paa

      Hi Beth! If using a non-dairy milk, I would try unsweetened oat or soy; both have a more similar fat content to dairy milk. I would try earth balance butter sticks. I haven’t tested it this way so not sure it would work, but if i did, that is how I would make them.

      • Beth Baker

        5 stars
        I used oat milk and vegan butter and they came out wonderful. Everyone raves about them. I’ll be making these again both dairy and non dairy.

        • Amanda Paa

          So great to hear, thanks for sharing your notes!

    • Sophia

      5 stars
      I made them with almond milk and they came out perfect!! Best rolls I have ever made!

      • Amanda Paa

        Oh, awesome; so glad that worked! Thanks for sharing your notes and making the recipe!

  12. Veena Sethaputra

    5 stars
    This recipe is fabulous! Easy to follow and the result is a beautiful soft and tender crumb. Love it.

    • Amanda Paa

      so glad to hear that, thank you for making the recipe!

  13. Cynthia K

    5 stars
    I made these rolls for Easter using the overnight proof. I had to transport to the gathering so I baked them ahead of time, let them cook, then wrapped in foil and reheated before dinner. Everyone enjoyed them, and they reheated beautifully. Still good the next day too. I used a scale to divide the dough, aiming for ~70 gms each. I will be making these again! Thanks for the recipe (and real-time consult!) Amanda!

    • Amanda Paa

      Oh, love to hear how your reheated! And so glad that everyone enjoyed.

    • Laura Garcia

      Thank you…. I came to the comments to see if the grams for each ball was on here. So, thank you again

  14. Karla

    5 stars
    These are so delicious and the instructions are so easy to follow! I followed the instructions for the bulk fermentation during the day as I wanted them baked right before our 1:00 meal on Easter. The video for shaping the rolls is super helpful. Thank you Amanda for a wonderful recipe!

    • Amanda Paa

      I’m so glad to hear they were on your Easter table!

  15. Candice

    5 stars
    So amazing! The only dinner roll recipe you will ever need! I made up the dough mid day, shaped and refrigerated overnight.

    Let sit at room temperature about 2 hours before baking. Can’t wait to enjoy these with family for Easter dinner.

    • Amanda Paa

      I’m so glad to hear your thoughts, Candice! And that the sourdough dinner rolls were on your table. ❤️

  16. Maria J

    5 stars
    Wow, these are light and fluffy and so delicious: one cannot tell you don’t use yeast. Thank you for the recipe and step-by-step instructions Few notes: 1. My kitchen is colder (62-3F) so I opted for longer proofing 2. I don’t have stand mixer so did hand kneading: about 10 min when incorporating the butter (step 5, i use melted butter, lukewarm temperature) 3. The method of preheating oven to 400F then reducing to 375F seems to be working well, my bake time was 26 minutes, turn halfway through (just function of my oven not baking evenly) 4. Once baked, I brushed with butter and covered with towel for 10 min.

    • Amanda Paa

      So glad you liked them, and appreciate your notes!

  17. Lydia

    5 stars
    I have made these with and without the garlic and rosemary. For my family, we prefer without. That enables us to have them like a desert too with butter and lots of honey! Great and EASY recipe! Thank you for all the wonderful recipes Heartbeet Kitchen!

    • Amanda Paa

      I’m so glad you like them, Lydia! And slathering with butter honey sounds a-mazzzzing.

  18. Ania

    5 stars
    I have made these on 3 separate occasions and they are now requested to bring/make for family gatherings. They are melt in your mouth soft with a hint of herbs. So good!

  19. Lindsey

    Hi! I’m looking forward to trying these. I’m a little concerned about the temperature factor for the overnight rise. What temp is your house typically when making these?

    • Amanda Paa

      Hi Lindsey! Our home at night is about 65 degrees F.

    • K

      Am I able to use ap flour for replacement of bread?

  20. Rachel

    These are delicious and my entore famly love the. Great for slider sandwhiches that day after. I make these almost every week during the fall and winter. So good. Thnaksgiving will be a huge hit with these rolls.

    • Amanda Paa

      So glad to hear that, Rachel!

  21. Hannah

    5 stars
    I’m slowly working my way thru your sourdough recipes! These were delicious. I don’t own a stand mixer, so I kneaded it-maybe all increase the time a little. Both of the rises took longer than noted because its winter where I lived and my cabin is chilly. Your videos are so helpful.

    • Amanda Paa

      nice work on the hand mixing! and yes, things do take a bit longer even for more in winter. that’s why i like to say that temperature is an ingredient in sourdough. :) thanks for the message and happy baking!

  22. Liesel

    5 stars
    Crowd pleaser! I made a double bath with half of the garlic. You can shape the rolls in the evening, cover and refrigerate. I took them out the next day for a few hours before baking. So good!

  23. Liesel

    Excited to make these! Have you ever made the shaped rolls ahead of time and left them in the fridge overnight before the final rise/bake?

  24. Amanda

    5 stars
    These are so simple for a stunning final product. Amanda’s recipes are carefully written to make you confident as every step. All of her sourdough recipes are my go tos!

    • Amanda Paa

      i’m so glad you liked the rolls!

  25. Kristen

    Why do you cover with a very damp tea towel instead of plastic wrap?

    Thank you!

    • Amanda Paa

      Either works great! Sometimes I don’t have plastic wrap in the house so use the damp tea towel to ensure they don’t dry out.

  26. Stephanie Perez

    5 stars
    Clear, concise instructions made it easy to bring these superb rolls to our Thanksgiving table! I will be looking for EVERY opportunity to whip these up! I doubled the recipe and baked the lot in a casserole dish.

    • Amanda Paa

      so great to hear that you enjoyed them, and that doubling worked well!

  27. Ruby

    5 stars
    I made these for thanksgiving and they were absolutely incredible! I got so many compliments on them and they were the star of the table. I also braved making them by hand and while I’m sure the stand-mixer is much easier, it worked with just a whole lot of kneading! They were fluffy and perfect.

    • Amanda Paa

      amazing! such great work kneading by hand. your pictures of the rolls that you shared on instagram were beautiful!

  28. Anna P

    5 stars
    These worked perfectly! I can’t wait to make them again.

    • Amanda Paa

      your pictures that you shared on instagram of the rolls were beautiful!!

  29. tc

    5 stars
    your recipes are written so well, i really like the fact you cover everything

  30. Erica

    Hi I want to make sourdough garlic Parmesan knots and I wondered how this dough would be for that? Is it a shape-able dough or would it be too soft? Thanks!

    • Amanda Paa

      Hi Erica! You could definitely shape them into knots with those dough! I think it would be delicious. Let me know if you try it.

  31. Christen Armstrong

    Can these be made in advanced and frozen?

    • Amanda Paa

      Hi Christen! I have not tested that before. If you do try it, let me know how it goes.

  32. Beth

    Hi,
    Want to make these for Easter.. a slight concern about leaving on counter with raw egg as ingredient? Thanks

  33. deb fodi

    hi , making your garlic rolls now but just realized that they are supposed to be left on counter. Could i put the dough in the fridge overnight and make them tmor?
    thx
    deborah

    • Amanda Paa

      hi deb! it works to have them rise on the counter. i’ve tried the overnight in refrigerator, and it will work, they just won’t be quite as light and airy.

  34. Meghana

    Made these rolls today and my family loved them so much! Thank you for the detailed recipe. I followed it religiously!

    • Amanda Paa

      wonderful news! so glad your family enjoyed the rolls.

  35. Nicole Becker

    Hi Amanda,
    These look amazing! I just re-started sourdough again (like everyone these days) and now I’m contemplating buying a stand mixer (especially since I really want to try making these ;)). I was curious what stand mixer you have and whether you have any thoughts on the one you have in comparison to other models?
    Thanks!
    Nicole

  36. T

    Hi, do you think this recipe would work with oat milk instead of dairy milk and plant based butter instead of dairy butter?
    My daughter has a diary intolerance so i’d really like to bake a dairy free version of these rolls, they sound delicious!

    • Amanda Paa

      Hello! I have had a few people try them with dairy replacements, and they do work! They may be a tiny bit less fluffy, but overall, a really great dairy-free sourdough bun.

  37. Sheri Nix

    Hi Amanda, I’m making these for several people for their Christmas Eve meals. Can you mix the dough & then let it proof in the fridge. It would save me a lot of time if I could. I just love this recipe!! So flavorful with just the perfect texture!

  38. Kaleigh

    Do you think these could be frozen after they were shaped and then thawed prior to baking?
    Thanks!

    • Amanda Paa

      Hi Kayleigh!
      I haven’t tested them with a freezing component. It would likely take at least at overnight rise and some time in the morning for them to thaw and go through their final rise.
      I would guess it might almost be better to freeze them when they are doubled and have gone through a final rise, and then unthaw them prior to baking. But can’t confirm as I haven’t tested.

      • Kaleigh

        Amanda I made these rolls (omitting rosemary and garlic) and froze them after shaping. I let them thaw and rise overnight, and baked them Christmas morning as pull apart cinnamon buns! They rose beautifully and tasted amazing! Thanks for the recipe!

        • Amanda Paa

          that sounds AMAZING! what a fabulous idea. thank you for sharing, I’ll also have to try it!

  39. Huong

    Thanks for taking the time to share us you wonderful baking!! I baked this for our thanksgiving feast yesterday. It turned out amazing!! Family loved it!! I’ve been baking sourdough artisan bread regularly & this would be a wonderful addition to my sourdough baking schedule. Thanks again. Happy Holiday.

    • Amanda Paa

      Oh, I’m so happy to hear that your family enjoyed them! Feels really special to have been a part of your table. Happy Holidays to you as well.

  40. Nora

    I literally just made this for thanksgiving and it was absolutely delicious! I bought your starter the other week and this was my first recipe with it! Thank you for the recipe!!

    • Amanda Paa

      Oh, I love hearing this! Thank you for sharing your joy.

  41. Sarah

    I’m assuming the butter is regular, salted butter. Is that correct?

    • Amanda Paa

      unsalted butter, actually! i just updated the recipe card. :)

  42. Diane

    Thank you. I weighed all you ngredients .my dough was not dry, actually opposite. Minimal rise in overnight proof. Is there a max time for final rise ? Temp 70 . Not much action at 1.5 hours

  43. Gretchen

    This recipe sounds divine. I would like to watch your shaping technique video however, the link does not take me there.

  44. Paula

    Any guidance on using just AP flour? Bread flour is hard to come by these days but was fortunate to get my hands on a bulk bag of AP.

    • Amanda Paa

      Hi Paula!
      I haven’t tested this recipe using only all purpose flour. The hydration would likely be off, as all-purpose flour cannot handle as much water as bread flour.

  45. Robert

    Do I need to use a mixer or can I do this by hand?

    • Amanda Paa

      hi robert! you’ll need to use a stand mixer.

  46. Diane

    Would fresh Rosemary work? They look amazing .nice for Thanksgiving
    Diane

    • Amanda Paa

      Yes, it would! I would use 2 1/2 teaspoons chopped fresh rosemary.

  47. Julie

    They sound divine! If I wanted a double batch, do you see a problem with just doubling the recipe or would you recommend 2 separate batches?
    I don’t know the story behind the computer issue so I don’t know if this would help but, 2 years ago my phone suddenly malfunctioned and completely shut down with 3 years worth of photos that we didn’t know weren’t being backed up. The phone stores told us nothing could be done. After a few local places, we ended up sending it to a forensics place in Texas that does data recovery. They were able to get 90% of my stuff recovered.

    • Amanda Paa

      Hi Julie!
      I see no problem with making a double batch. Just use a larger pan to bake them in, like a heavily greased casserole pan, or 9×13.
      And thank you for sending comfort regarding the computer. I’m holding onto the tiny sliver of hope that things can be recovered.

      • Laurie

        Thanks! I would like to double the recipe also!

  48. Michelle Addy

    These sound amazing!
    Do you use a dough hook or a regular paddle?
    My kitchen is quite cool overnight (62 degrees) – do you recommend keeping it warmer for the overnight rise?
    Thank you!

    • Amanda Paa

      Hi Michelle! The dough hook, yes. I just added that note to the recipe card, thank you. :)
      My house is at 65 degrees, so if yours is 62, maybe wait until 8:30-9 am for bulk fermentation to finish. The dough will be poofy and have doubled, but still be somewhat firm.

    • Nancy

      I have a sensitivity to garlic, do you think these would taste just fine with just the honey and rosemary? This looks amazing by the way! I’ve been waiting since you first talked about the recipe in your stories!

      • Amanda Paa

        hi Nancy! They’d still be amazing with just rosemary and salt. I’ve made them that way too. :) Even just salt!