Rustic Rye Sourdough Bread Recipe
By Amanda Paa – Updated October 31, 2023
Jump to Recipe
This post may contain affiliate links. Please read my disclosure policy.
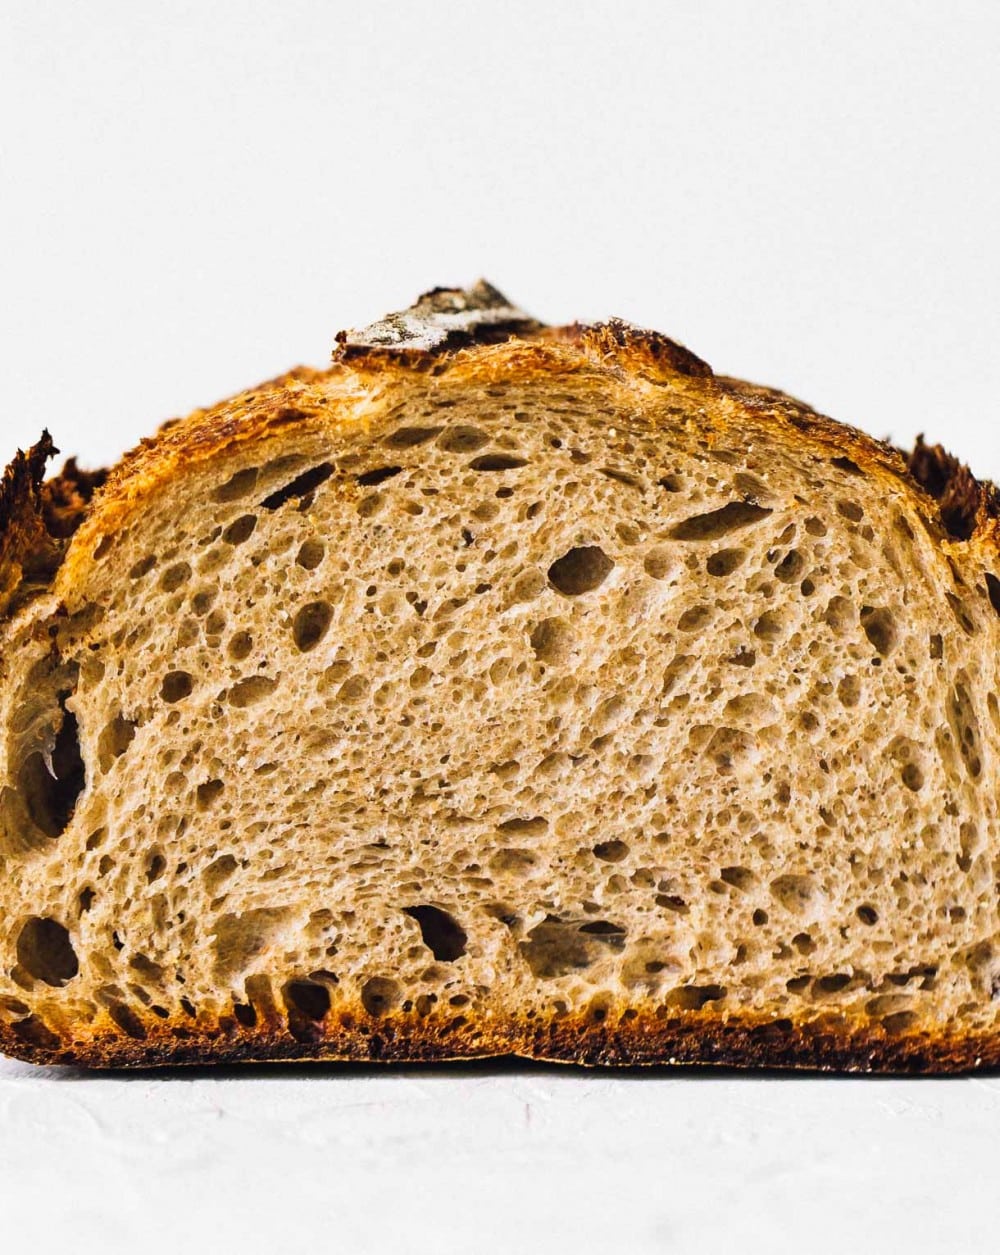
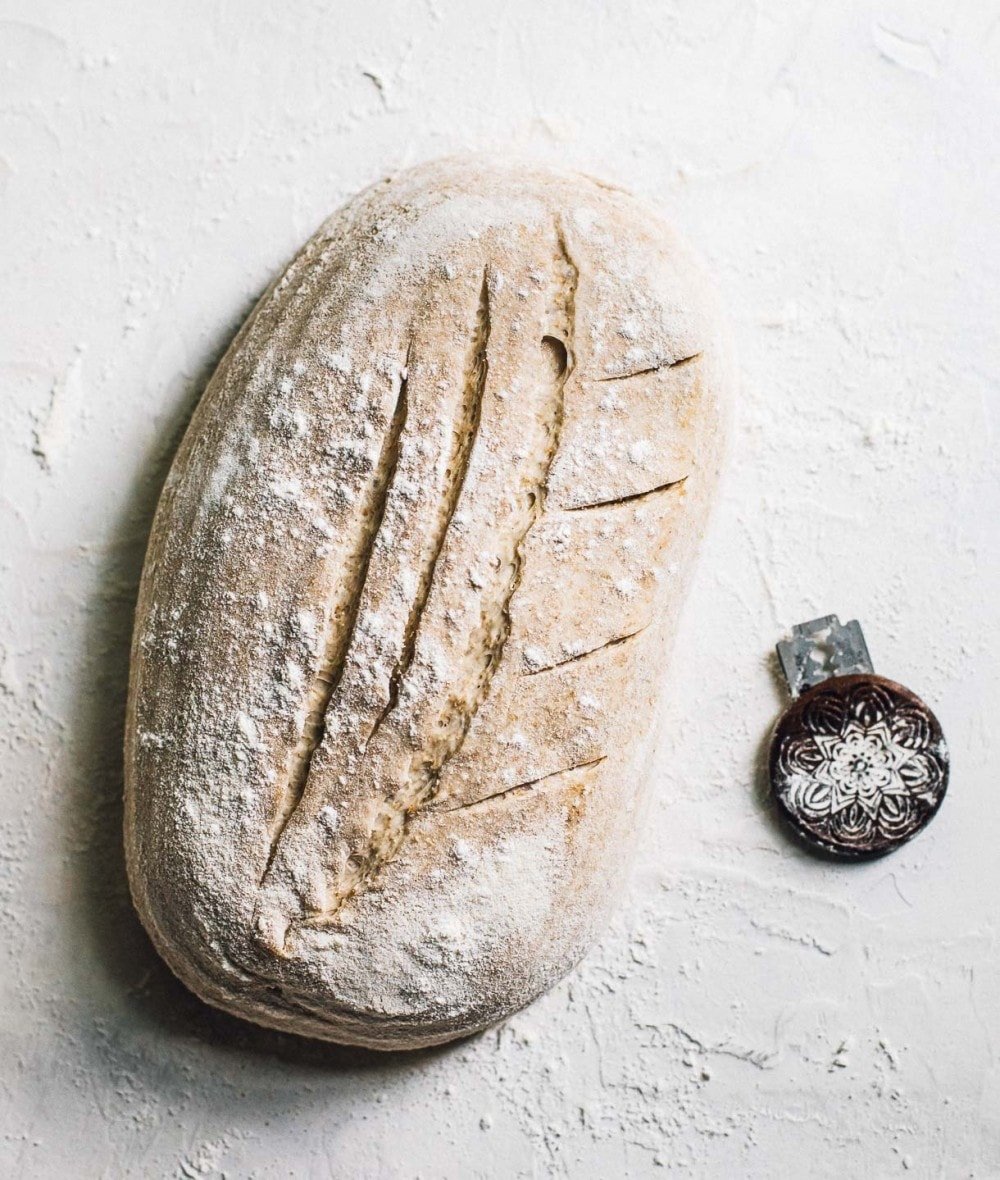
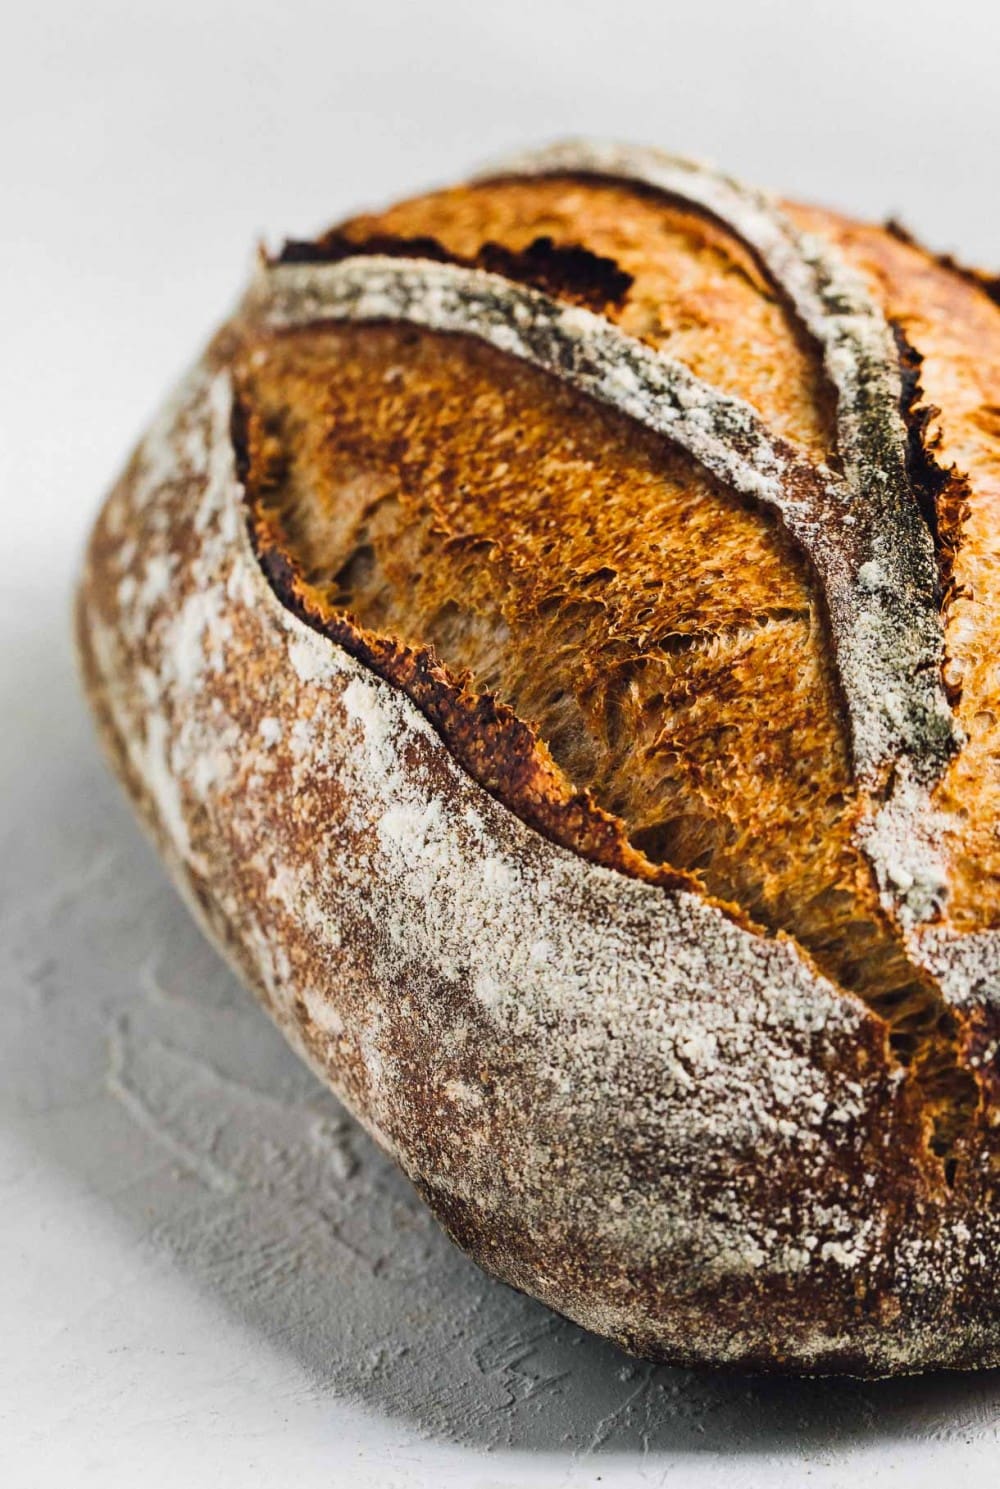
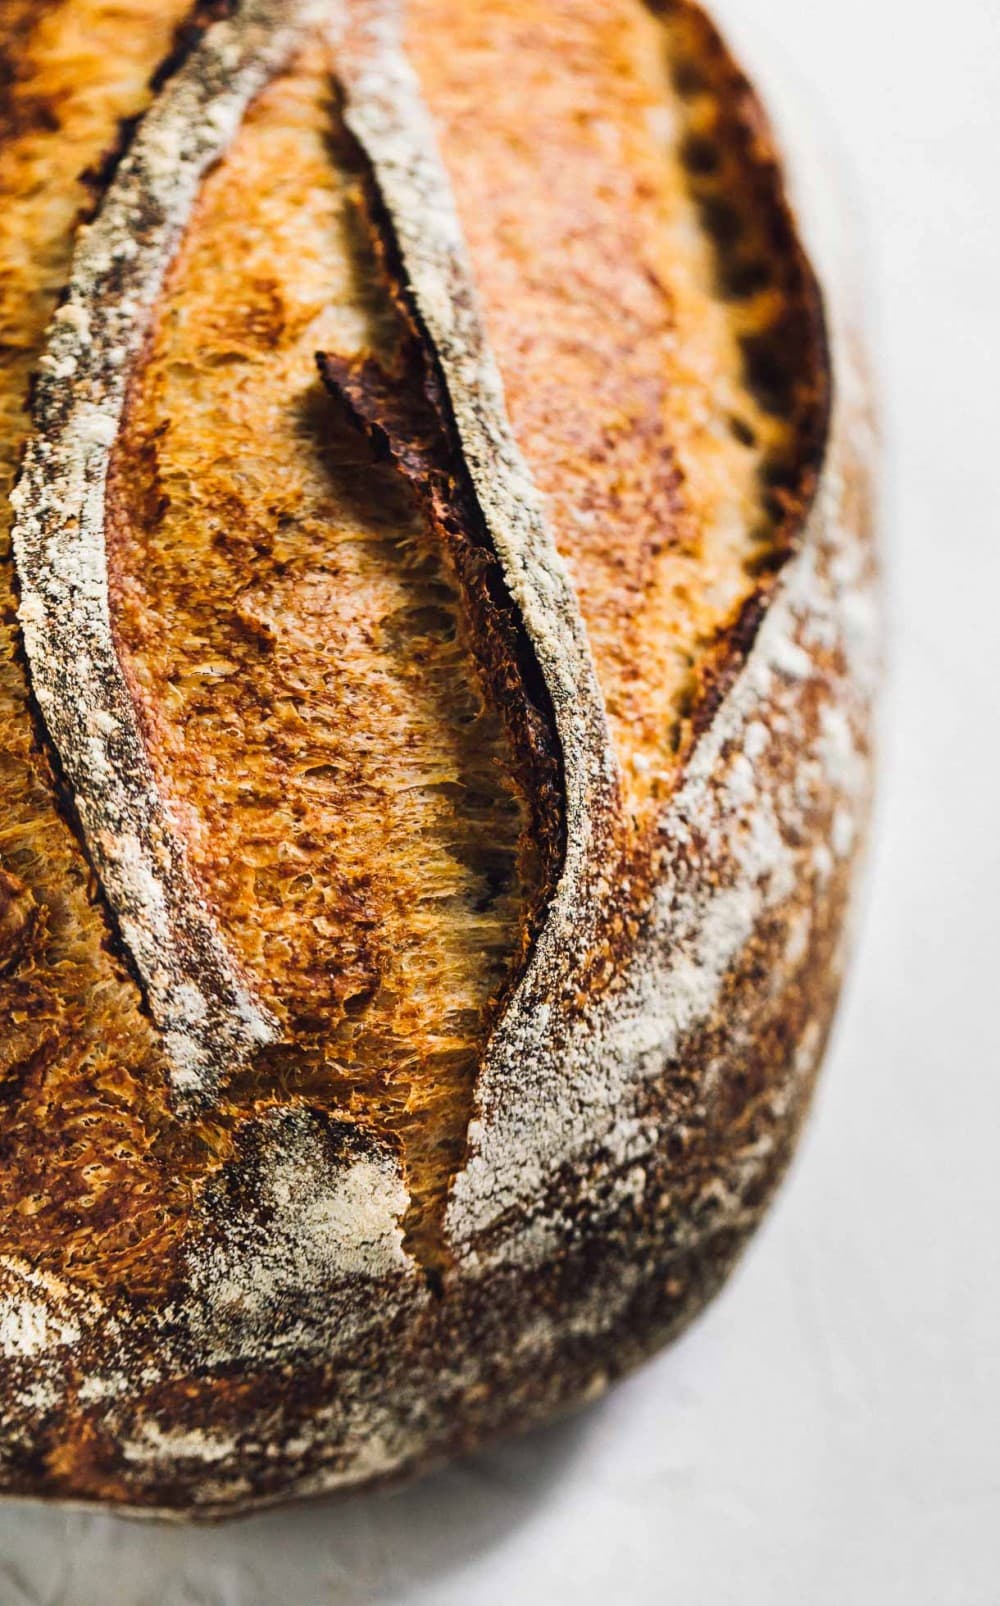
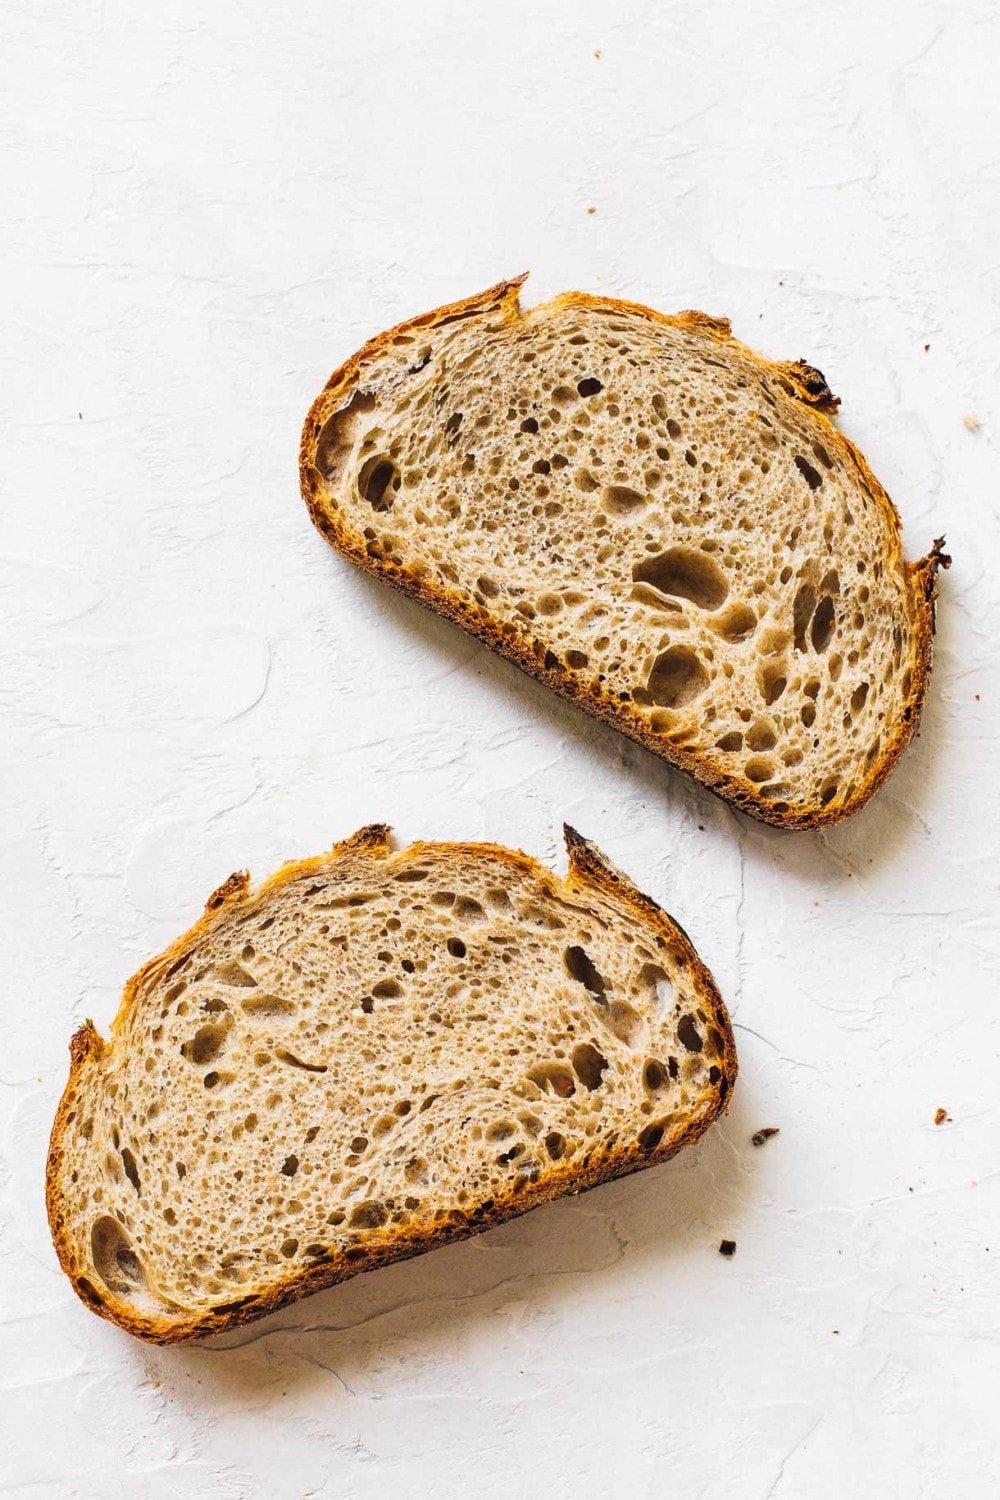
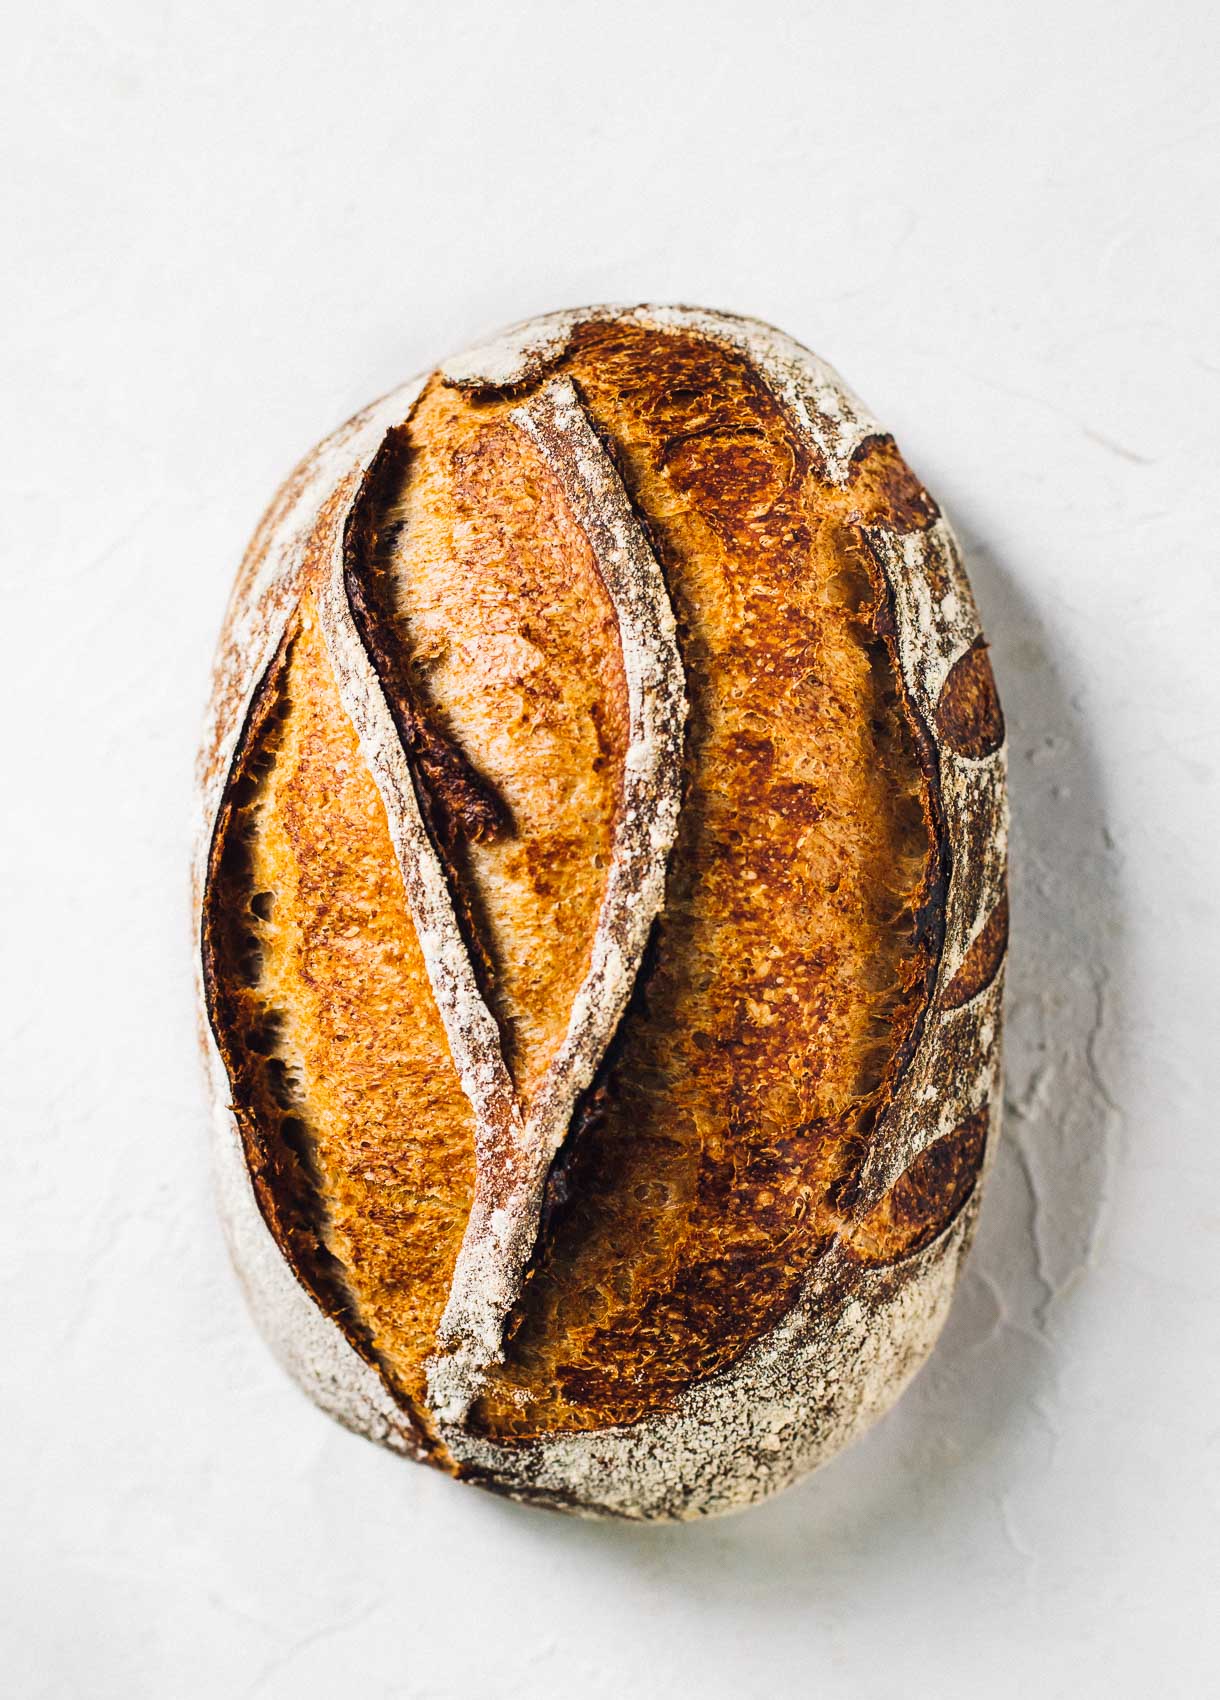
Homemade rye sourdough bread is a glorious choice for sandwiches, or eating on its own. Made with a blend of whole wheat, bread flour, and rye flour, this naturally fermented loaf holds its shape and has a moist, chewy crumb. The rustic crust is deeply colored and boasts beautiful blisters!

New to sourdough baking? You’ll need an active sourdough starter! I ship my well-maintened 13+ year old starter to anyone in the U.S! You can ORDER it here.
A great deli has a great rye bread for sandwiches, am I right?
I certainly love my Everyday Sourdough recipe for toast and my sourdough english muffins for epic breakfast sandwiches, but I had my heart set on creating a loaf that was the perfect vehicle for my recent craving of EGG SALAD. I’m fully aware how strange this craving is, but let me tell you, when I piled it on this rye sourdough with crisp lettuce and pickled red onions – it was a joyful moment.
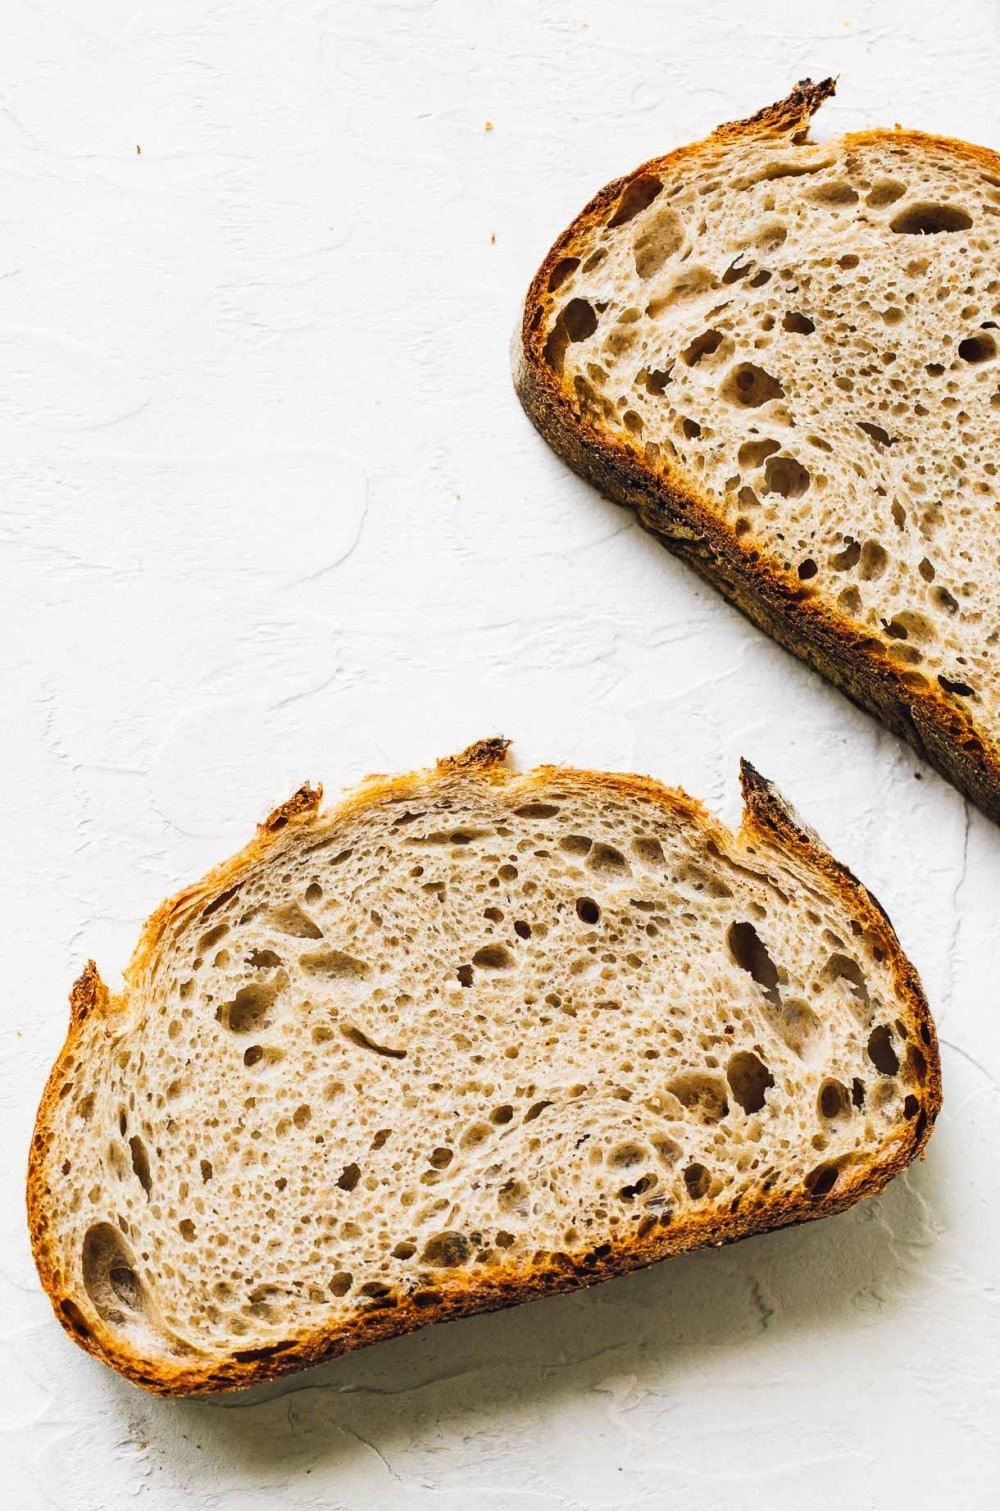
This rustic rye sourdough is called such because of its crisp, deeply browned crust and artisan sourdough shape, rather than baking it in a pullman loaf pan to get perfectly square slices for sandwiches. I might invest in one of those in the future, but for now, I wanted to share a sandwich bread recipe that you could make with your regular sourdough baking tools.
It’s hearty. Has substance. A pleasant tang. And a shatteringly crisp crust.
What is rye?
Rye is a type of grain, different than wheat, that contains a low amount of gluten. This means it will not create the same gas trapping air pockets that a bread made entirely of bread flour does.
The dough will also feel wetter and stickier compared to working with all purpose and bread flours, known as high gluten flours. Don’t be alarmed – the dough will become less sticky by the end of your stretch and folds. Knowing this before making this recipe is important.
For these reasons, I like to use rye in combination with bread flour, for a balance of high/low gluten percentages. This allows for excellent structure in the loaf, while the rye contributes a complex flavor and wonderful softness.
Why I love using rye flour in sourdough bread
- Complex flavor!
- Rye flour bodes particularly well to sourdough as it’s unique fruity, subtle sourness compliments the traditional notes of fermented bread.
- Less dense than traditional rye bread.
- Because of the chemical reaction that takes places in rye flour during fermentation, your loaf will be airier and fluffier than if you were to use rye flour in a bread made with commercial yeast.
- Bread has a moist, chewy texture that you can’t achieve with whole wheat.
- Because of rye’s ability to absorb and keep much of it’s moisture, the inside of a sourdough loaf made with rye flour will have a more moist texture.
- Your loaf will stay soft for several days after baking!
- Higher nutritional profile that whole wheat.
- Rye contains more nutrition than wheat flour does, and this is especially true when rye flour is added to sourdough bread. The slow fermentation increases the nutrient availability of the flour.
How to make rye sourdough bread that holds its shape
Because rye flour has little to no gluten content, it’s difficult to make a loaf of 100% rye bread. It can be done, but I wanted this to be a hybrid loaf, that would hold it’s shape for you, and still achieve a nice rise.
That’s why I used bread flour in combination with the rye and whole wheat, because it’s higher protein percentage is the key to the loaf holding its shape.
You’ll also notice this is a slightly smaller loaf, which makes the slightly wetter dough more manageable. Yes, you’ll notice the dough is slightly wetter than other sourdough bread you’ve made, and that’s okay! Just keep going with it. It will bake up with great structure if properly fermented.
WATCH this short video to see all the steps of making rye sourdough, so you know what to expect from your dough.
What should I bake an oval loaf in?
I tried using my round dutch oven for baking oval loaves in the past, but without fail the edges of the dough with hit the side of the pot, creating wonky, bulged shapes. I’m newly in love with the Challenger Bread Pan, which has a unique shape that allows you to bake any shape of bread in it! Bâtards, boules, demi-baguettes, and other loaves of almost any size.
Because of how it’s made, the perfect amount of steam is created inside the pan. I’ve never had better oven spring or thinner crusts.
This pan is magical. If you love baking sourdough, it is 100% worth having in your kitchen. You can learn more and purchase here.
My favorite things to eat on rye bread:
- egg salad
- whipped feta and tomato jam
- smashed avocado + lemon + smoked paprika
- ricotta + strawberry rhubarb jam
- salted butter
More sourdough recipes:
Yield: 1 loaf
Equipment
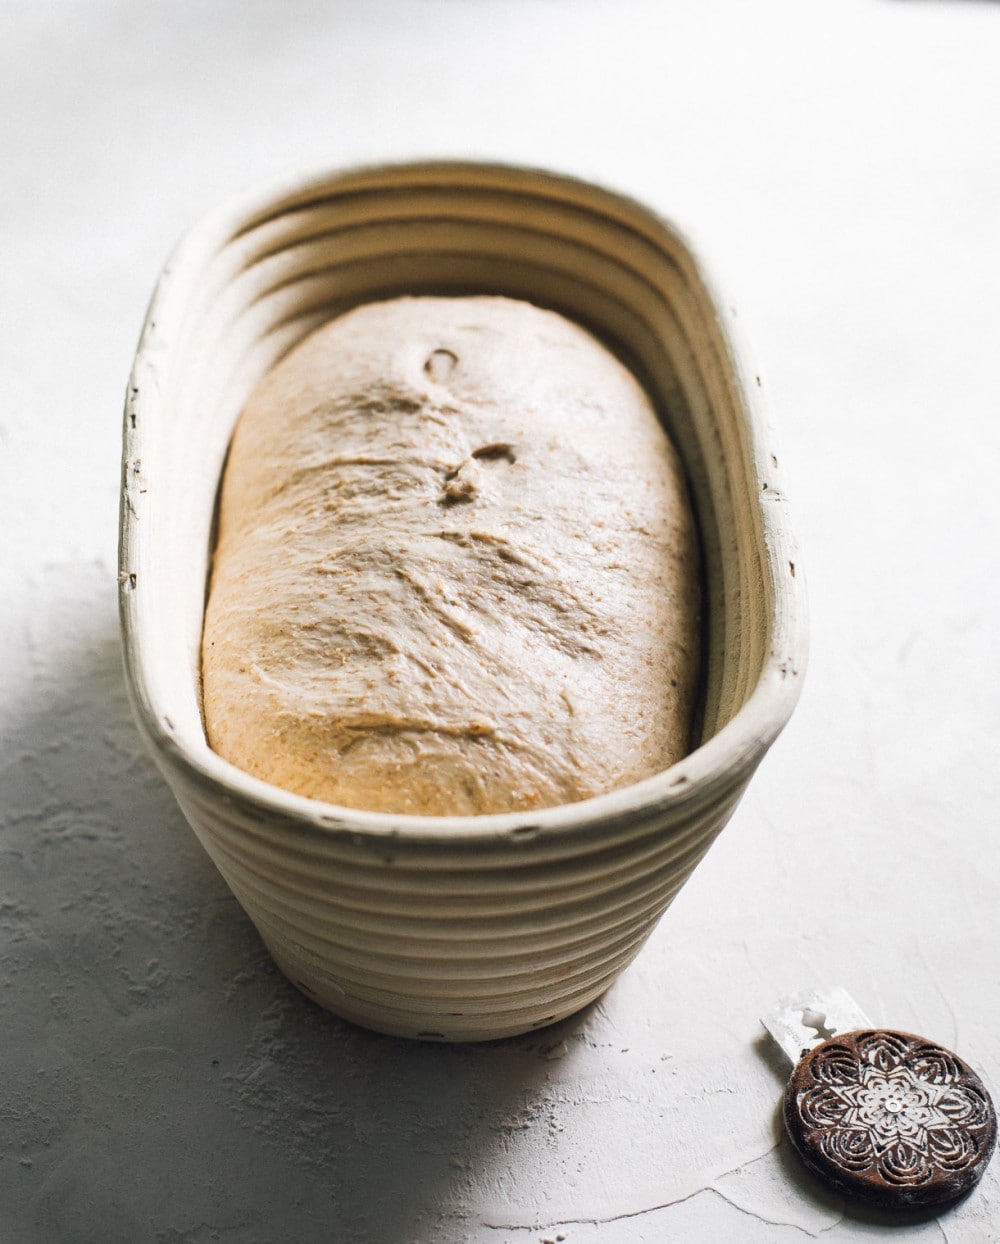
- oval banneton (can also use round)
Ingredients
- 55 grams active sourdough starter
- 280 grams slightly warmer than room temperature water (about 80-85 degrees F)
- 15 grams honey
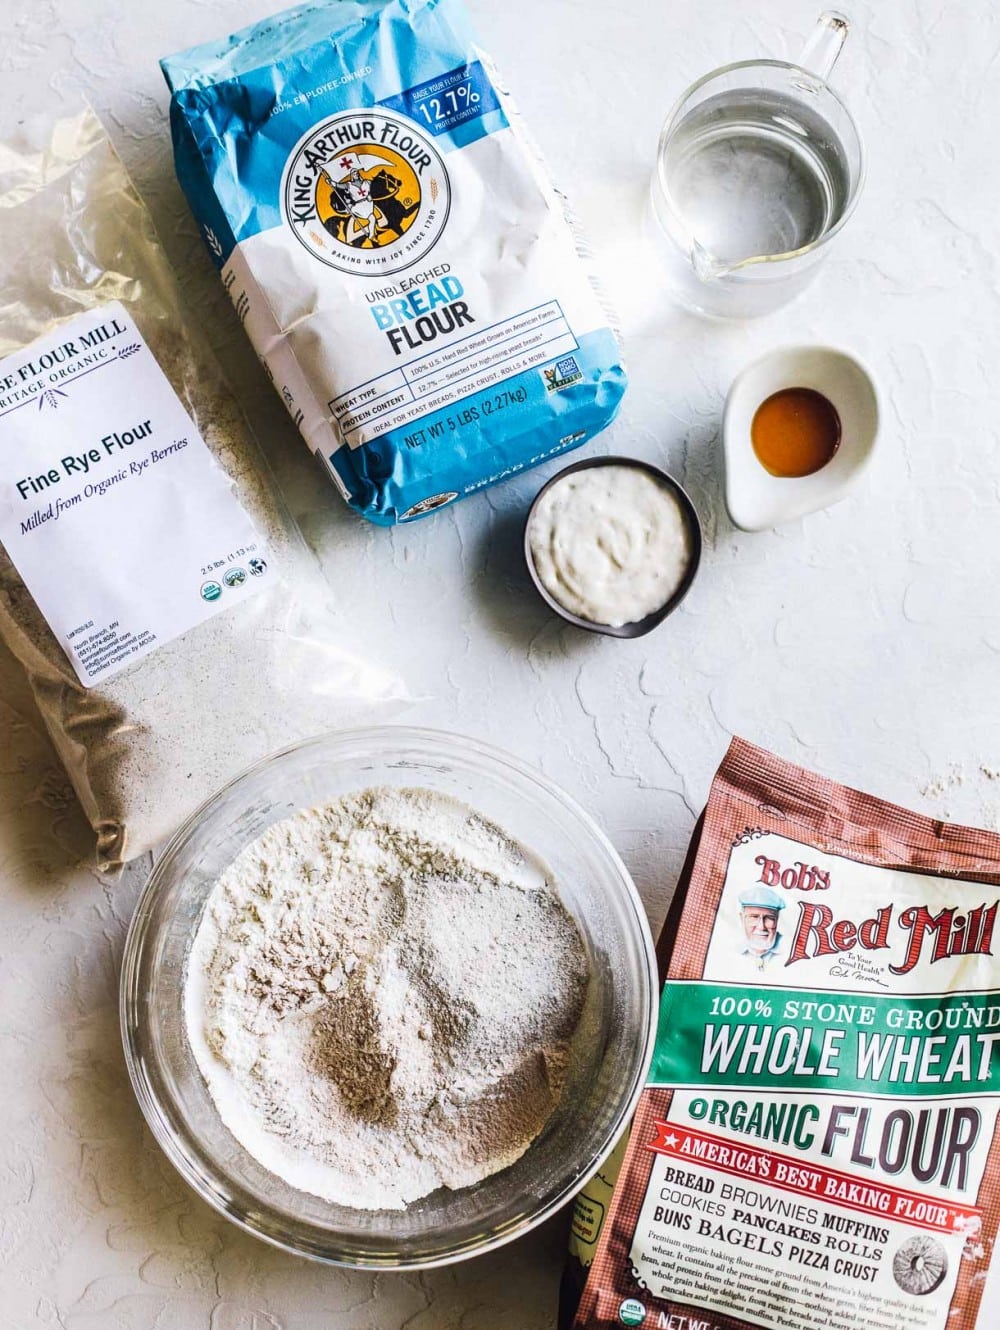
- 100 grams medium (or light) rye flour
- 260 grams bread flour
- 40 grams whole wheat flour
- 7 grams fine sea salt
Instructions
- Before beginning, it will be helpful to watch this SHORT VIDEO to see me make this bread, noticing that the dough will be stickier than normal because of the rye flour, but it will come together – you just have to trust!
- Add starter, water, and honey to a bowl. Whisk thoroughly until combined, with a fork. Add flours, and mix together first with the fork to start to incorporate, then with your hands until a shaggy dough is formed, and the bits of flour left just disappear. Sprinkle the salt on top and do not mix in, just leave it on top. Cover with a damp cloth.
- Autolyse: let dough sit for one hour, covered and undisturbed.
- Bulk ferment: Now you will knead the salt that is sitting on top, into the dough for about 2 1/2 minutes. There is no precise way to do this, just think of working the dough through your hands and up against the bowl, push and pull. You will start to feel the dough relax a bit around 1 minute. Then leave the dough alone, covered, for 30 minutes. This counts as your first set of stretch and folds.
- After those 30 minutes pass, perform a set of stretch and folds. Repeat 2 more times.
- Now you will let sit, undisturbed and covered with a damp cloth, for the remainder of its bulk fermentation. You will know it is finished with its bulk ferment when the dough has risen about 75% (just short of doubling) in size, is smooth and puffy on top, with a few bubbles around the edges. It will not be as jiggly as some sourdough you've made before. I find this takes between 5-7 hours, depending on the temperature of your home. If the temperature in your home is above 72 degrees, this will be on the lower end; if it is cooler it will take on the longer end. Always go by the look and feel of your dough to know when it is finished proofing rather than time.
- When finished with bulk fermentation, lightly dust your work surface with flour. Put dough onto the work surface, and pre-shape. Then let sit for 15 minutes on your work surface.
- Then shape your dough using the video attached here as a guide.
- Place dough into your flour dusted banneton, (or flour dusted linen lined banneton) seam side up. (Optional, you can wait 15 minutes after placing it in banneton, and pinch the perimeters of the dough into the center to hold the shape even more, called stitching.) The dough will now go through its final rise. You can do this on the counter, which will take about 1 1/2 to 2 hours at 70 degrees F for the dough to puff up and be jiggly. It will not double. OR you can do the final rise overnight in the refrigerator, with the banneton covered in a plastic bag or with a very damp cloth. You need this for holding moisture in.
- Time to bake. Preheat your oven to 475 degrees F, with your dutch oven preheating inside the oven. When the oven is preheated, flip your dough out gently onto parchment paper and score your dough. If you did the final rise in the refrigerator, take it straight from fridge to scoring. You should score it cold, and DO NOT need to let it come to room temp.
- Then put scored dough into the dutch oven on the parchment, and put cover on. Turn oven down to 450 degrees F and slide dutch oven in. Bake for 20 minutes, then remove cover.
- Turn heat down to 430 degrees F, and bake for 20 to 25 more minutes, until crust is golden brown and crackly. Remove from oven, and remove bread from dutch oven and place onto a cooling rack.
- Wait AT LEAST one hour to cool otherwise, the interior will be gummy.
Did you make this?
tag @heartbeetkitchen on instagram and hashtag it #heartbeetkitchen
June 12, 2020
JG
June 19, 2026
Hi! If I don’t add honey, do I need to make any other modifications? Thanks!
Amanda Paa
June 19, 2026
Hello! You can use maple syrup instead.
JG
June 20, 2026
Thank you. I meant do I need to add more flour or water to account for no honey?
Jane Ormrod
June 14, 2026
I made this in a loaf pan following the recipe exactly, except that, after some research, I altered the oven temperature. I preheated to 450. Just after putting in the loaf, I added a cup of water for steam, and turned the oven down to 425 for 15 minutes. Then I lowered the temperature to 375 and continued to bake until the loaf was done. It makes perfect toast!
Amanda Paa
June 15, 2026
Oh fantastic! Thank you so much for your notes!
Laurie
June 11, 2026
Hi Amanda
I can’t do hand kneaded bread anymore because of arthritis, but your recipe works GREAT in my KBS bread machine!
I add caraway seeds at the beginning or after first fermentation, set it on 750g loaf, dark, and it goes for 6hr 44min. in Sourdough setting
I’ve not had a failure yet!!
Amanda Paa
June 13, 2026
Oh that’s so great to know it works well in the bread machine! I’m so glad you’re enjoying this recipe.
Lisa
June 8, 2026
Great recipe, great bread!
Can this recipe be upscaled?
Amanda Paa
June 8, 2026
Yes, you can double!
Jane Ormrod
June 7, 2026
Amanda, can I make this in a loaf pan or pullman pan for a sandwich bread?
Should I alter the cooking temperature or time?
Please let me know! I love this bread so much, and my husband and son always complain that it won’t fit in the toaster! A loaf would be perfect!
Amanda Paa
June 8, 2026
Hi Jane! I haven’t tested it in a loaf pan but I think it would work. Let me know if you try it!
Craig Blyeth
June 2, 2026
This is a great recipe! I’m new to sourdough and my niece, a sourdough expert, has been a great help. This was my first time deviating from her recipe. After baking the loaf with the lid on the Dutch oven, I accidentally turned my oven off, which I only discovered when the bread was supposed to be baked. I turned the oven back on and timed it once it reached the needed temperature and the bread came out perfect. I aim for 210 degrees fahrenheit and it was 212.
Lin Maine
May 25, 2026
Somebody suggested your recipe for my first foray into rye bread. I grew up on rye bread. I made it using a medium rye and included 2 tbsp of toasted Caraway and about two grams of cracked pepper. I followed all of your directions explicitly and after everyone saying oh it won’t rise, I got the most beautiful rise in the most beautiful Chrome and the most beautiful taste. I am now going to try your spelt recipe! This is the recipe equivalent of the crotchety old man that lives on the corner and yells at the kids to stay off his lawn and then gives out full size Hershey’s bars at Halloween
Lin Maine
May 21, 2026
I do have a question before I start. You say to autolyze the dough but you describe a fermentolyze. Which is your preference, given that there’s a good percentage of whole grain in here?
Andre Jaurigui
May 19, 2026
This recipe was great and super easy to use! thank you! I love the flavor of the rye and how it comes out in this loaf. Sticky is always scary but I trusted the process and it came out good!
Amanda Paa
May 19, 2026
So glad you enjoyed it! And way to trust the process!
Jill
May 3, 2026
I purchased some dark rye flour without a plan for a recipe. So as I was searching, I found this one and decided to try it. Well, let me say that this is the best Rye I ever tasted! I used white whole wheat flour along with the rye, caraway seeds and bread flour. The crust is amazing, and the crumb is nice and tender, I feel I really hit the jackpot with your recipe and it will be my go to for sourdough rye!
jill o'leary
May 23, 2026
I forgot to rate this recipe. Obviously, I give it 5 stars
Lisa
April 26, 2026
Great recipe. Thank you!
Amanda Paa
April 26, 2026
You’re welcome! ❤️
Bryn
April 25, 2026
Hi! This recipe looks great! My husband is looking for me to make rye bread with the caraway seeds. Do you have tips on how to include that? Thanks!!!
Amanda Paa
April 25, 2026
Yes! You can mix in 2 tablespoons during the 2nd set of stretch and folds.
Craig Blyeth
June 2, 2026
I just added the caraway seeds with the rest of the ingredients and it was fine.
Jane
April 24, 2026
Can I mix the salt in along with the flour, rather than kneading it in after the autolyse?
Amanda Paa
April 25, 2026
Hi Jane! I prefer mixing it in later but you can mix it in with flour. The dough may just ferment a bit slower and feel tighter in the initial stages.
Taryn Stevenson
April 17, 2026
Hi…love this recipe! I am still getting a bit of a darker bottom than I would like and I have reduced the time. Should I lower the temperature instead?
Kyle
April 19, 2026
Put a cookie sheet on the rack below your Dutch baking oven. Have it in there when you preheat the oven along with the Dutch oven. It should reduce the bottom burning
Taryn Stevenson
April 19, 2026
I have a pizza stone in there and it still was too brown. I shared 5 min of the last bake (where the lid is off) and it helped a lot.
Jonathan Knowles
April 14, 2026
This was a great recipe and delicious. Thank you. I made 2 loaves for my Eastern European friends. They absolutely loved it and plan to make open faces sandwiches. I was l little nervous when the dough turned out super firm and tight. I think the was due to the less water and rye flour reducing the hydration. My bulk fermentation at 72⁰F was 9 hours and I proofed in baskets for an additional 4 hours. I typically bake seam side up and don’t score, however I wouldn’t advise since the bread blew up like a piece of popcorn :)
Lauren Stringer
April 12, 2026
Thanks to your starter, I am now baking sourdough bread every week— I have loved your basic recipe, but love rye bread so have made this loaf— it is delicious and beautiful! Thank you for your clear recipes and videos— I have learned so much!
Amanda Paa
April 14, 2026
Oh, so happy to hear that Lauren! Makes my day.
Avia
April 11, 2026
Fantastic loaf, really delicious & probably my favourite so far! Thank you!
Katie
April 7, 2026
Perfect! I added caraway seeds. Absolutely wonderful bread.
Amanda Paa
April 7, 2026
Thanks for making the recipe!
Kathleen
April 5, 2026
OMG so good!!!! I’ve made numerous different rye sourdough loaves and this recipe is by far the best. Crispy crust and dense moist interior in the best way possible. And it has a great rye flavor. I did add caraway seeds. This was the perfect accompaniment to Easter dinner. Looking forward to having ham sandwiches with the rest of the loaf. We had a lovely dinner with lots of good food, but my husband just ranted about the bread. Thanks for sharing this recipe.
Amanda Paa
April 5, 2026
Such a joy to hear this! Thank you for making the recipe!
Dianne
April 5, 2026
I’ve just made my second loaf of this bread and we LOVE it! It’s just the right density with a nice chewy crust.
However, I do have a bit of a struggle slicing my bread, do you have any tips or tools to suggest?
Big thanks for a wonderful site – really (really) great recipes!
Christy Guevarra
April 3, 2026
Hello. Can I use AP flour instead of bread flour?
Lynn Jackson
April 1, 2026
Very tasty and easy to make. Makes delicious toast!
Simone Ribanic
March 31, 2026
I made your recipe the other day. It was amazing, reminded me of German bread! I was wondering if the baking time will change if I double the recipe and make 1 big loaf. Bread was gone in a heartbeat it was so good
Amanda Paa
April 1, 2026
Makes my day to hear that! Bake time should not change much for doubling, I would maybe add 5 minutes to the end of baking. You can always check internal temp of bread too – it is done at 205 degrees F.
Carole
March 29, 2026
Great recipe! We love the flavor, especially when caraway seeds are included. Definitely a keeper. Made it with Sunrise Mills ancient grains flour because it has low gluten content.
Tish Rubin
March 22, 2026
Can I cook this in a normal loaf pan to use for sandwiches? I’d rather not use the cast iron Dutch oven if I don’t have to. If I can do you know at what temp and for how long? Thanks so much!!
Amanda Paa
March 22, 2026
Hello there! I haven’t tested that, sorry! Let me know if you do.
Joseph Wasser
March 22, 2026
This bread is the bomb!! I also added 1 Tbs. caraway seed that I ran through a spice grinder, and another Tbs. of whole caraway seed because my wife and I love that robust hearty flavor! I would also ask what the science is behind leaving the salt atop the dough during autolyse.
Thanks for the recipe!!
Taryn Stevenson
March 21, 2026
Hi…I am new to sourdough but your recipes are the best ones I have tried yet. Can you bake this in a bread pan or does it have to be in a Dutch oven?
Amanda Paa
March 22, 2026
Hello there! So glad you’ve had success. I haven’t tested this in a loaf pan, sorry! Let me know if you do.
Monica
March 20, 2026
The loaf turned out well and has the great rye aroma. I added in 2 teaspoons of caraway seeds. I’ll be serving it to family tonight. The loaf is small so I’ll need to slice it thinly. Perhaps the size is because of the lower gluten of the rye.