Jalapeño Cheddar Sourdough Bread
By Amanda Paa – Updated October 31, 2025
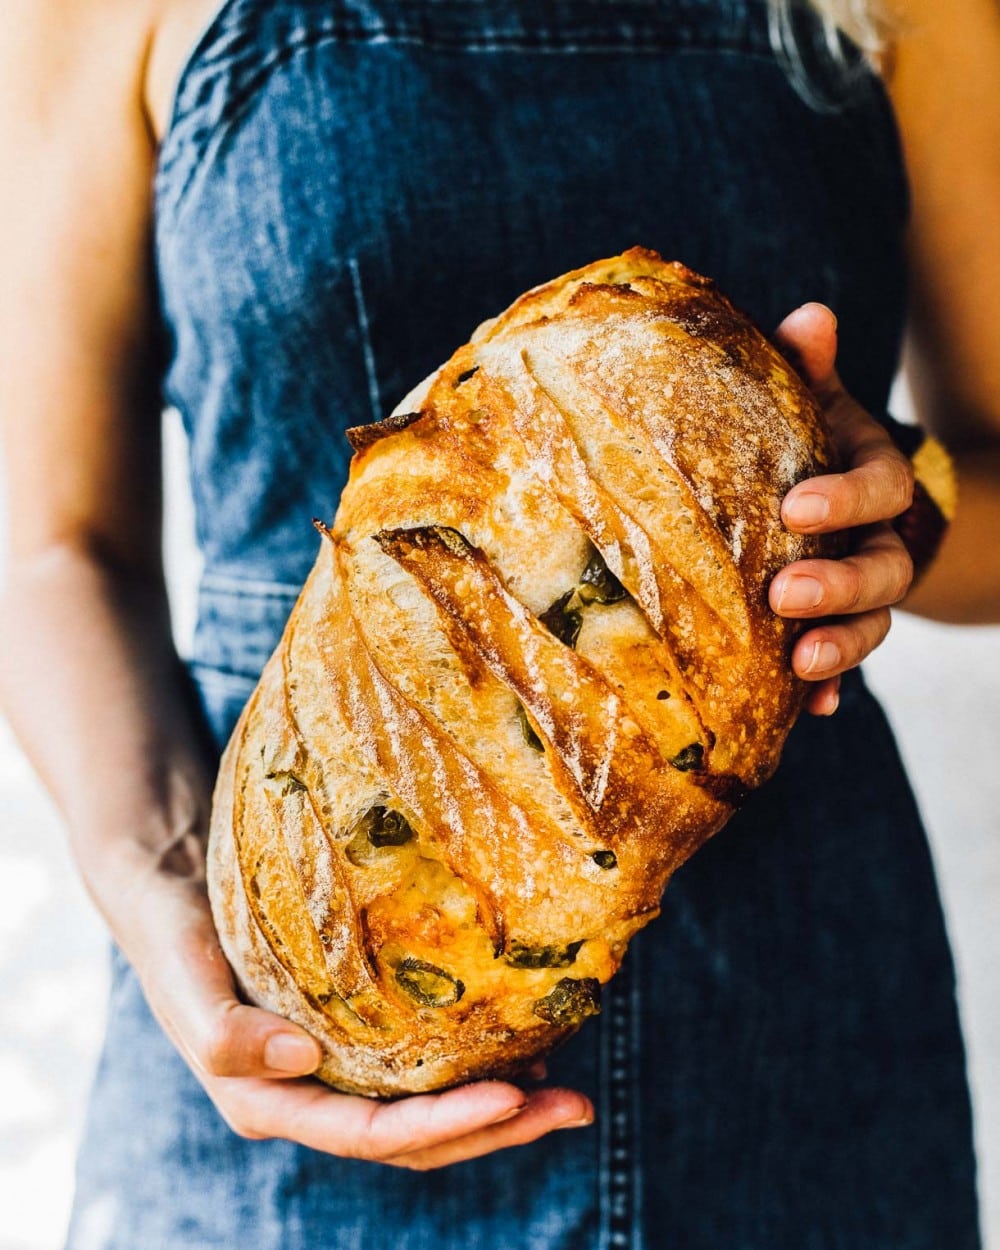
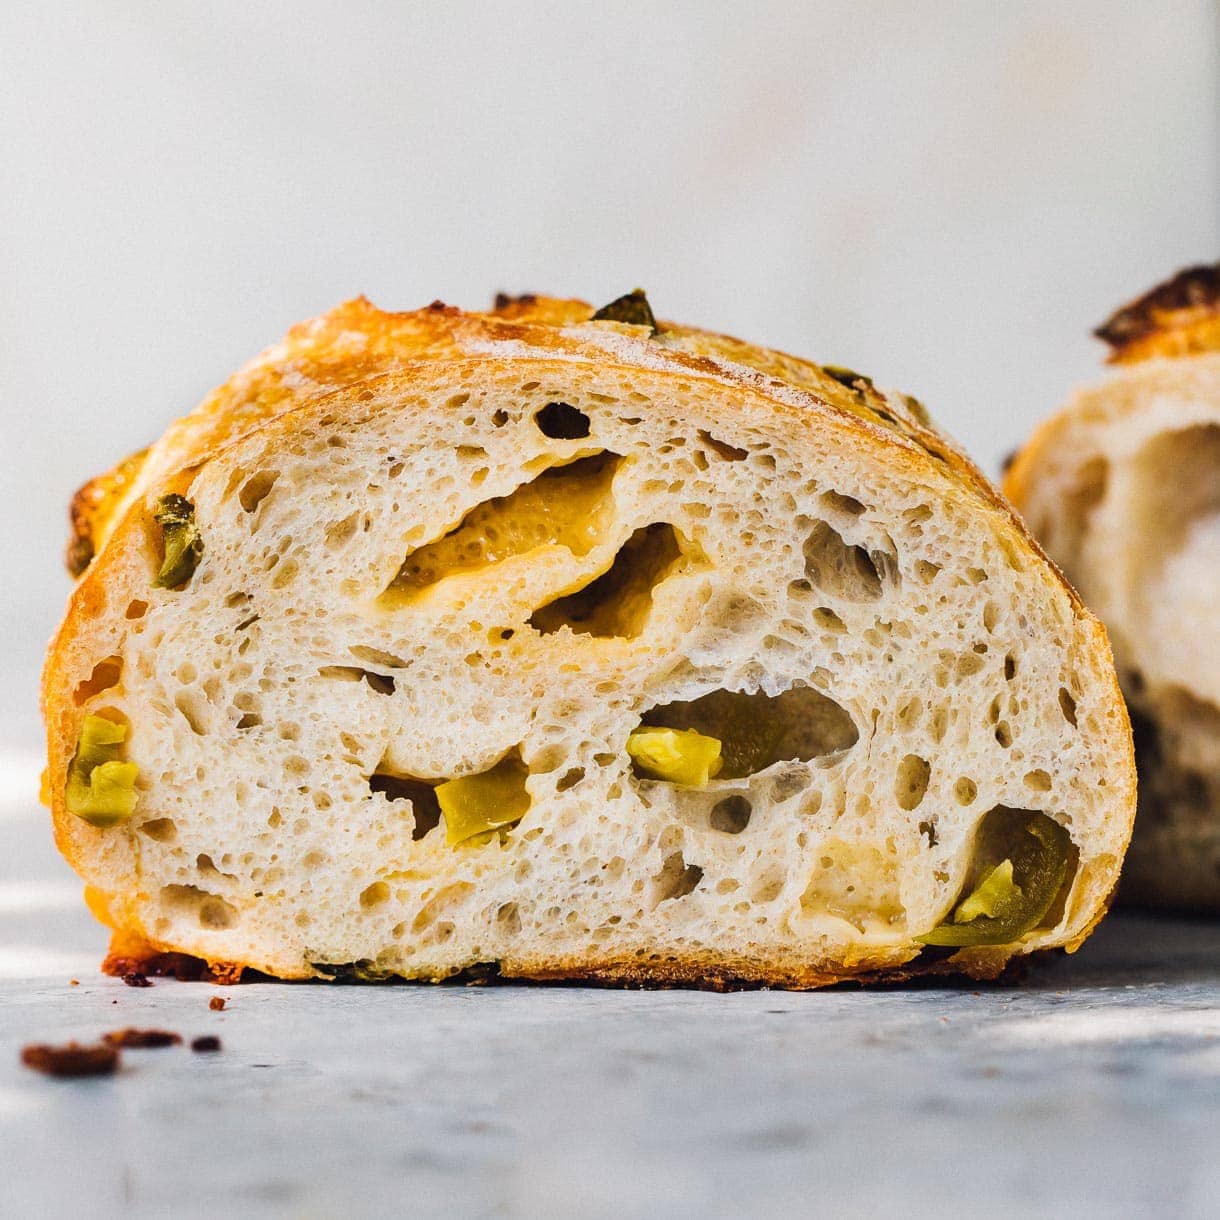
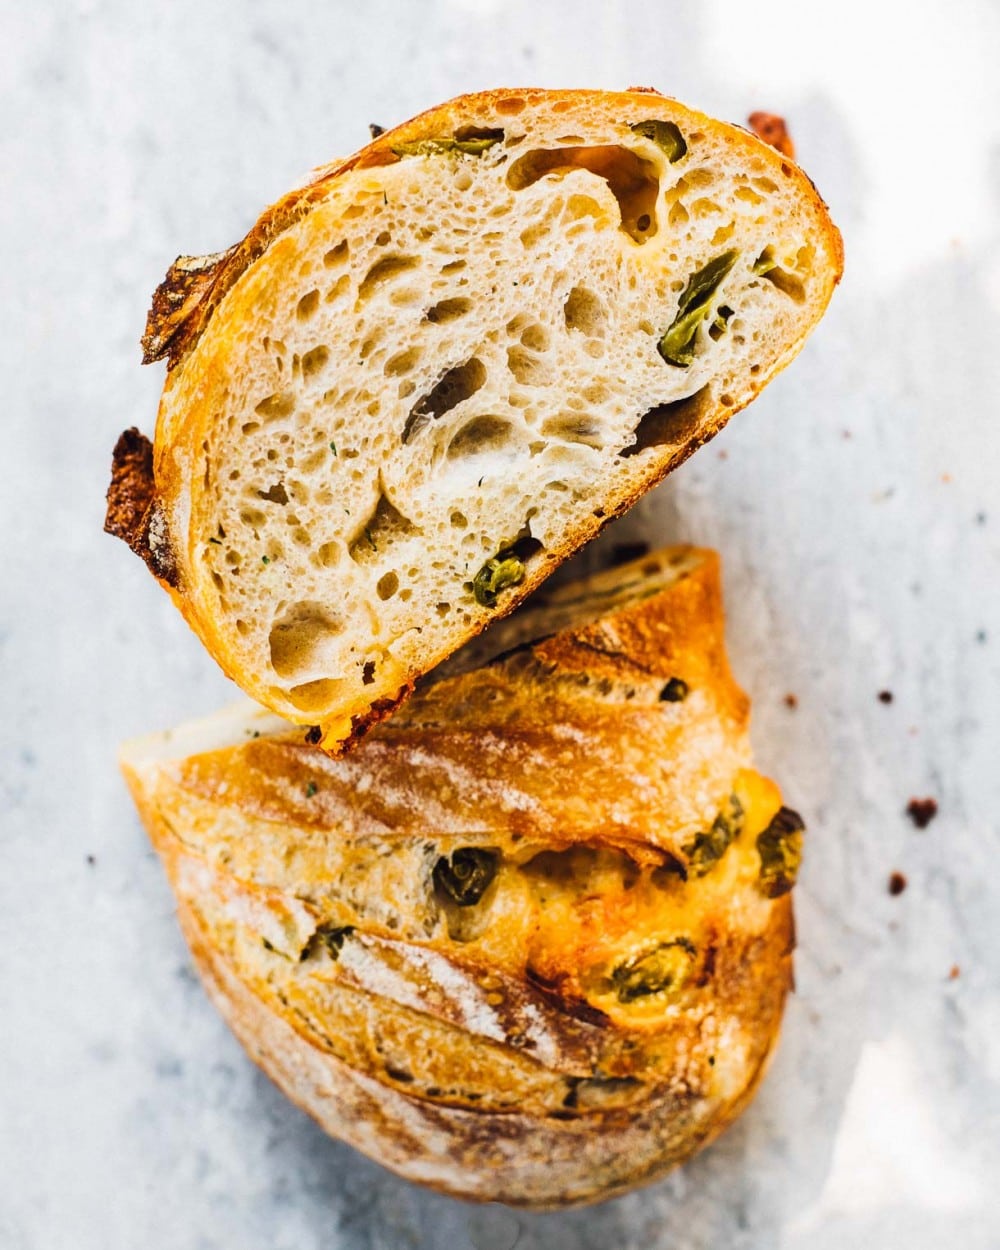
This cheesy, jalapeño studded sourdough bread is flavorful, soft, and absolutely delicious. You'll use active sourdough starter to make it, along with cheddar cheese and pickled jalapeños. The chunks of cheese melt into gorgeous pockets, and the crust turns golden brown.
Jump to Recipe
This post may contain affiliate links. Please read my disclosure policy.

When it’s right, it’s SO right.
As if homemade sourdough bread wasn’t delicious enough, I added cheese and pickled jalapenos, and I’m never turning back.
This bread has a soft and chewy crumb, with molten nuggets of melted cheese scattered throughout, a perfect match to the spicy, briny jalapeños! I’m absolutely crazy about this combination, and I think you will be too.
I’ve been working on this sourdough cheese bread for a few months, using my Everyday Sourdough recipe as a starting point. I discovered a few things along the way…..
Tips for Making the Best Jalapeno Cheddar Sourdough Bread:
- Use a creamy variety of cheese that melts well, like gouda or cheddar.
- Cut your cheese into cubes, rather than shredding it. I found that shredded cheese gets lost in the bread. With cubes, you’ll discover the robust flavor of the cheese hidden in pockets of each slice!
- I think pickled jalapenos are the best choice, rather than fresh. Pickling helps to enhance the jalapeno flavor, compared to using fresh. I get mine from Trader Joe’s.
- Bread flour gives each piece a chewy, soft bite that I just LOVE and gives it structure to hold up to the mix-in’s, so do not substitute with all-purpose flour.

When to Mix Jalapenos and Cheddar into Dough:
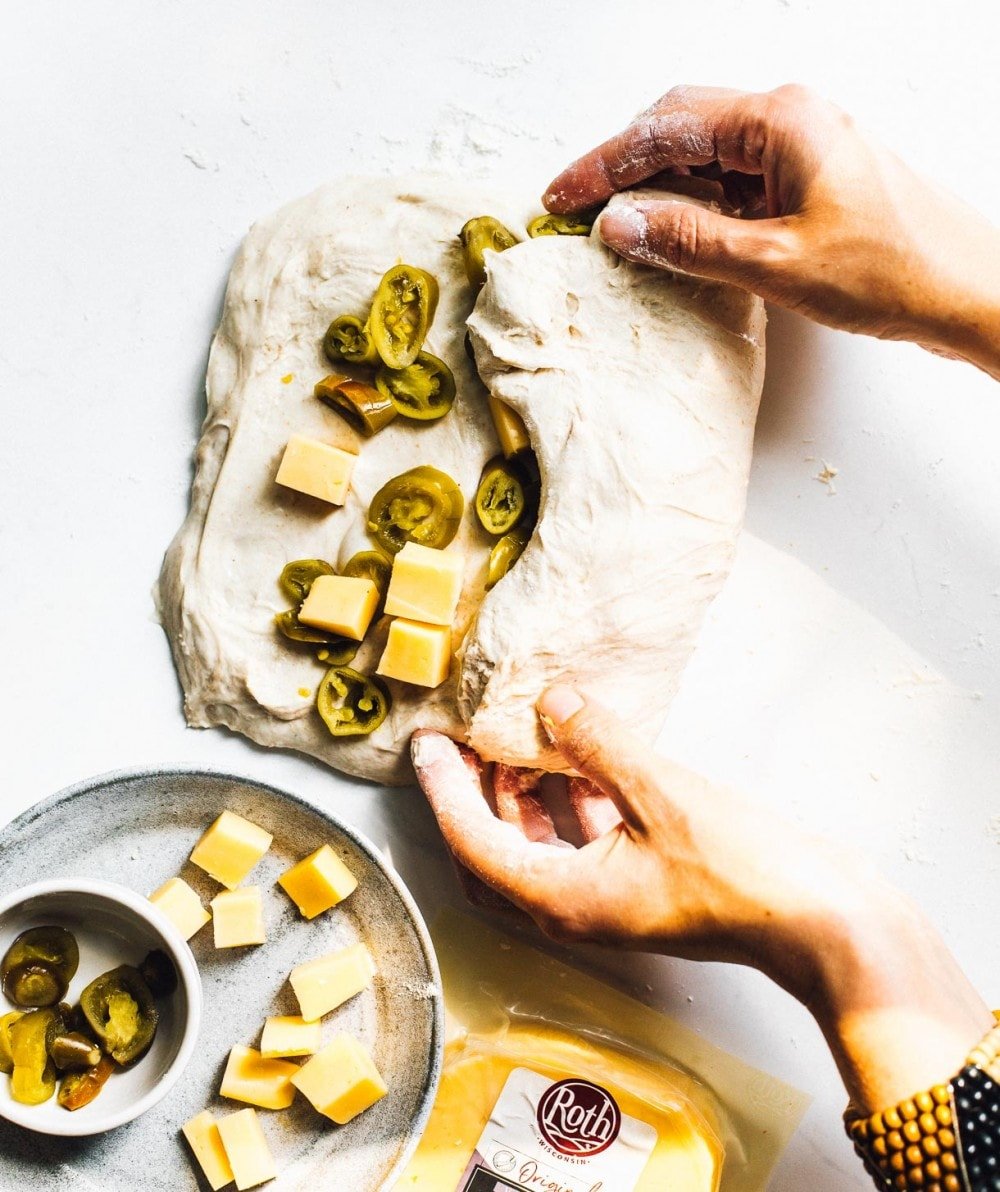
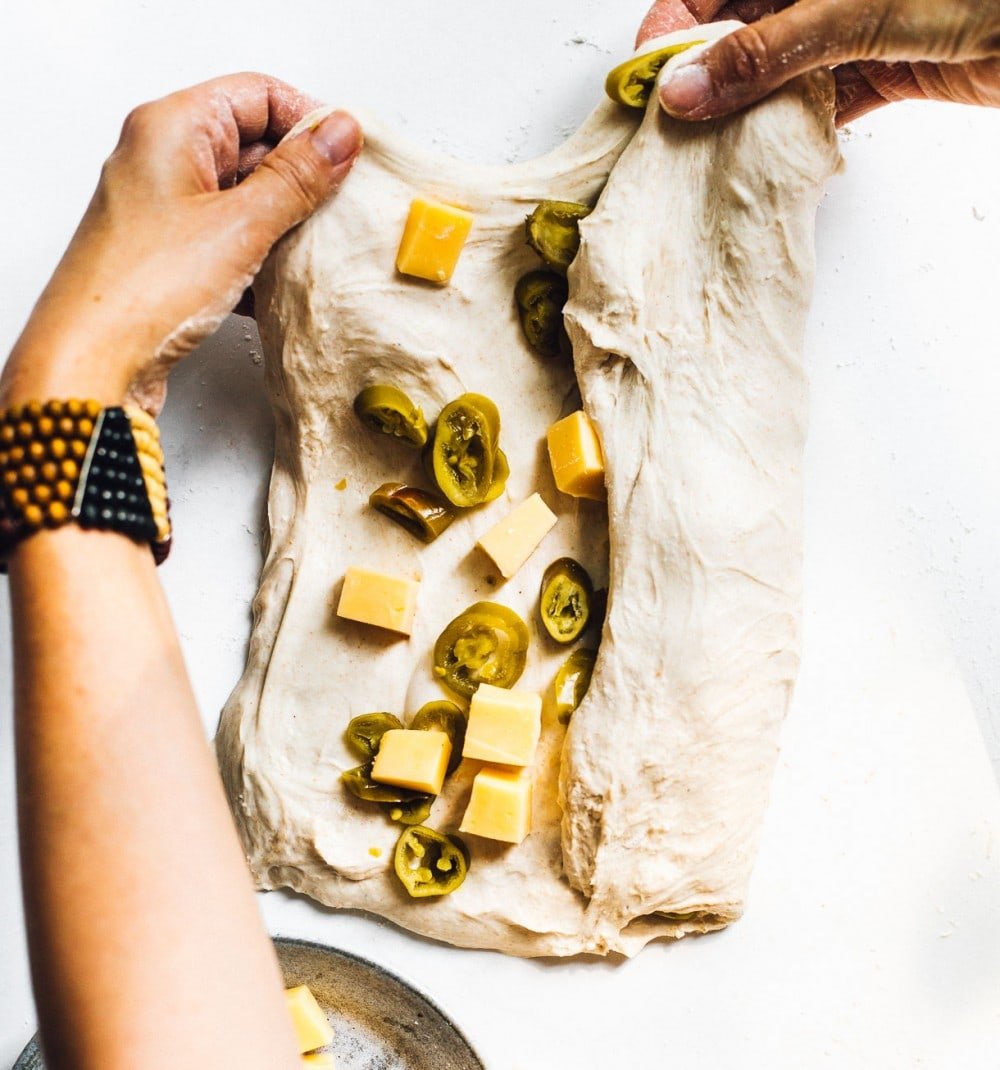
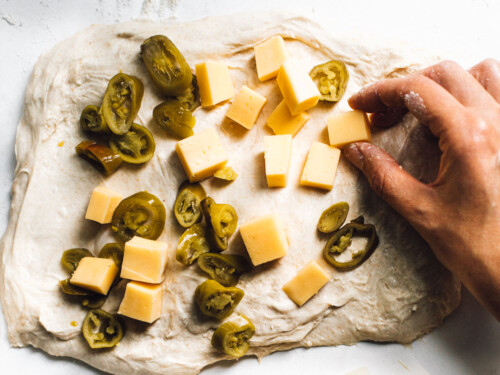
After the 3rd set of stretch and folds, you’ll remove the dough from your bowl and gently stretch into a rectangle. You’ll then distribute the cheese and jalapeños over the dough, leaving a little bit of a border.
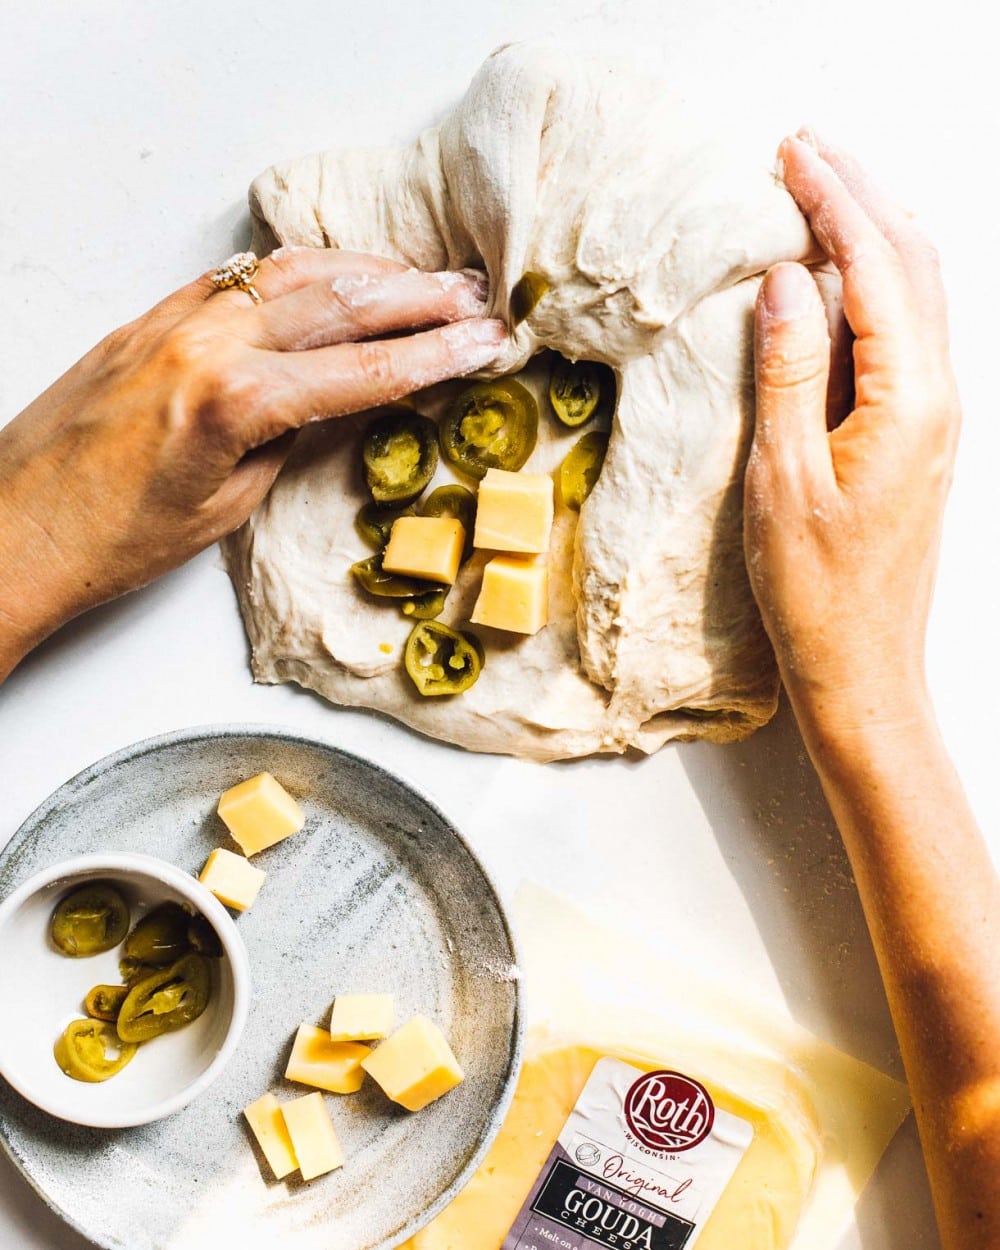
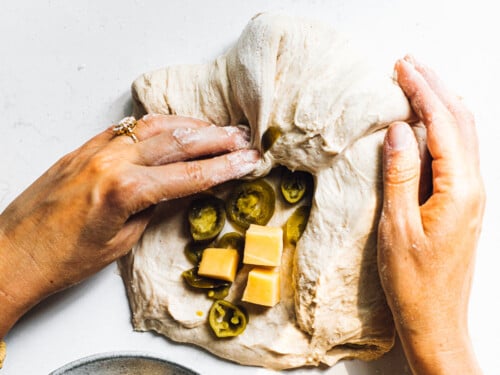
Patting the ingredients down lightly helps them adhere to the dough. Then you’ll lightly stretch out one side of the dough, and bring back over into the middle of the dough, then the other side, then top and bottom so you’ll have a ball of dough. This step doesn’t need to be perfect. You just want to make the ingredients are mostly inside the dough.
Bakers Schedule for Jalapeno Cheddar Sourdough
I typically do the final rise overnight in the refrigerator to make things easy. So if you’d like to do that too, here’s a rough timeline to follow:
- Feeding sourdough starter around 9 or 10am
- Mixing your dough around 2 or 3pm
- Doing stretch and folds throughout late afternoon
- Finishing the bulk fermentation around 9pm and shaping the dough (this depending of course on how fast your dough is rising, while taking into consideration the temperature in your home)
- Putting dough into banneton after shaping and letting go through final rise overnight in the refrigerator
- In the morning of the next day, bake the bread, anywhere from 7am to 11am
Helpful Tools for Baking Sourdough Bread
- Active Sourdough Starter
- Digital Scale: A scale is essential for making sourdough bread because all recipes are written in grams. It’s more accurate, less messy, and totally worth the cost.
- Dough Scraper: Enables you to move the dough from the bowl to the bench, or help shape.
- Challenger Bread Pan: I’m newly in love with this pan, which has a unique shape that allows you to bake any shape of bread in it! Bâtards, boules, demi-baguettes, and other loaves of almost any size. Because of how it’s made, the perfect amount of steam is created inside the pan. I’ve never had better oven spring or thinner crusts. This pan is magical. If you love baking sourdough, it is 100% worth having in your kitchen.
- Banneton: For this loaf, I like using an oval shaped banneton, where the bread will embark on its final rise and take shape.
Ways to Eat This Bread:
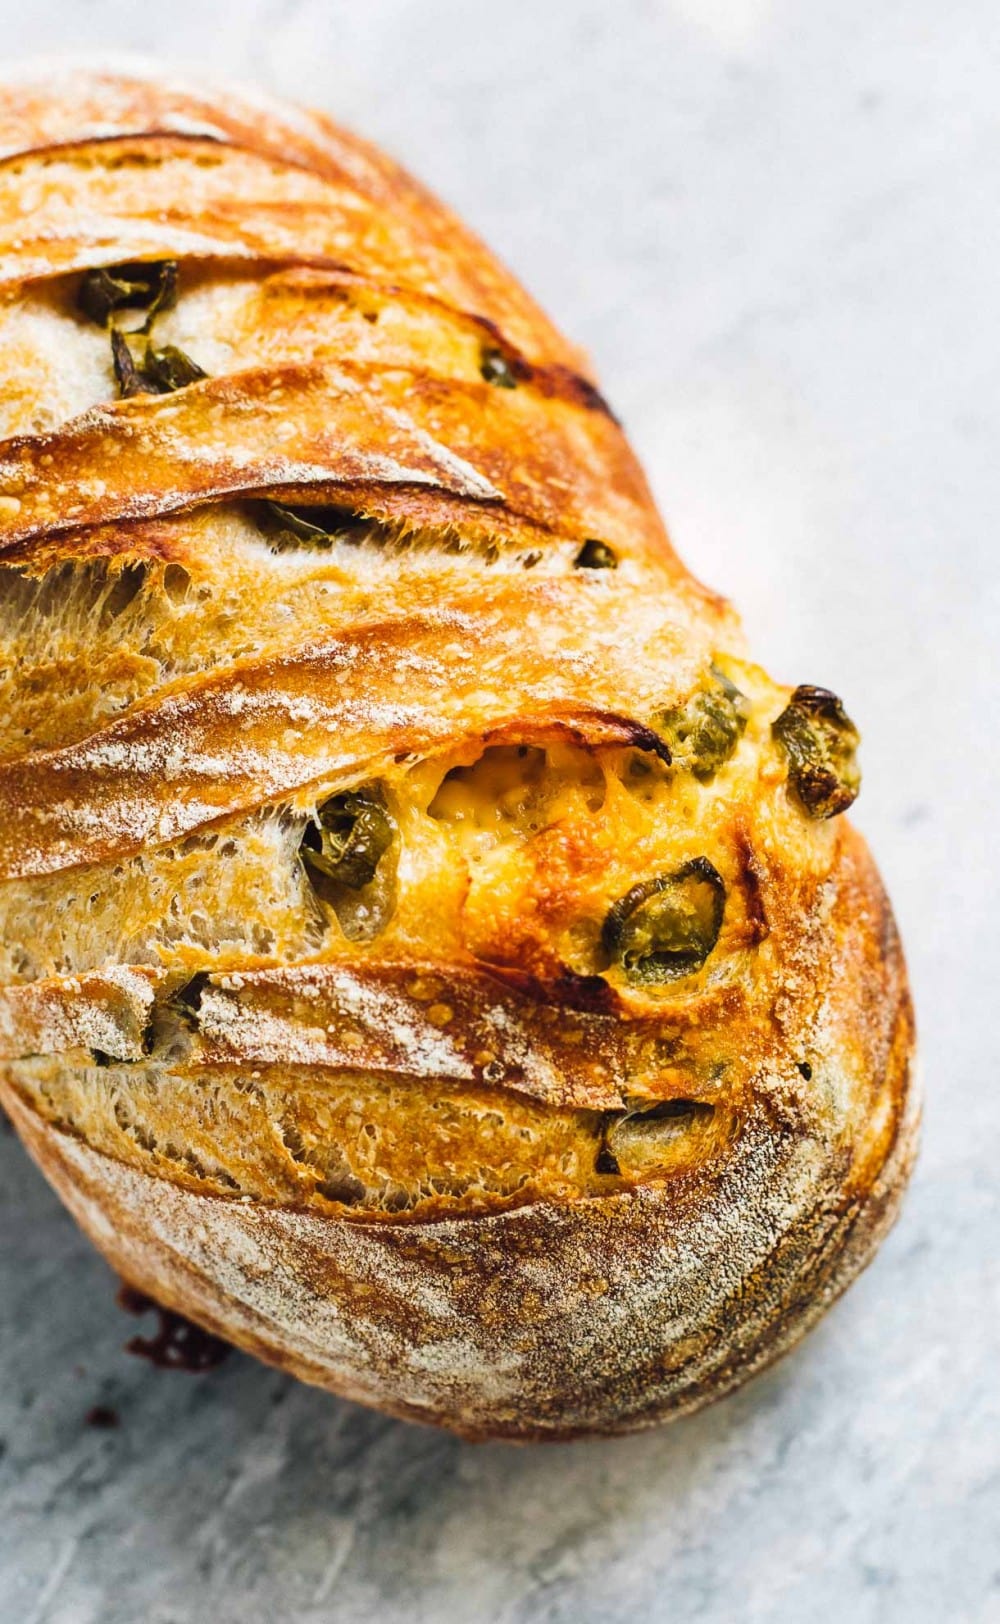
Wait until you see, and smell the cheese bubbling on the top and sides of the sourdough while it bakes. I guarantee it will be your newest sidekick for soups, stews, and every pot of beans you make.
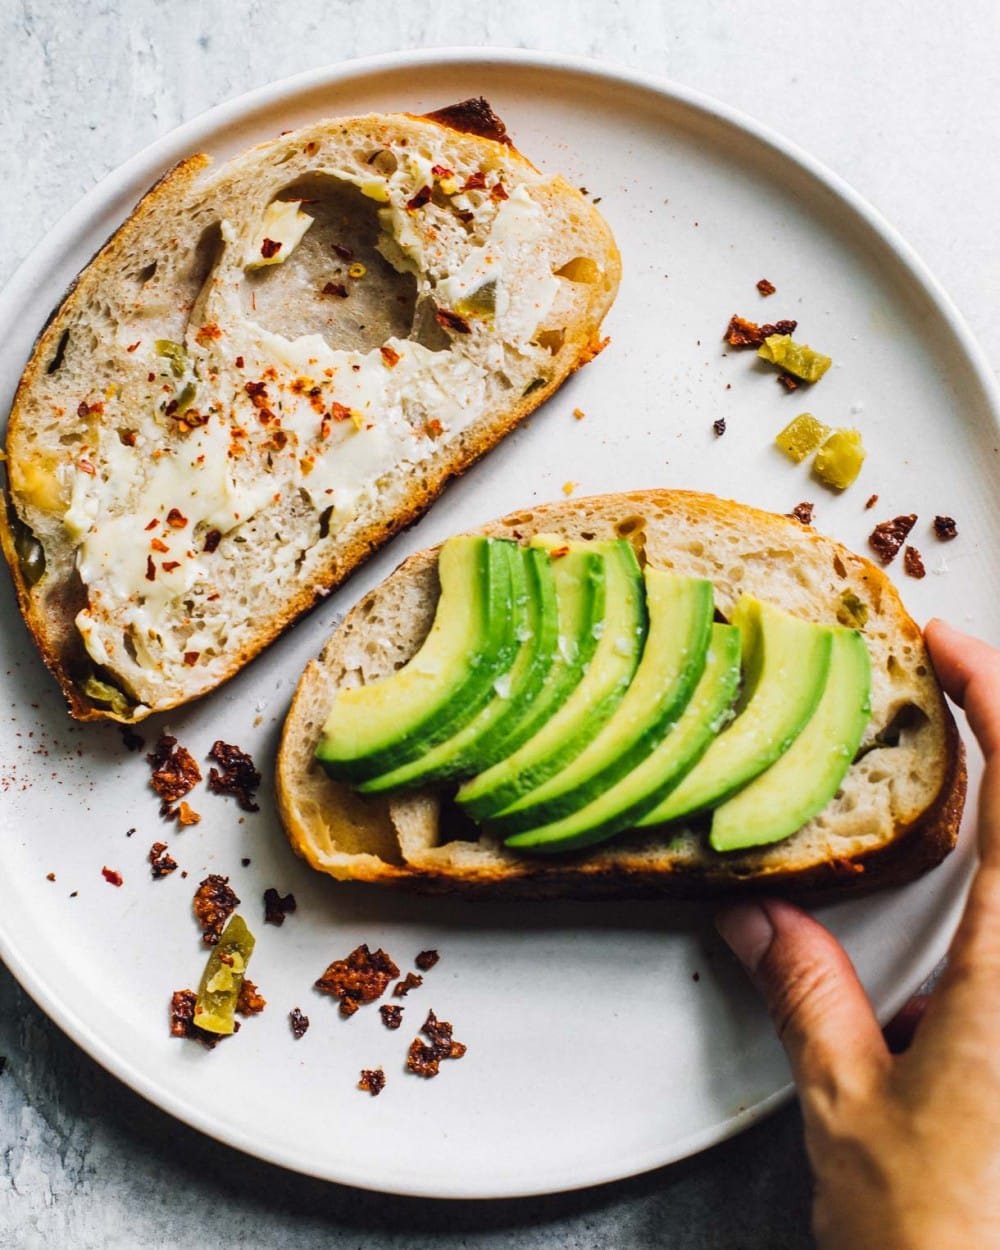
This sourdough cheese bread makes the most incredible sandwiches, and avocado toast, too!
Yield: 1 loaf
Ingredients
- 50 grams active sourdough starter
- 300 grams filtered water, around 85 degrees F
- 375 grams bread flour
- 30 grams whole wheat flour
- 8 grams fine sea salt
- 100 grams cheddar cheese* cut into 1/4 to 1/2 inch cubes (doesn't have to be exact)
- 60 grams pickled jalapeños, patted with paper towel to remove excess moisture
Instructions
- In a large bowl, mix starter and water with a fork, until starter is dispersed. Add flours, mixing with a spatula first. Then with your hand until a shaggy dough is formed, just enough so that flour is not visible.
- Sprinkle salt on top of dough. Cover bowl with a damp cloth and let sit for 40 minutes to an hour.
- Now work the salt into the dough, as you perform your 1st set of stretch and folds. Then let rest for a half hour. Perform 2 more sets of stretch and folds, waiting the 30 minutes in between for each, for a total of 3 stretch and fold sequences. After the 3rd set, wait the regular 30 minutes.
- When those 30 minutes have passed, you will now add the mix-ins. To do this, use a dough scraper to gently remove your dough from the bowl onto a lightly floured surface. Use your hands to gently stretch the dough out into a rectangle about 12 inches X 14 inches. Distribute the cubes of cheese and jalapeños over the inside of the dough, leaving about a 2 inch border. Gently pat the ingredients with your hands so that they stick to the dough.

- Using lightly floured hands, gently pull the sides of the dough and into the middle to enclose the fillings. Then gently roll the dough onto itself and use your hands to give it a little tension to get it into a ball. This step doesn’t have to be perfect, it isn’t the final shaping.
- Let the dough bulk ferment on your counter, covered with a damp cloth for about 5-6 hours if your house is around 72 degrees. It will take more time if it is cooler, or less time if it warmer.
- When your dough is a little short of doubling in size, has a glossy top and has a few bubbles peaking through the top, it is ready for shaping.
- Gently move the dough out of the bowl onto a floured work surface. Let the dough rest there for 10-15 minutes. Then, shape the dough. Once shaped, use a bench scraper to put the dough into a flour dusted, linen lined banneton (proofing basket), seam side of the dough facing up.
- Cover with a damp cloth, and let rise for a final time, on the counter. This will take about 1 1/2 hours, if your house is around 70 degrees. OR you can slide the banneton into a plastic bag and refrigerate overnight for the final rise. The dough can be in the refrigerator for up to 10 hours at this stage. (If you do the final rise in the fridge, score and bake straight from the fridge. This makes it easier to score and hold its shape.)
- Once your dough has gone through its final rise and has risen slightly and is puffy on top, you’re ready to bake. You can test to see if your dough is ready by doing gently pressing a floured thumb into the dough. If it indents and gradually releases, but still holds a finger shape, you're ready. If it indents and the dough springs right back to the surface, it still needs time to rise. Let it ferment in half hour more increments, until ready.
- Preheat oven with dutch oven inside of it, to 450 degrees F. Wait until oven is preheated, then place parchment over the top of your dough and flip over, so that the seam side is now on the parchment paper and you are able to score the top of the dough. Score the dough with a bread lame, making sure to go at least 1/2 inch deep in a few spots so that dough can release gases. Otherwise your bread will not rise.
- Place dough on parchment paper into dutch oven, and put cover on it. Bake for 25 minutes, covered at 450 degrees F. Then remove cover, turn oven down to 435 degrees F and bake for 20 more minutes, until bread is golden brown and crackly.
- Remove from oven and place load on a cooling rack. Let cool for AT LEAST ONE HOUR before slicing. Otherwise the crumb will be squished and the texture will be gummy.
Notes
You can also use gouda cheese for this recipe, it works just as well as cheddar and melts beautifully!
Did you make this?
tag @heartbeetkitchen on instagram and hashtag it #heartbeetkitchen
August 29, 2020
Yvette
March 6, 2026
I have made this bread so many times I cannot count! It is amazing Avocado toast style, toasted with eggs and i love love love it toasted with tuna salad!
Amanda Paa
March 7, 2026
Love to hear that!
Virginia Otts
February 15, 2026
I’m not close to a store, and only have regular flour can I still make this bread?
Shannon meredith
January 30, 2026
This is the only recipe I use! ( well this and the original as recipe she offers) I have tried a few while learning sourdough and Amanda’s Paa’s recipes are my favorite hands down! Beautiful loaves every time! Thank you so much Amanda!
Noe
January 10, 2026
This recipe is sooo good. I shredded my cheese instead of cubing it. I don’t know why, but it worked. I baked with lid closed for 30 minutes and off for 15 minutes since my oven crisps my crust too much. These notes are mostly for myself because I will be making this bread on repeat and I need to know what I did exactly.
Jim
January 1, 2026
Thank you for the great recipe! Made it twice now. Does the bread need to be refrigerated after baking due to cheese and peppers in it?
Amanda Paa
January 1, 2026
So glad you enjoy it! Does not need to be refrigerated, the cheese and peppers are cooked through.
Jim
January 1, 2026
Ok! Thank you so.much! And thank you for your folksy Sunday coffee chats!
Dee
October 19, 2025
I made sourdough for the first time and I was so glad I did! My husband said mic drop! So excited to try more of your recipes! Thank you
Karen
October 14, 2025
Can you bulk ferment in the fridge li fee than 10 hrs if you are not ready to bake it?
Amanda Paa
October 14, 2025
Yes, up to 24 hours!
Karen
October 15, 2025
Thank you. Glad you understood my typo 😂
Tracy
August 13, 2025
I made this and my husband and I both think it’s delicious! Turned out great!
Abby
July 30, 2025
This recipe turned out so well, thank you for sharing and giving instructions that are simple to follow! :)
Amanda Paa
August 1, 2025
So glad you enjoyed it, Abby!
Christine
June 19, 2025
I’d love to post a picture of my jalapeno cheddar!! It smells so delicious cant wait to get into it! Thank you so much!!
Amanda Paa
June 19, 2025
Yay, so glad it was a success! I’m going to work on getting the photo upload option, thanks for the idea!
Mel
March 16, 2025
Beautiful loaf.
Just for the heck of it, I substituted 1 large, fresh Jalapeño, 2 chopped, sweet mini peppers and 1/2 of a small can of mild Chiles and a sharp Cheddar. It turned out really flavorful.
Amanda Paa
March 16, 2025
Oh wow, that sounds amazing!
Erin
March 12, 2025
I don’t have wheat flour. Can I substitute a different type of flour?
Amanda Paa
March 12, 2025
Hi Erin! You can use more bread flour in equal weight in substitution of the whole wheat. Just decrease the water by 5 grams.
Megan
March 9, 2025
I took Amanda’s in person sour dough class (highly recommend if you’re local) and I loved her methods and recipes. Well written with clear instructions. This loaf is my favorite yet – turned out perfect.
Nancy
March 2, 2025
I made the Jalapeño Cheddar Sourdough Bread today, and…OH MY GOSH, it was SO GOOD! My husband wants me to make a loaf for him to bring to work to share with his co-workers.
Marty Feldkamp
January 26, 2025
Amanda,
This is the second recipe that I have made from your site (first rustic rye, latest jalapeño cheddar).
My family loved both, so grateful to break awesome bread together. Absolutely delicious, instructions very clear, suggestions on what to serve with etc., are very helpful and spark creativity.
Kristen Borsari
January 1, 2025
My first sourdough with “mix-ins”. Amazing! The whole family loved it and now they don’t want “plain” sourdough. Lol. I’ll be making this a lot.
Camille W
December 31, 2024
Amazing!! This bread was so good! It was super soft, and light. It was my first time adding inclusions and I was concerned it wouldn’t turn out but it did, and so GOOD! Thank you, I will be making this often.
Amanda Paa
January 1, 2025
Yay, so glad to hear your success!
Pat
December 21, 2024
Made this along with everyday sourdough. My sourdough skills a bit rusty, but the instructions are so clear had no issues. Had today toasted with avocado and bowl of chile. Can’t wait to try with leftover Christmas roast!
Amanda Paa
December 21, 2024
So glad to hear, Pat! Thanks for making the recipe!