Dill Pickle Sourdough Bread
By Amanda Paa – Updated April 21, 2026
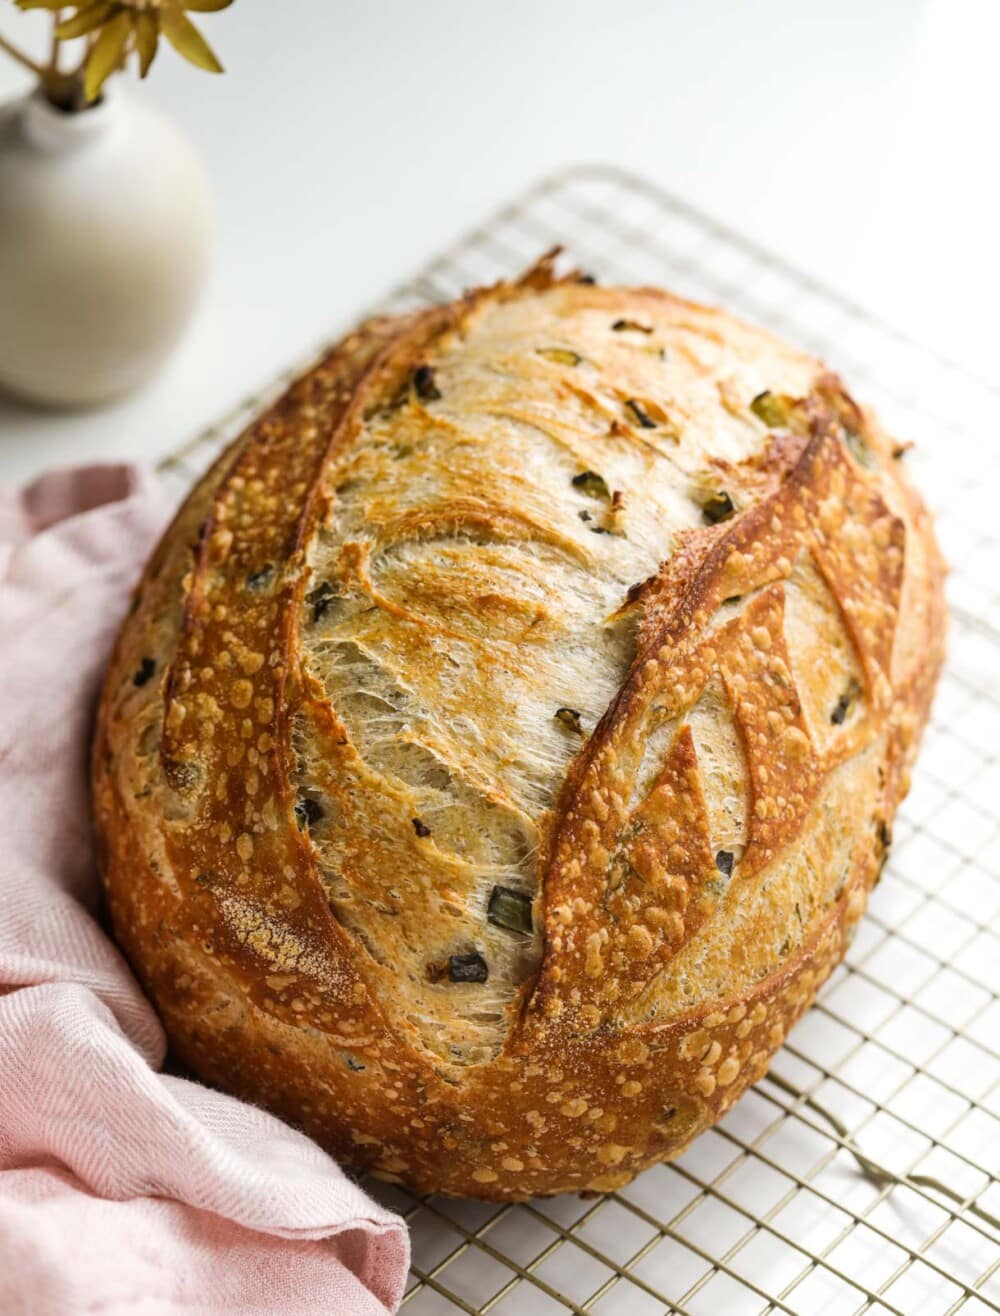
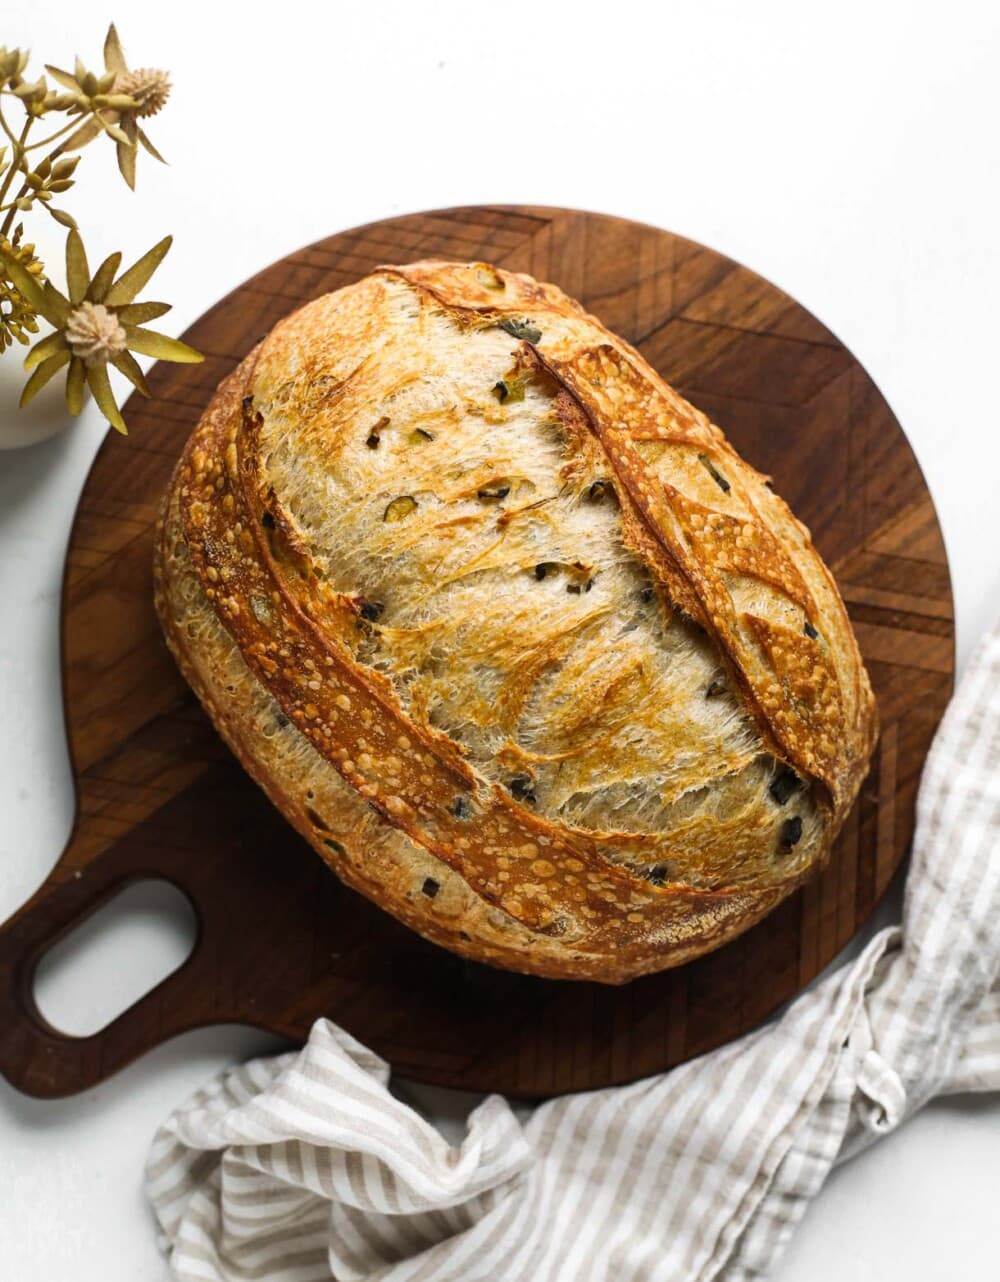
This sourdough bread has chopped dill pickles, pickle brine, and dill mixed into the dough for incredible flavor! It has a custardy, soft crumb and golden crust. It makes the best sandwiches and avocado toast. This loaf is made with active sourdough starter, and the final rise can be done in the fridge overnight to make things easy.
Jump to Recipe
This post may contain affiliate links. Please read my disclosure policy.

Pickles are one of my favorite things to eat (and drink, cue this Dill Pickle Martini!). I love their salty, crunchy, briny, savory deliciousness and find myself using them in all kinds of recipes from deviled eggs to potato salad, cheese boards, and my latest obsession – folded into sourdough bread with fresh dill.
Yes, this Dill Pickle Sourdough is ready for all of your sandwich making, bread and buttering, toasting, and broiling with cheese. It really is one of the best breads I have ever eaten! A loaf is lucky if it lasts two days in this house, and there’s only 2 of us.
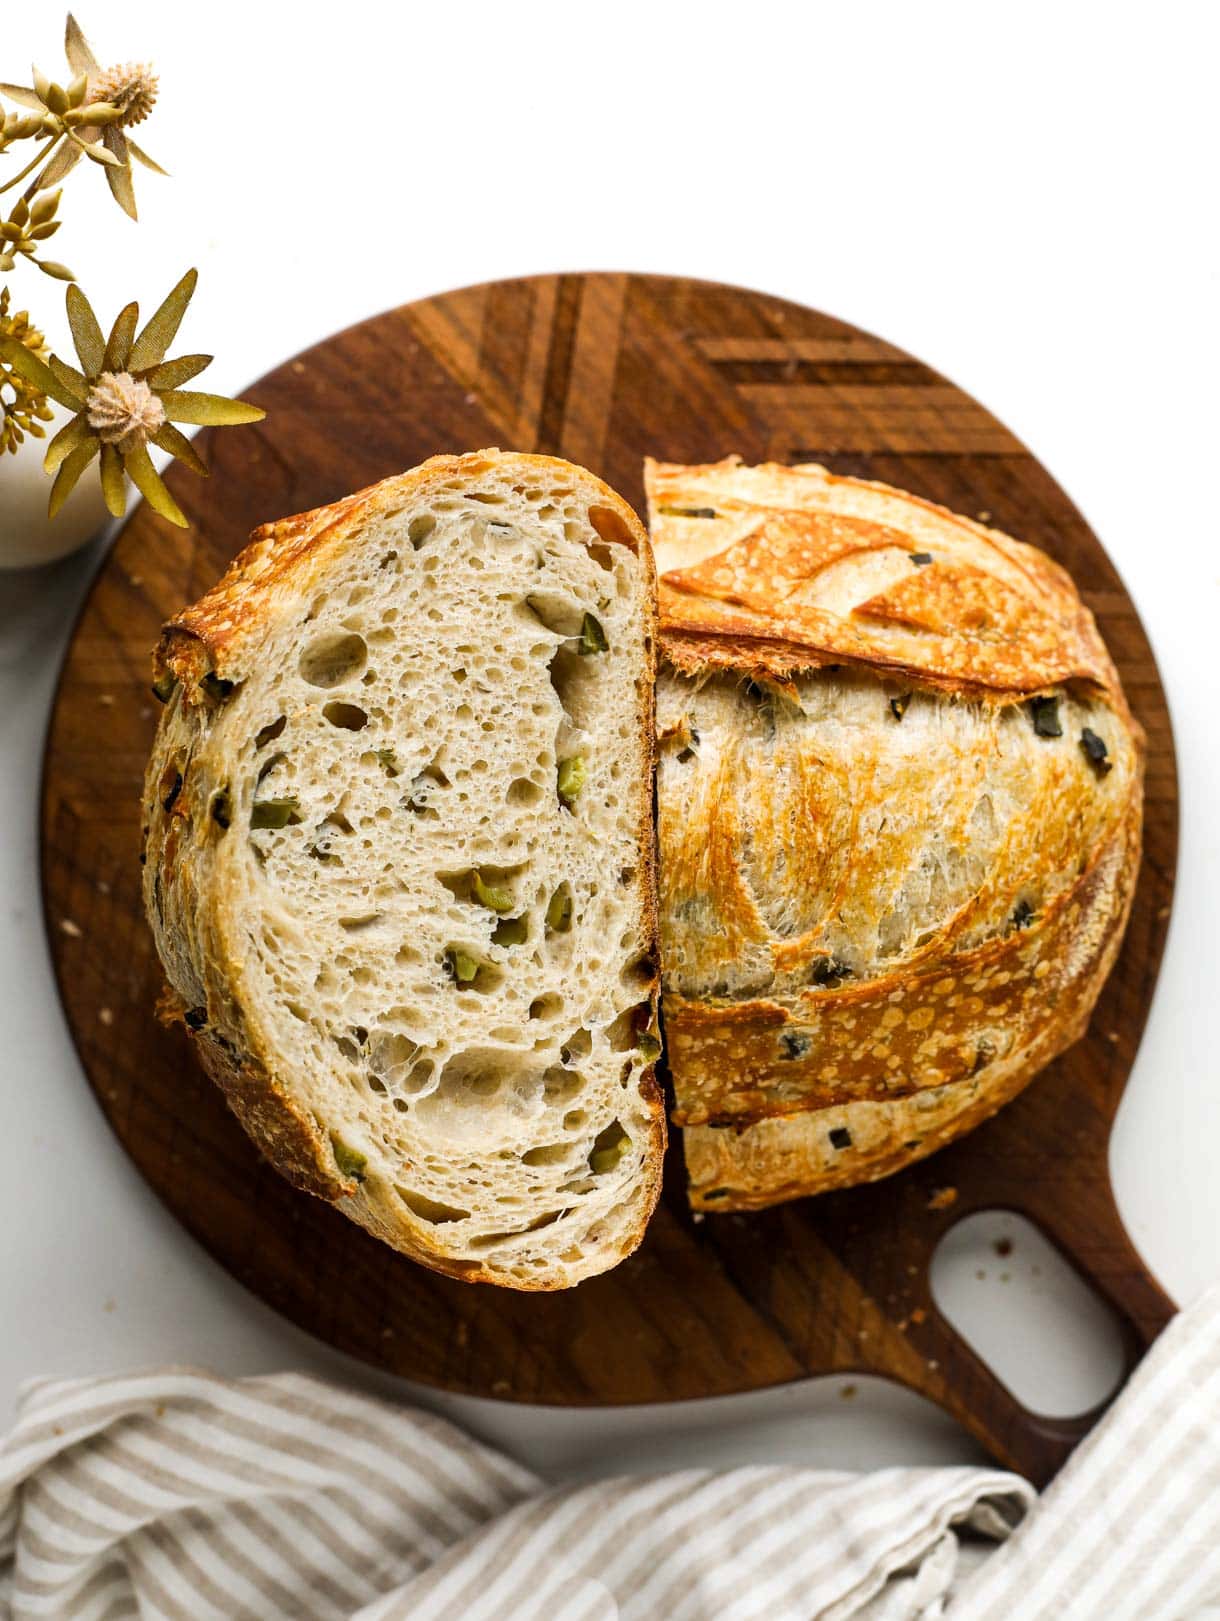
There is both chopped dill pickles folded into the dough AND pickle brine that takes the place of the some of the water. The crumb of this bread is soft and custardy, airy and chewy. The crust is blistered and golden brown, with a few pops of pickles showing themselves.
When to Mix Pickles and Dill into the Dough:
After you do your initial mix of the dough and first set of stretch and folds, you’ll let the bread rest for the typical 30 minutes. When that 30 minutes is up, you’re ready to add the inclusions and do your 2nd of stretch and folds. Scatter the chopped pickles and dill evenly over the top of the dough, tucking some down the edges of the dough where it meets bowl.
Use lightly damp hands to grab one side of the dough and lift up and over to the other side, in effect, trapping the pickles. Rotate the bowl 180 degrees and repeat. You’ll dough this with each of the 4 “sides” of the dough, stretching gently upwards while lifting, and finishing by folding the dough up neatly.

Baker’s Schedule for Dill Pickle Sourdough Bread:
I typically do the final rise overnight in the refrigerator to make things easy. So if you’d like to do that too, here’s a rough timeline to follow:
- Feed your sourdough starter around 8 or 9am
- Mixing your dough between 1 and 3pm
- Do your mixing and stretch and folds throughout late afternoon
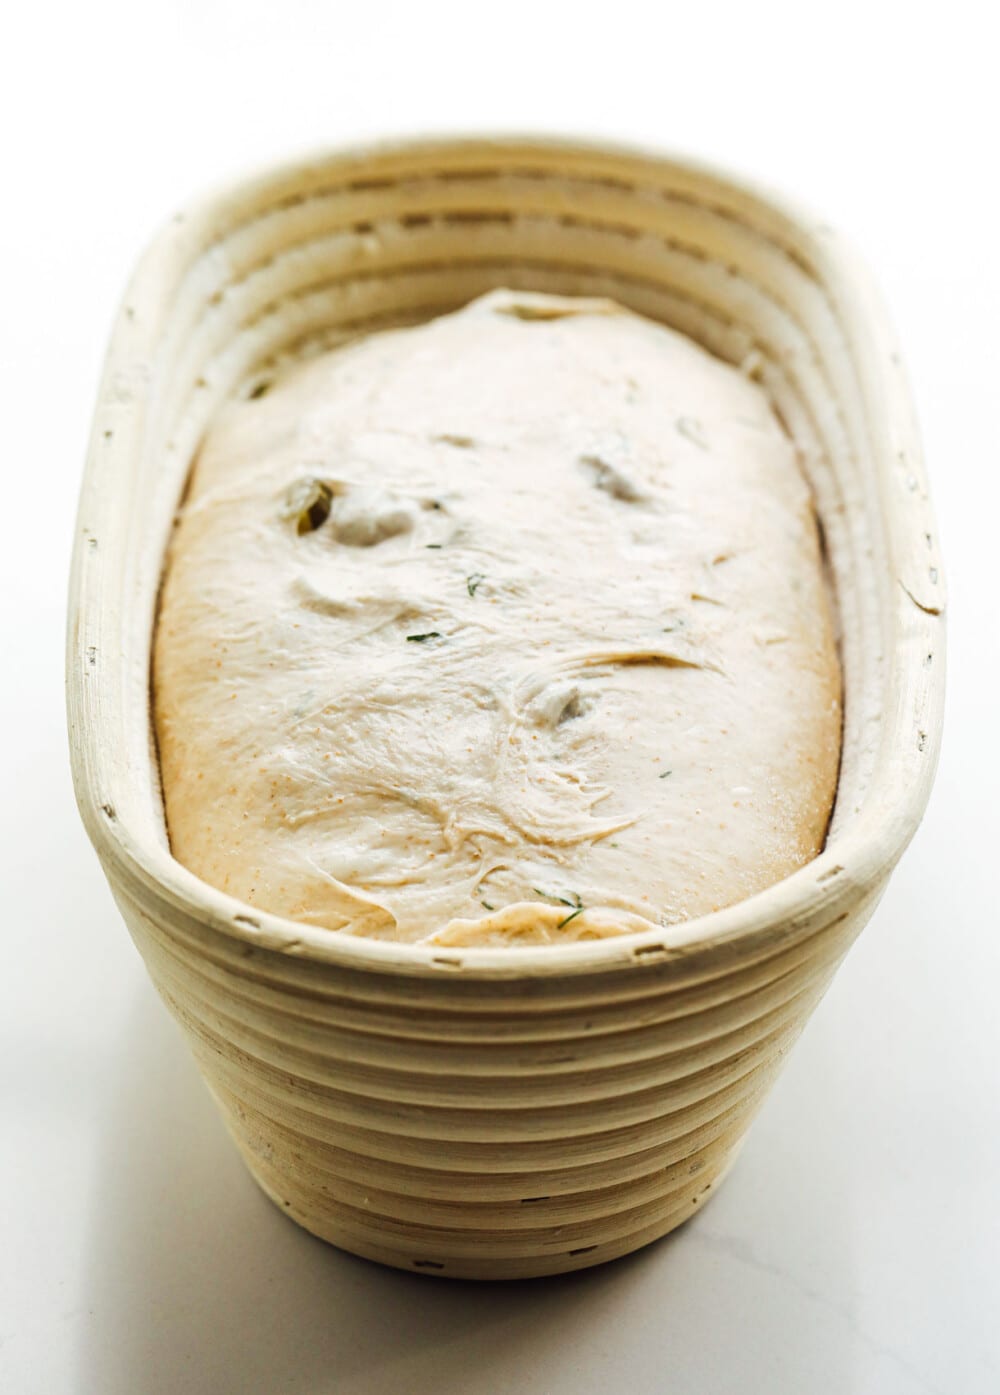
- Bulk fermentation will finish in the evening sometime. You will know bulk fermentation is complete when the dough has risen about 75%, just short of doubling, has a slightly domed topped, and maybe a few bubbles on the top edges of the dough. (The exact time will depend on how fast your dough is rising, while taking into consideration the temperature in your home.)
- That evening, shape the dough once the bulk fermentation. Cover the banneton with a plastic bag or shower cap to keep it from drying out. Refrigerate overnight.
- Score and bake your loaf the next morning, as dough can be in the fridge up to 12 hours.
Favorite Vessel for Baking Sourdough Bread
After using it for 5 years, I am still in love with the Challenger Bread Pan, which has a unique shape that allows you to bake any shape of bread in it! The best part is that it has a shallow base pan, so no more burning yourself trying to get your dough into a deep dutch oven.
You can bâtards, boules, demi-baguettes, and other loaves of almost any size. Because of how it’s made, the perfect amount of steam is created inside the pan. I’ve never had better oven spring or thinner crusts.This pan is magical. If you love baking sourdough, it is 100% worth having in your kitchen. You can learn more and purchase here.
What it means if your dough is sticky during shaping:
If your dough has finished its bulk fermentation and you notice it kind of flattens out on your surface like a blog, is sticky to work with it, and doesn’t have much strength, that means you likely overproofed the dough.
There isn’t a complete remedy for this, but you can use a bit of extra flour to help you work with the dough and shape it before putting in a banneton. Most importantly get your banneton into the fridge as to halt the fermentation as soon as possible. Score the dough cold straight from the fridge, and do one big slit down the middle rather than something artistic because the overproofed dough will start to spread again when scored.
When baked, your loaf will not have the same rise as one with proper proofing, however it will still taste delicious.

Yield: 1 loaf
Equipment
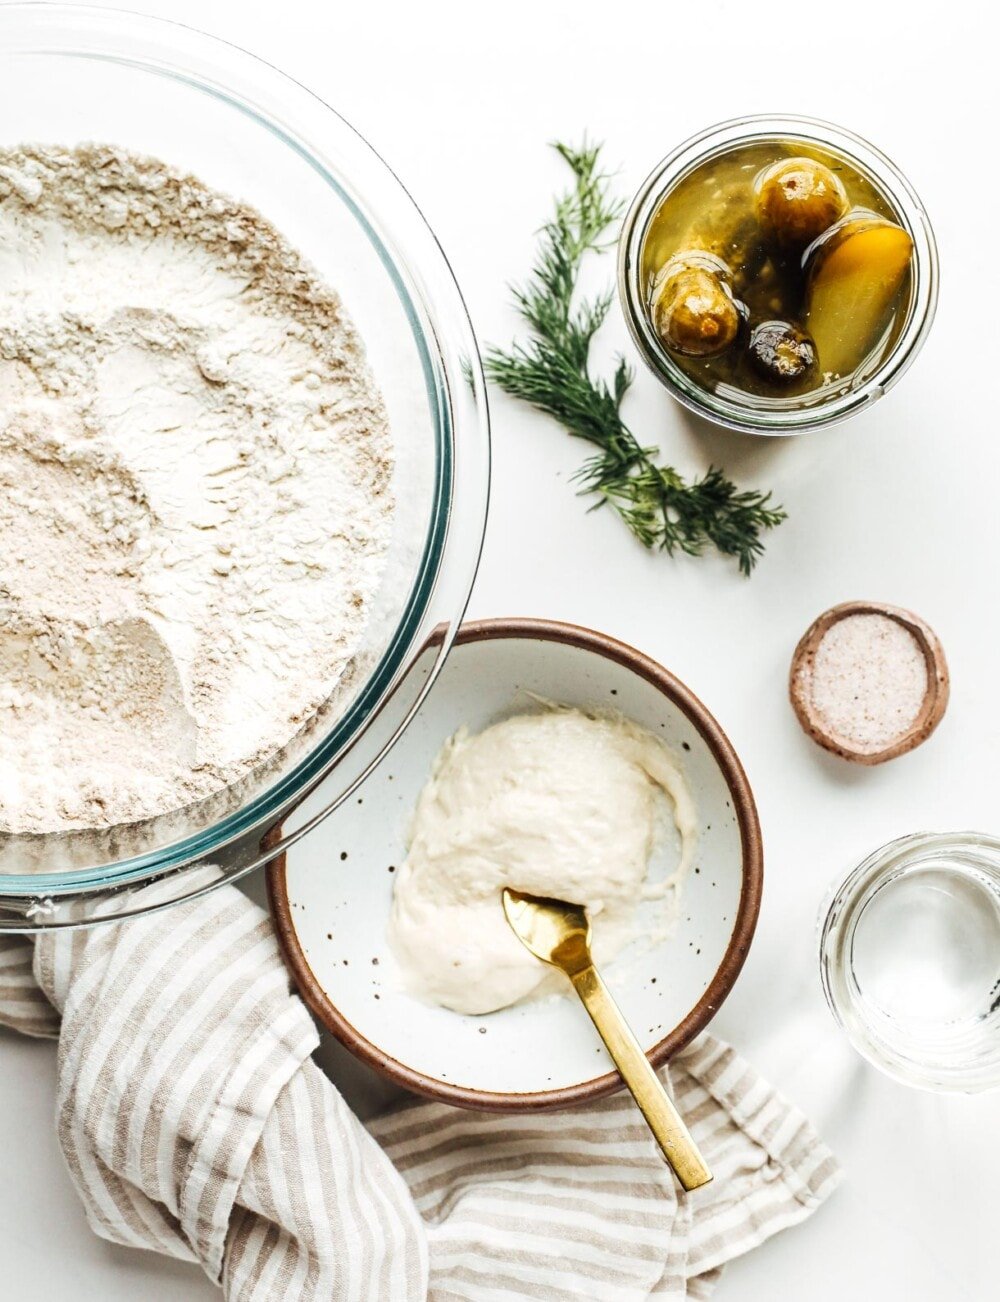
Ingredients
- 50 grams active sourdough starter
- 260 grams filtered water, around 85 degrees F
- 30 grams dill pickle brine
- 380 grams organic bread flour
- 35 grams whole wheat flour
- 7 grams fine sea salt
- 80 grams chopped dill pickles (for the size see video below), patted with paper towel after chopping to remove excess moisture
- 1 1/2 tablespoons finely chopped fresh dill
Instructions
- In a large bowl, mix starter, water, and brine with a fork until starter is dispersed. Add flours, mixing with a spatula first, then switching to mixing with your hand until a shaggy dough is formed, so that flour is not visible.
- Sprinkle salt on top of dough. Cover bowl with a damp cloth and let sit for 40 minutes.
- Now work the salt into the dough, kneading the dough stongly with your hands for two minutes. Then perform your 1st set of stretch and folds. Let dough rest for 30 minutes, covered..
- After the 30 minute rest, sprinkle the pickles and fresh dill evenly on top of the dough, all the way to the sides of the bowl. Perform a set of stretch and folds, encasing the mix-ins into the dough.
- Perform 2 more sets of rests and stretch and fold, waiting the 30 minutes in between for each, for a total of 4 stretch and fold sequences.
- When that is finished let the dough (covered with a damp cloth) bulk ferment on your counter until just short of doubling, a rise of about 75%. If you home is around 74 degrees, this will take about 4 hours. It will take more time if it is cooler, or less time if it warmer.
- When your dough is a little short of doubling in size, has a glossy top and has a few bubbles peaking through the top, it is ready for shaping.
- Gently move the dough out of the bowl onto a floured work surface. Let the dough rest there for 10-15 minutes. Then, shape the dough. Once shaped, use a bench scraper to put the dough into a flour dusted, linen lined banneton (proofing basket), seam side of the dough facing up.
- Cover with a shower cap or damp cloth and let rise for a final time. The final rise can happen in the fridge overnight (which I prefer), or on the countertop, which will take about 1 1/2 hours. The dough can be in the refrigerator for up to 12 to 18 hours at this stage. (If you do the final rise in the fridge, score and bake straight from the fridge. This makes it easier to score and hold its shape.)
- Once your dough has gone through its final rise and has risen slightly, about 15% and is puffy on top, you’re ready to bake. You can also do this test if you did the final rise on the counter to know if it's ready. If need mores more time do, so in half hour increments.
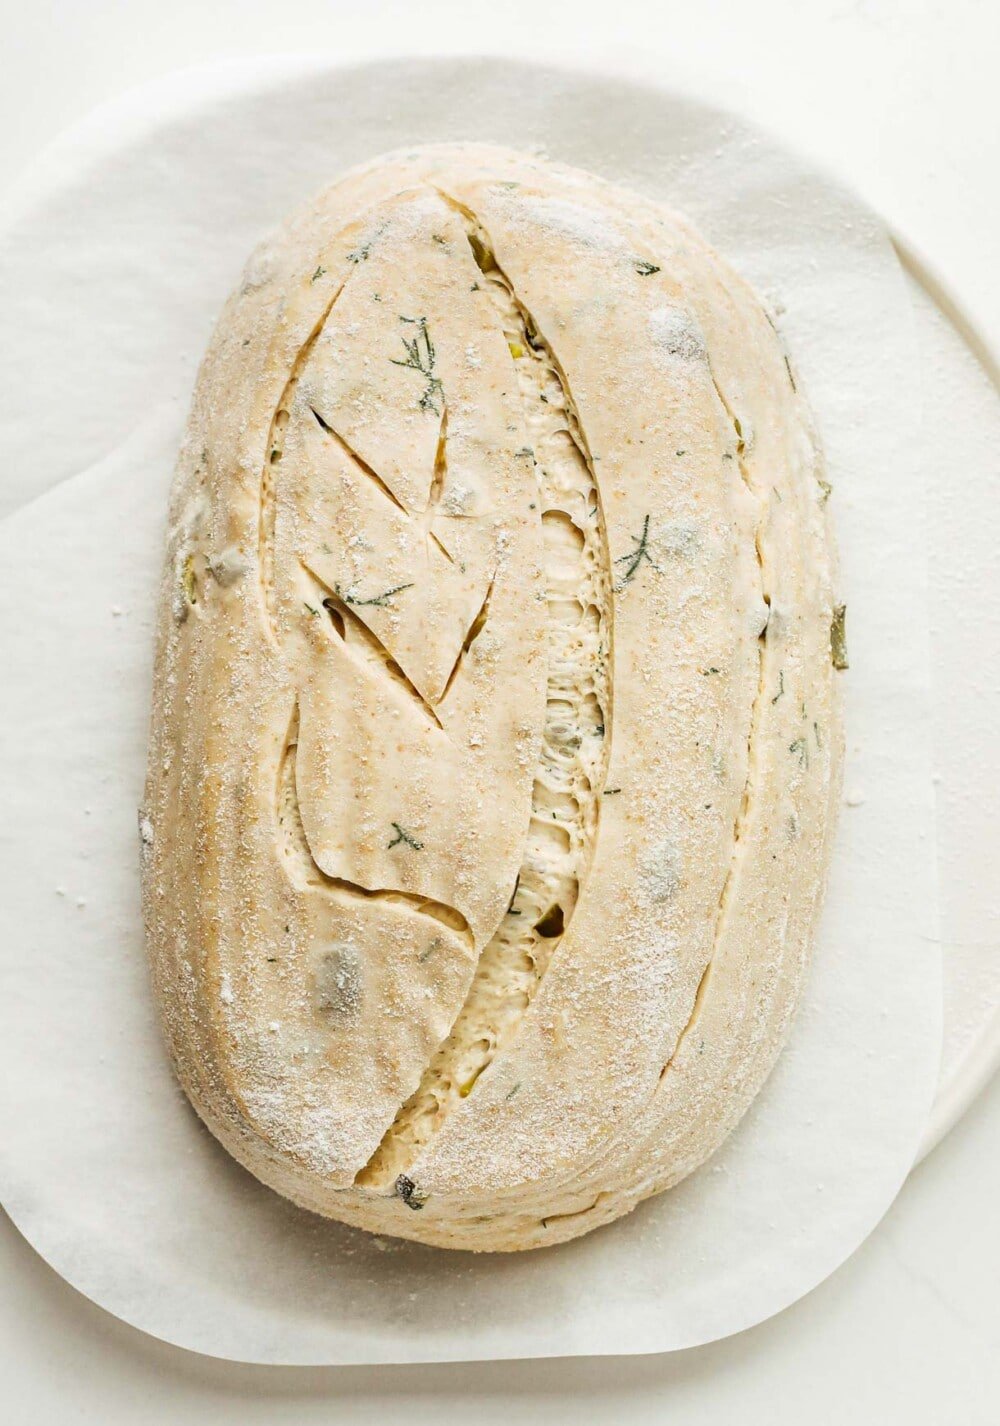
- Preheat oven with dutch oven inside of it to 450 degrees F. Wait until oven is preheated, then place parchment over the top of your dough and flip over, so that the seam side is now on the parchment paper and you are able to score the top of the dough. Score the dough with a bread lame, making sure to go at least 1/2 inch deep in a few spots so that dough can release gases. Otherwise your bread will not rise.
- Place dough on parchment paper into dutch oven, and put cover on it. Bake for 25 minutes, covered at 450 degrees F. Then remove cover, turn oven down to 435 degrees F and bake for 20 more minutes, until bread is golden brown and crackly. Wait ONE HOUR before slicing, or the bread will be gummy because of the steam inside.
Notes
If you love this recipe, you might love my Bacon & Dill Pickle Soup!
Did you make this?
tag @heartbeetkitchen on instagram and hashtag it #heartbeetkitchen
April 27, 2023
Maribeth McFall
May 31, 2026
Judging from the amounts of the ingredients I’m thinking this must make a smaller sized loaf?? Can’t wait to try it!
Camia
March 28, 2026
I made this loaf and it is the most amazing texture. I want to try it again with more pickle juice. This loaf is in my top 5 sourdough recipes to date though!!! So good!
Amanda Paa
March 30, 2026
So glad you enjoyed it!
Amber
December 27, 2025
The inside of mine looks great with nice tunneling, but it’s quite moist, not really gummy. I baked mine a bit longer until it reached 107 degrees inside. Any ideas why? I will say it was a bit wet during stretch and folds. Bulk fermentation and final shaping went well . Flavor is good though!
Kate
September 29, 2025
Do I pop it right into the oven after the cold proofing? Or do I have to let it sit out for some time to get it to room temp before cooking?
Amanda Paa
September 29, 2025
Hi Kate! It goes right from cold proofing to oven. You don’t want it to come to room temp.
Irina
July 28, 2025
Amazing flavor combination! I used the recipe for inspiration, but made following changes to the ingredients:
* increased the hydration to 81%,
* used about 135 g of dill pickles
* used slightly warm buttermilk instead of water
* used about 25% of whole wheat flour (more than the recipe suggested);
* swapped fresh dill for 2 tsp of dried dill.
So, the flavor turned out really well, and the bread was amazing with some herb infused cheese spread. I should have gone more conservative on the hydration because it was a bit difficult to build tension and I didn’t achieve a good ear. However, I got a very nice open crumb! If you haven’t tried using buttermilk instead of water in bread, give it a try!
Jill
July 3, 2025
Can this cold proof longer ?
Amanda Paa
July 3, 2025
yes, can cold proof up to 24 hours!
Kari Lathrop
May 24, 2025
Saturday morning here and starting. Can it cold ferment longer if needed?
I want the loaf for a Memorial Day BBQ but my Sunday morning is packed so earliest I could bake it it Sunday evening.
Amanda Paa
May 24, 2025
If starting today and putting it in the fridge tonight for cold proof, baking tomorrow night will be just fine!
Judy
April 28, 2025
Wonderful!
Natasja
March 4, 2025
Delicious sourdough recipe! Mine wasn’t very pickle-y flavored though, just a really nice sourdough type of sour. Is that what it should taste like? If I want more of a pickle flavor, can I replace some of the water with more pickle brine? Can’t wait to try more of your recipes!
Amanda Paa
March 4, 2025
Hi Natasja! I’m so glad you liked the recipe! You could replace a bit of the water with brine, but I wouldn’t do significantly more as it is more acidic than water and therefor can alter fermentation. It’s a delicate balance with developing an inclusion recipe like this; the pickle flavor will mostly come through when you get a bit of the diced pickles and the fresh dill throughout the bread.
Pam
January 27, 2025
This recipe is delicious! It came out perfectly with a crunchy crust and soft crumb. I’ll be making this regularly .
Karen G
November 18, 2024
I have made your jalapeno cheese loaf over and over and it’s amazing! I want to try this recipe as well but would like to add cheese to it. Do you have any recommendations? Can I just add 200g of cheese and proceed with the recipe as normal or do I need to make some other changes?
Amanda Paa
November 18, 2024
Hi Karen! I would only add 70 grams cubed cheese and reduce the pickles to 70 grams. That should work well!
Jim
September 7, 2024
Amanda, I have made several of your breads over the last couple of years and all have been very good. I made this bread today after looking at the formula for a while and it was also very good; nice color, chewy crust with a very flavorful, moist and open crumb. I though it was pretty wet and sticky after bulk rise, 4 1/2 hours after autolyse in a 75+ degree kitchen, but the timing was fine as it came out great after an overnight in the refrigerator.
Court
August 9, 2024
This recipe is fantastic!!
I live at 4,500 ft-ish and I baked this loaf using the cold start method at 450 for 50 minutes, it turned out perfectly!! Next time I’ll do 55 minutes. I hope this helps anyone like me that is ballin on a budget and can’t preheat their Dutch oven and all that jazz.
Amanda Paa
August 10, 2024
Yay, so glad you enjoyed it Court! And thanks for the notes about your altitude.
LT
May 29, 2024
Delicious. We loved it and the she requested more to be made. Concumed in a day.
Amanda Paa
May 29, 2024
So glad to hear that, thanks for making the recipe!
Kim C
May 20, 2024
I love this recipe! Thank you for the video clips, they helped me find my groove and understand the process. I used a dried dill seasoning since I didn’t have fresh. Worked great! Definitely a keeper recipe!
Amanda Paa
May 20, 2024
yay, so glad to hear that! thanks for making the recipe.
Ashleigh
September 6, 2024
If substituting dried dill for fresh dill, how much would you use?
Amanda Paa
September 6, 2024
i would use a tablespoon of dried dill weed!
Winnie M.
May 16, 2024
Amazing! Do you think you could make bagels using the same recipe? If so, is there a trick to those, or can I use the same recipe but form them as bagels? I made this for friends at work, and they are still talking about the bread 2 days later!
Amanda Paa
May 16, 2024
the hydration would need to be tested and adjusted to be lower for bagels. i’m so glad you and your friends enjoyed the bread!
Christina Doerfel
February 2, 2025
I bet that after a few stretch and folds, you could turn this right to a bagel dough. I just made like 75 bagels and turned some extra dough into a mini loaf of bread and it came out wonderfully without adjusting hydration.
Amanda Paa
February 2, 2025
Genius. I totally want to try that!
Heather
May 6, 2024
Hi. Can you use dry dill instead of fresh?
Thank you.
Amanda Paa
May 6, 2024
I would think that would be fine! Typically use 1/2 of what fresh amount is when using dried.
aliciaceciliaa
April 30, 2024
I’m mid-process (x4 folding sequence) and just just folded in the pickles & dill. I’m a bit anxious! Halllp! I dried the pickles off with paper towel but it felt like it added a lot of moisture to my dough. While performing the stretch & folds, the dough was ripping a bit more due to the added moisture. Have I ruined this batch?
Christina Doerfel
February 2, 2025
just bake it. I have had that happen too many times over the years and it makes it a little difficult to shape, but with a scraper and quick hands, you can shape it and bake it, and it will come out wonderful. I have just noticed that it may take a few more minutes in the oven and will be a “little” more flat, but still taste wonderful.
Marianne
March 26, 2024
Fantastic loaf, flavors are delightful! So glad I tried it! Thank you, this will be on repeat.
Amanda Paa
March 26, 2024
Yay, thanks for making the recipe, Marianne!
Erika
March 13, 2024
Ooo! This sounds fantastic but I only have bread flour. Is there a conversion chart? Can I make with just the 1 flour?
Amanda Paa
March 13, 2024
Works equally as well with just bread flour, I just like the little bit of added flavor from the whole wheat!
Mike
February 18, 2024
Is the typical 2% salt necessary with pickles that are salty to begin with in addition to the brine?
Amanda Paa
February 18, 2024
I don’t find this too salty as written (and haven’t had that feedback from others who’ve made it), but you can certainly decrease the salt if you would like!
Jenn
January 20, 2024
I made the dill pickle sourdough and it was OUT OF THIS WORLD!! The directions were so easy to follow, the recipe was easy and the result was SO good! We ate it with chive and onion cream cheese, prosciutto, and a drizzle of bbq sauce. I’ve also made the focaccia and I have the same rant as above for that recipe too! It’s become something I make all the time…thank you!!
Amanda Paa
January 20, 2024
Yay! So glad you liked it! And that combination sounds amazing.
Raija
January 19, 2024
I love pickles, so I was searching for a pickle sourdough bread! This recipe did not disappoint! The bread turned out perfect and delicious! Thank you for an amazing recipe!!
Amanda Paa
January 19, 2024
Yay! So glad you enjoyed the bread. If you love pickles, you might want to try my cheesy baked dill pickle dip, too!
Madelaine
December 4, 2023
Wow wow wow!! I’m a big fan of your easy seeded sourdough recipe & this Sunday I decided to go ahead and make two loaves, one of each.
This was just as simple as the seeded sourdough and it turned out AMAZING. Golden crust and a lovely soft crumb. And the flavour is out of this world. I didn’t have fresh dill and didn’t feel like going to the store on a rainy day, so I subbed 1.5tsp of dried dill with success.
I’ll have to make another loaf stat because this one disappeared in less than a day.
Thanks so much for another great loaf of bread :)
Amanda Paa
December 4, 2023
Hi Maddy! Love hearing that you enjoyed the dill pickle sourdough! It disappears in our house too. :)
Shannon
September 17, 2023
Very good! I only had a small amount of fresh dill so I need to try it again with more the next time. Neighbors were over and had some and everyone was thinking of great sandwiches to make for the next time! Thanks!
Amanda Paa
September 18, 2023
Yay! Yes, so many sandwich options. It makes the best toasted ham and cheese, and cream cheese with fresh greens and avocado!
Lucy
June 4, 2023
Delicious! Makes fantastic grilled sandwiches too! Next time I’ll add more fresh dill – and there will definitely be a next time. Thank you for the recipe.
Amanda Paa
June 4, 2023
so glad you liked the recipe, thanks for making it!
Richard
May 21, 2023
A wonderful recipe and a surprisingly delicious loaf. Your description of the crumb and crust is spot on! Thank you for your creativity and adventurousness, Amanda.
Amanda Paa
May 21, 2023
So glad you enjoyed it, Richard! Thanks for making the recipe.
Katie
May 19, 2023
This is such a great recipe! I followed it as written and the bread turned out perfect! Soft interior, crunchy exterior…and all the pickle flavor! Yum! We served with bbq pulled chicken and it was delish! Thank you!
Amanda Paa
May 19, 2023
So glad you liked it! And that bbq pulled chicken sounds like an awesome flavor combination!