Easy Whole Wheat Sourdough Sandwich Bread
By Amanda Paa – Updated March 31, 2022
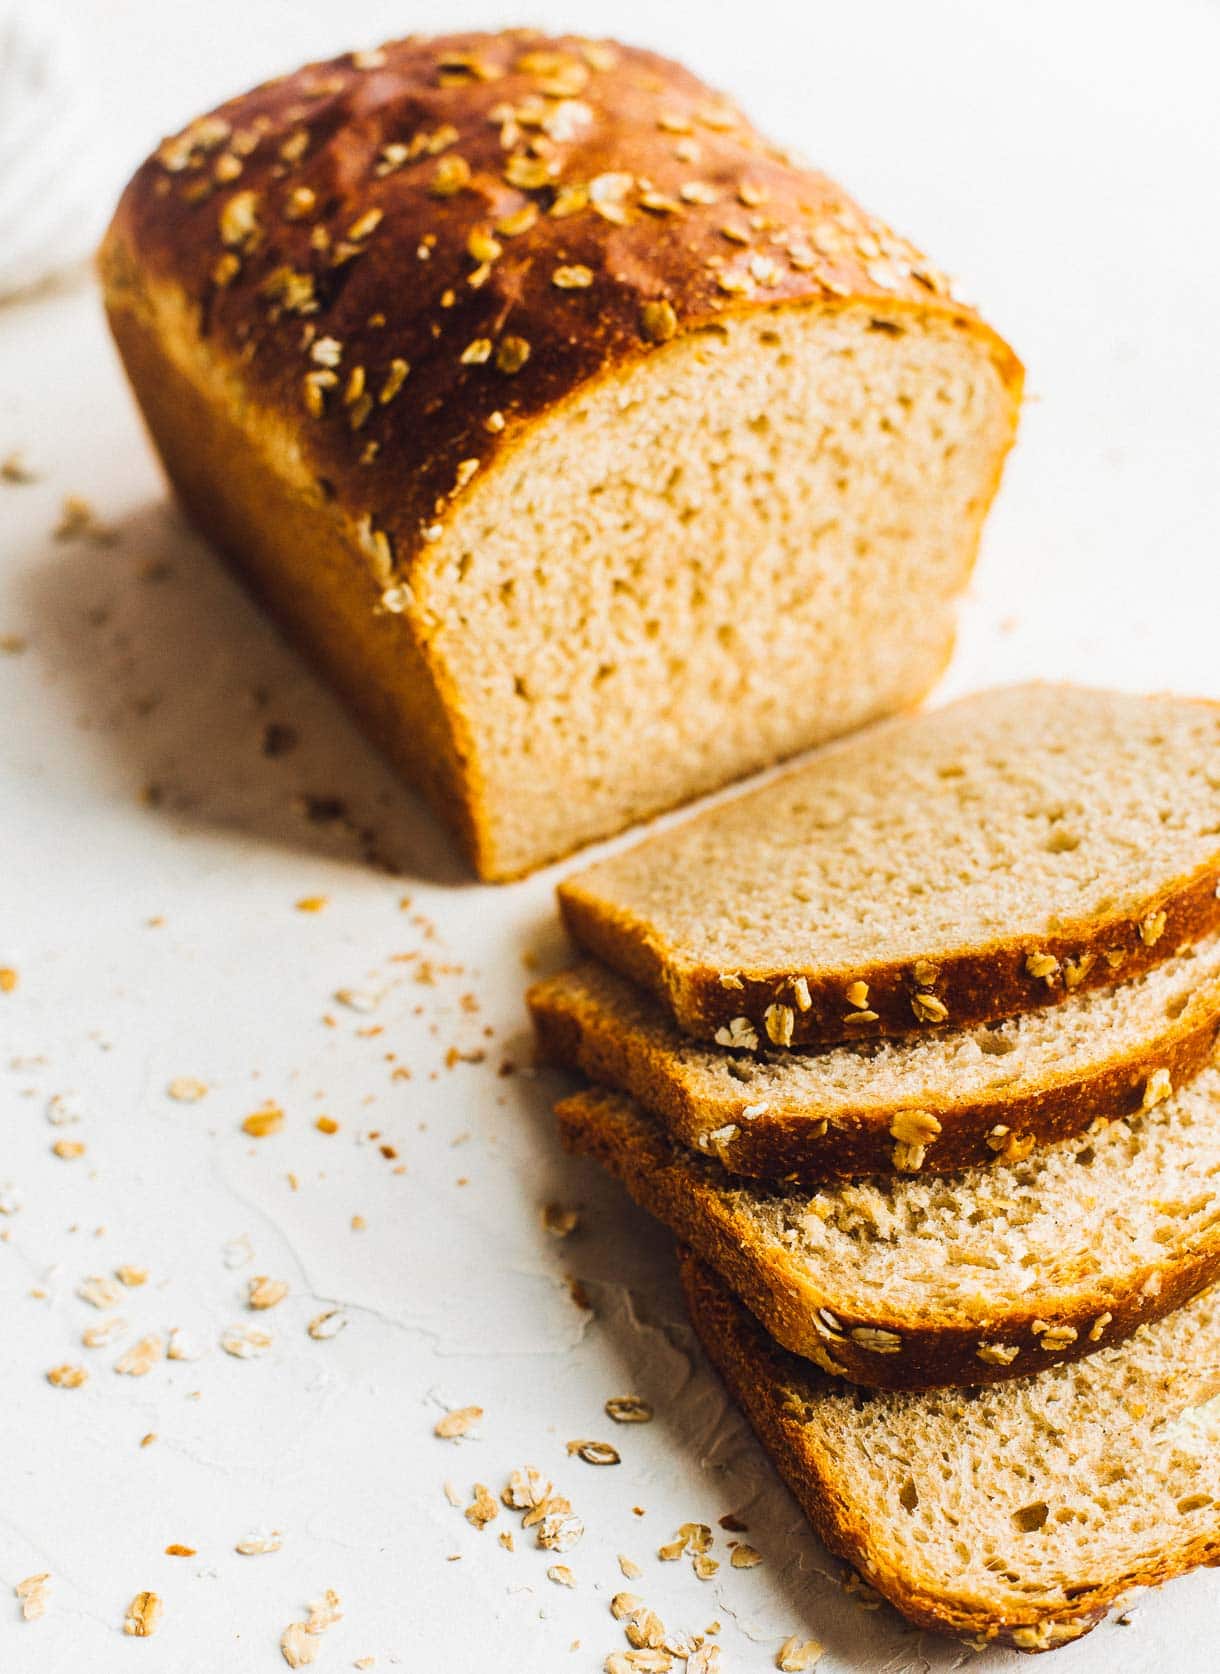
This easy whole wheat sourdough sandwich bread is soft, fluffy, and a breeze to make. Full of whole grains and wonderful flavor, it's the perfect way to use sourdough starter to make an everyday loaf. The crust is beautifully golden brown, the crumb tender and even. You'll use your stand mixer to mix the dough, then bulk ferment overnight while you sleep. No kneading or stretching and folding!
Jump to Recipe
This post may contain affiliate links. Please read my disclosure policy.

There’s something about a lofty loaf of soft, buttery sandwich bread that shouts nostalgia. I grew up with store-bought sandwich bread that certainly wasn’t artisan or full of much nutrition, despite the whole grain labeling. But it was soft and delicious, and I loved nothing more than making a peanut butter and jelly sandwich with it.
And I absolutely wanted to create a sourdough sandwich bread that was soft and airy, with the benefits of fermentation and whole grains.
What to expect from this whole wheat sourdough sandwich bread:
I tested this recipe over and over again, until I achieved what I think is an amazing whole wheat sourdough sandwich bread that will bring you right back to your childhood.
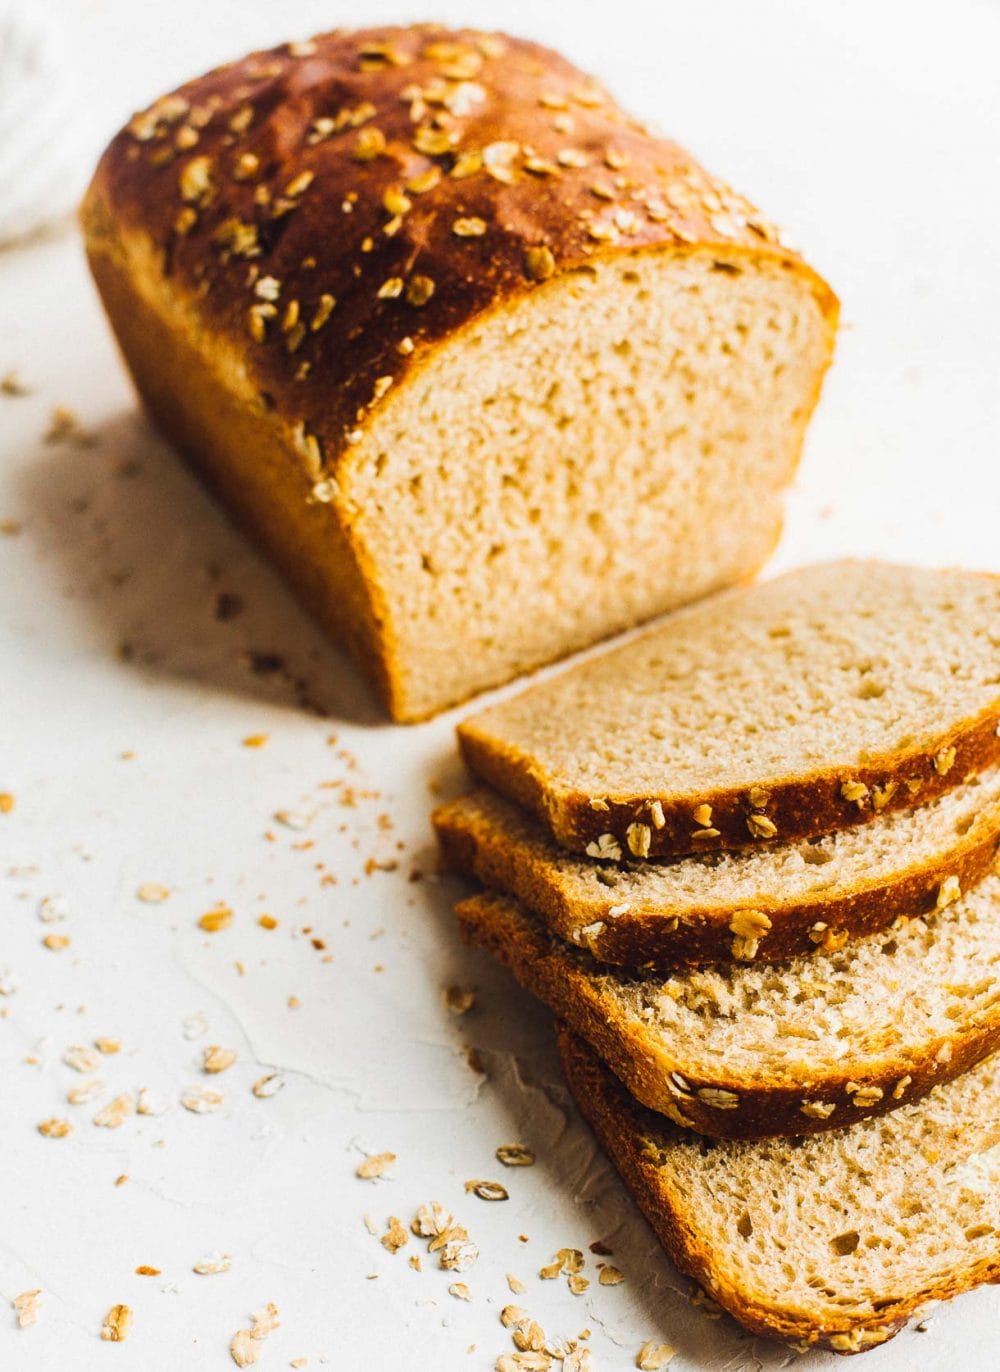
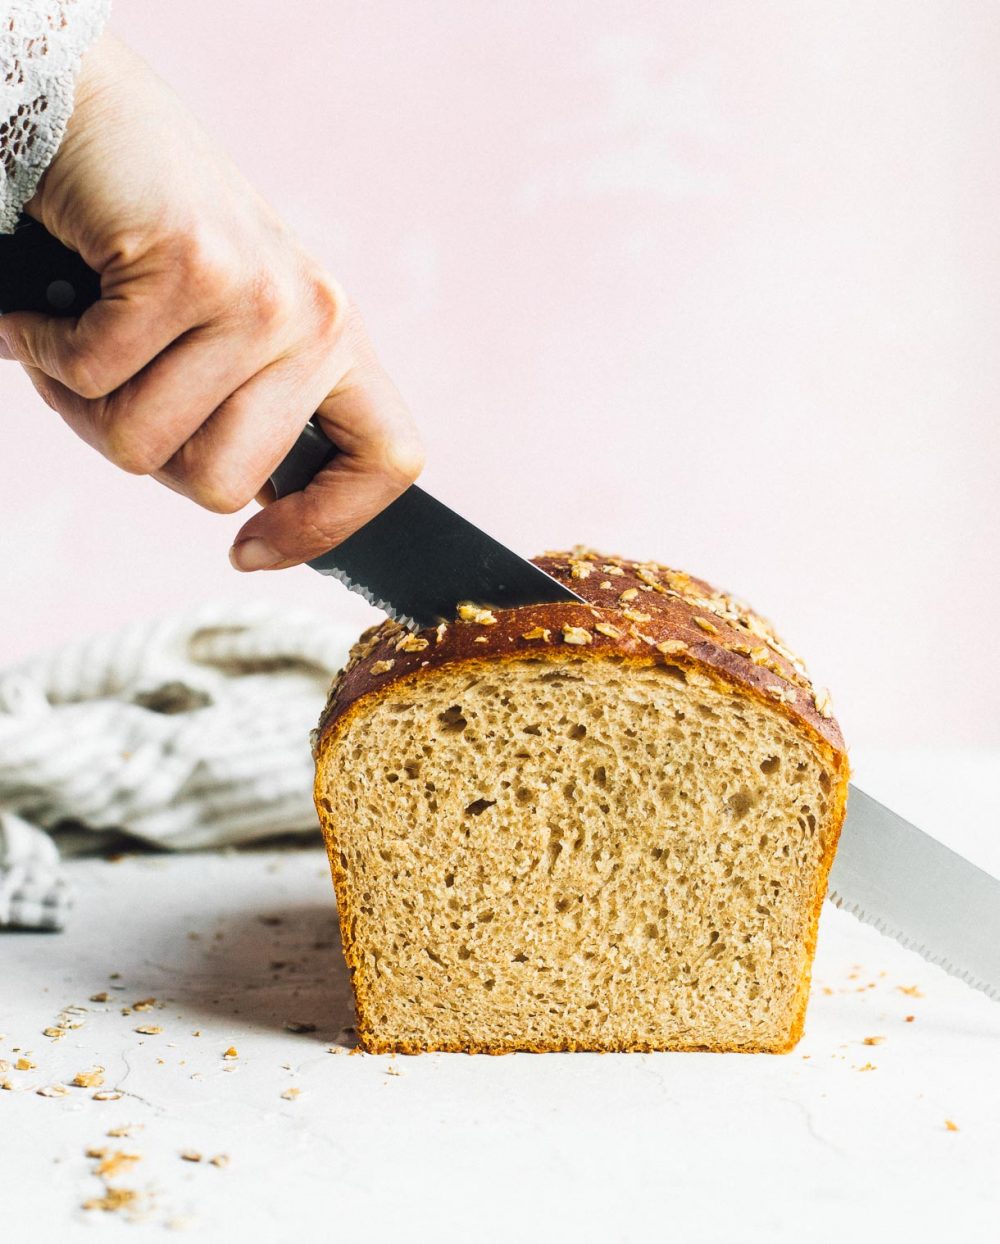
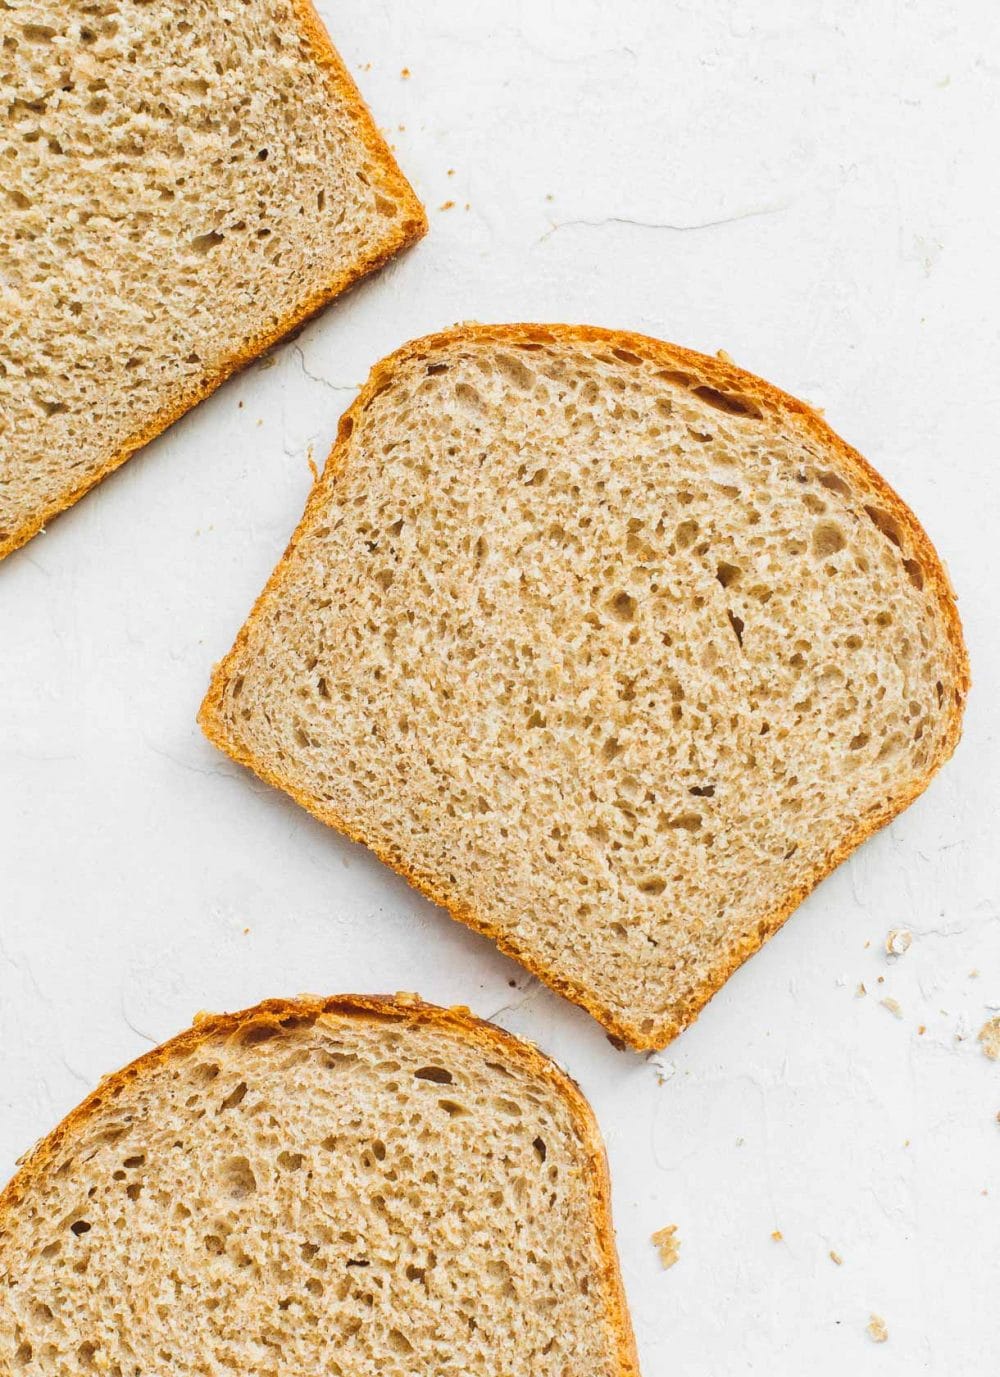
It slices like a dream, with an even crumb and a soft, tender texture.
It’s not dense (which can happen when using whole wheat flour)!
And the whole grain component leads the way to fabulous nutty flavor.
This whole wheat sourdough is ready to be made into your favorite deli sandwich, grilled cheese, or pb & j.
And it’s easy to make! Your stand mixer will do all the work for you, NO hands on stretching and folding, or kneading.
Baker’s Schedule:
I like to make this recipe using an overnight bulk fermentation, and then a shorter final rise in the morning. It makes things super simple!
- 8:30pm: Mix starter, flours, milk, water, and honey. Let sit for 45 minutes.
- 9:15pm: Use stand mixer with dough hook to mix in salt and softened butter. Then mix on medium speed for 7 minutes.
- Cover with plastic bag and let rise overnight in a cool spot.
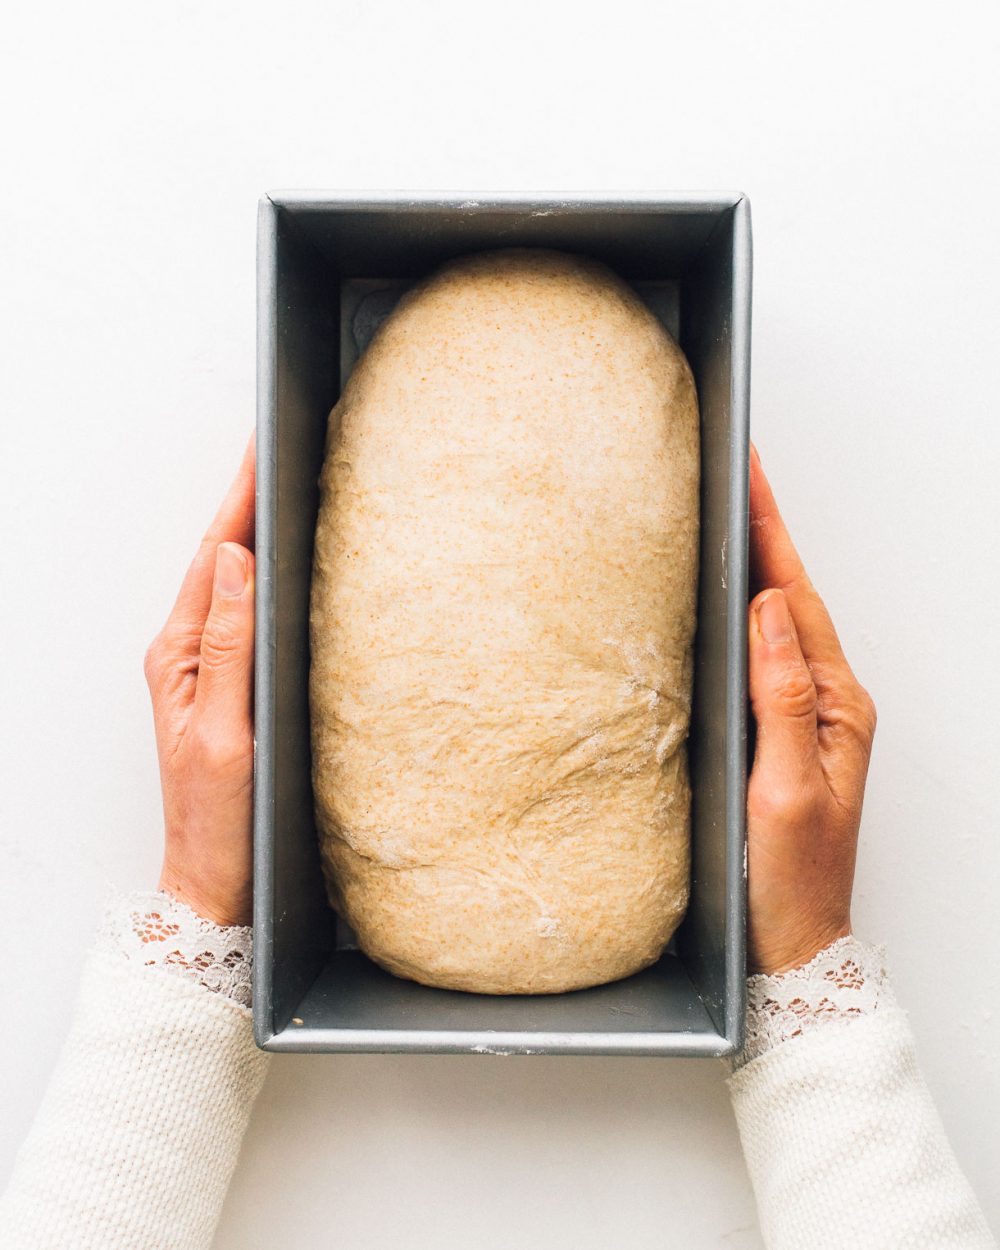
- 7:30am next day: Turn dough out onto counter and let rest for 10 minutes. Pat dough into a square and fold 1/3 of dough into the middle, then roll the rest of the dough up. Use a bench scraper to create a bit of tension and seal the seam. Place seam side down into well greased, 9×5 inch loaf pan. Cover with plastic bag (that doesn’t touch the top of the dough). Let dough complete its final rise in a warm spot.
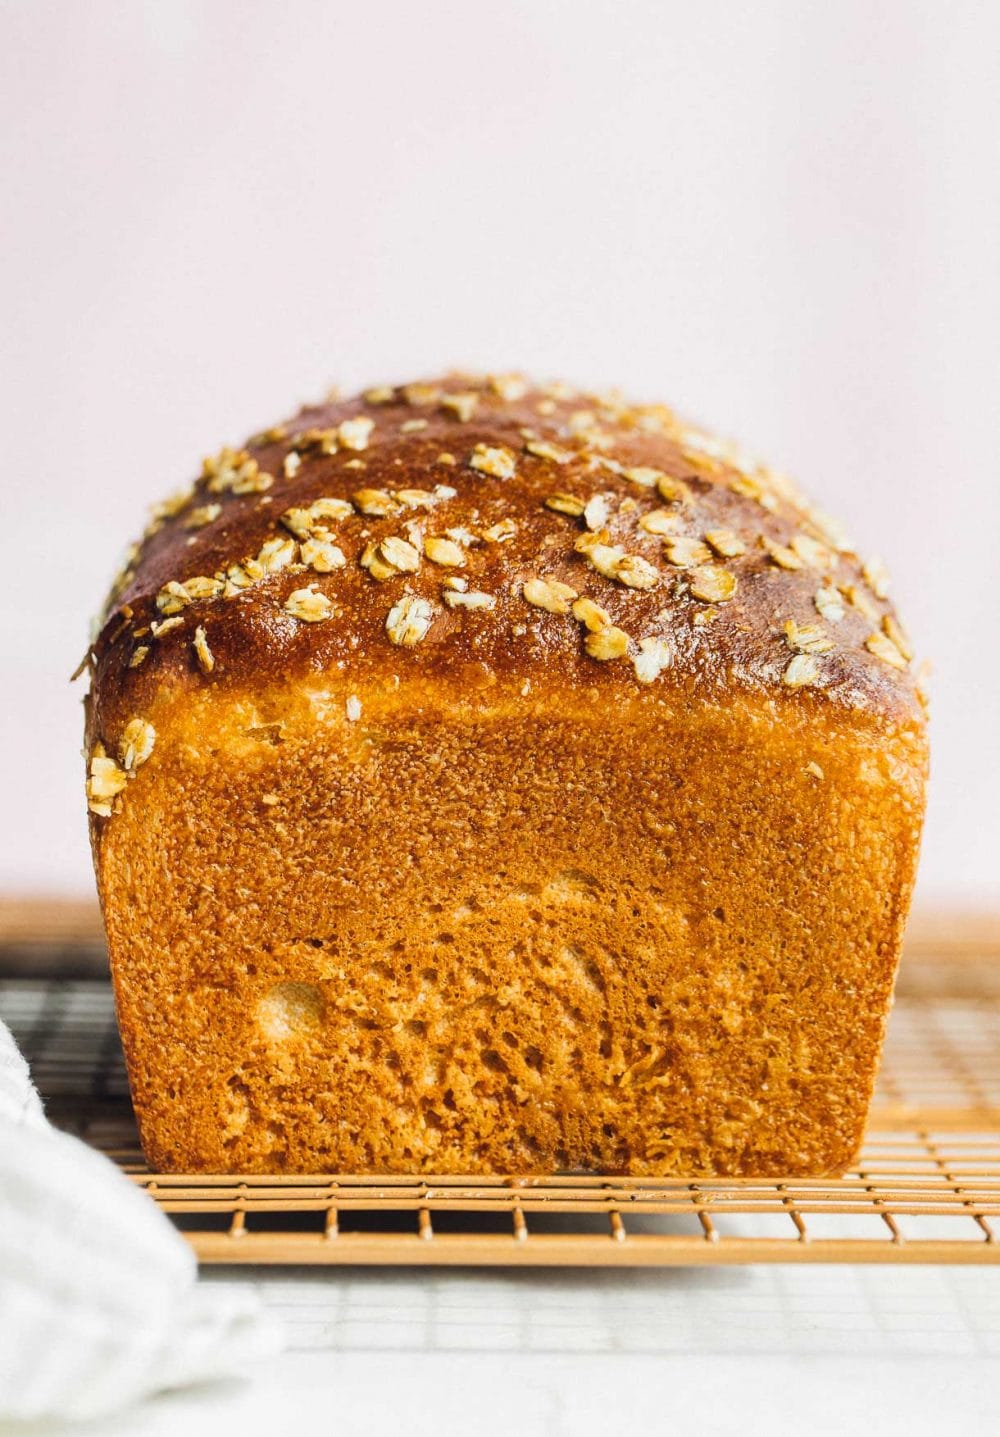
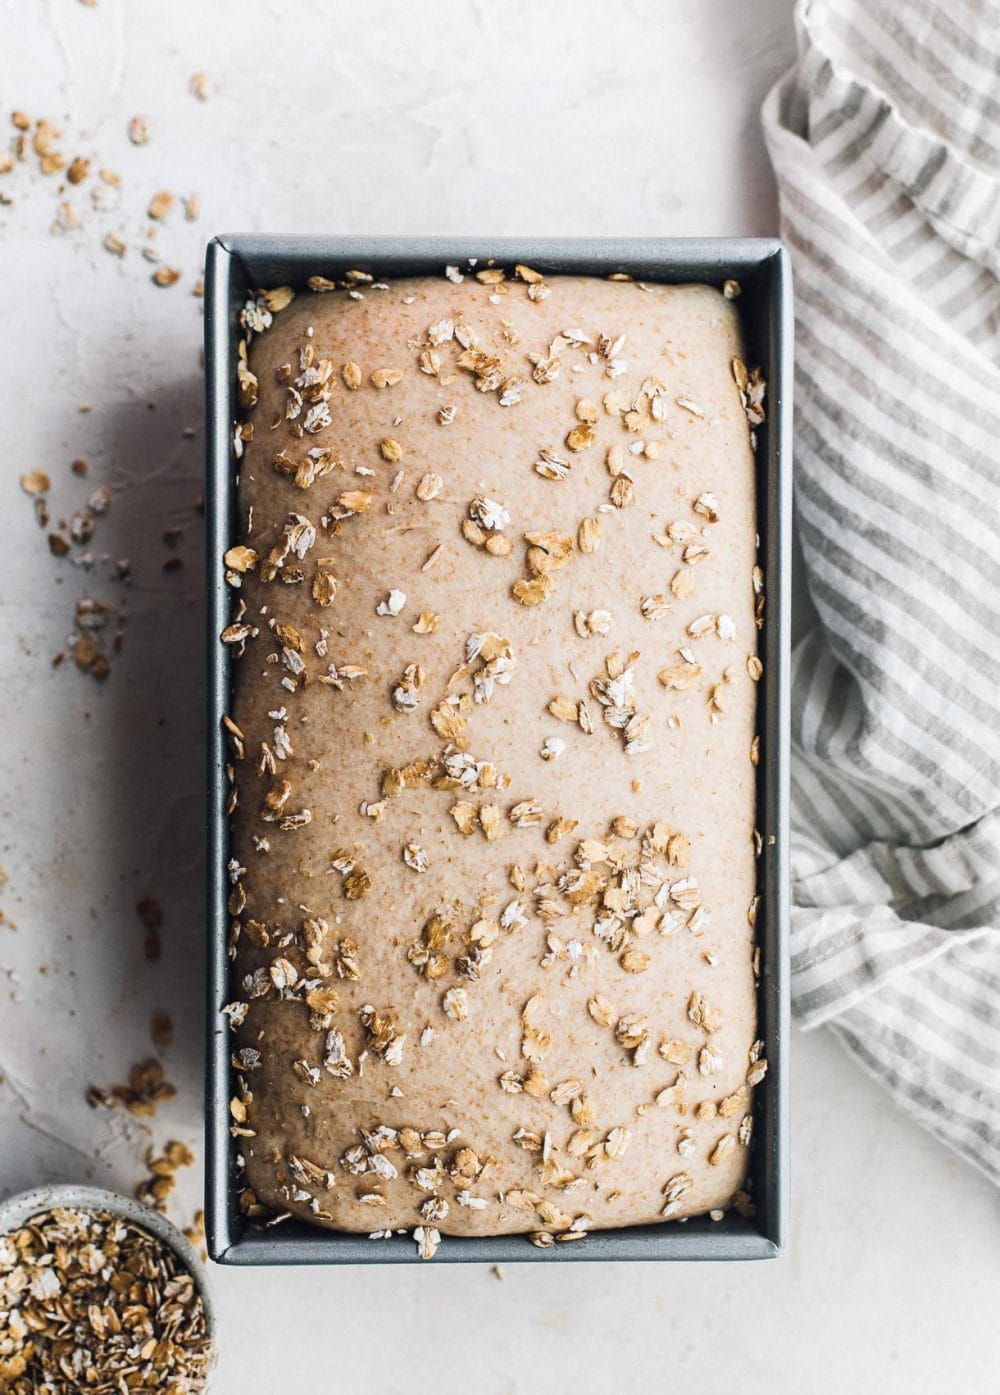
- 11:00am: Final rise is complete when dough has risen just above the rim of the pan. Brush with water and sprinkle with oats, if desired.
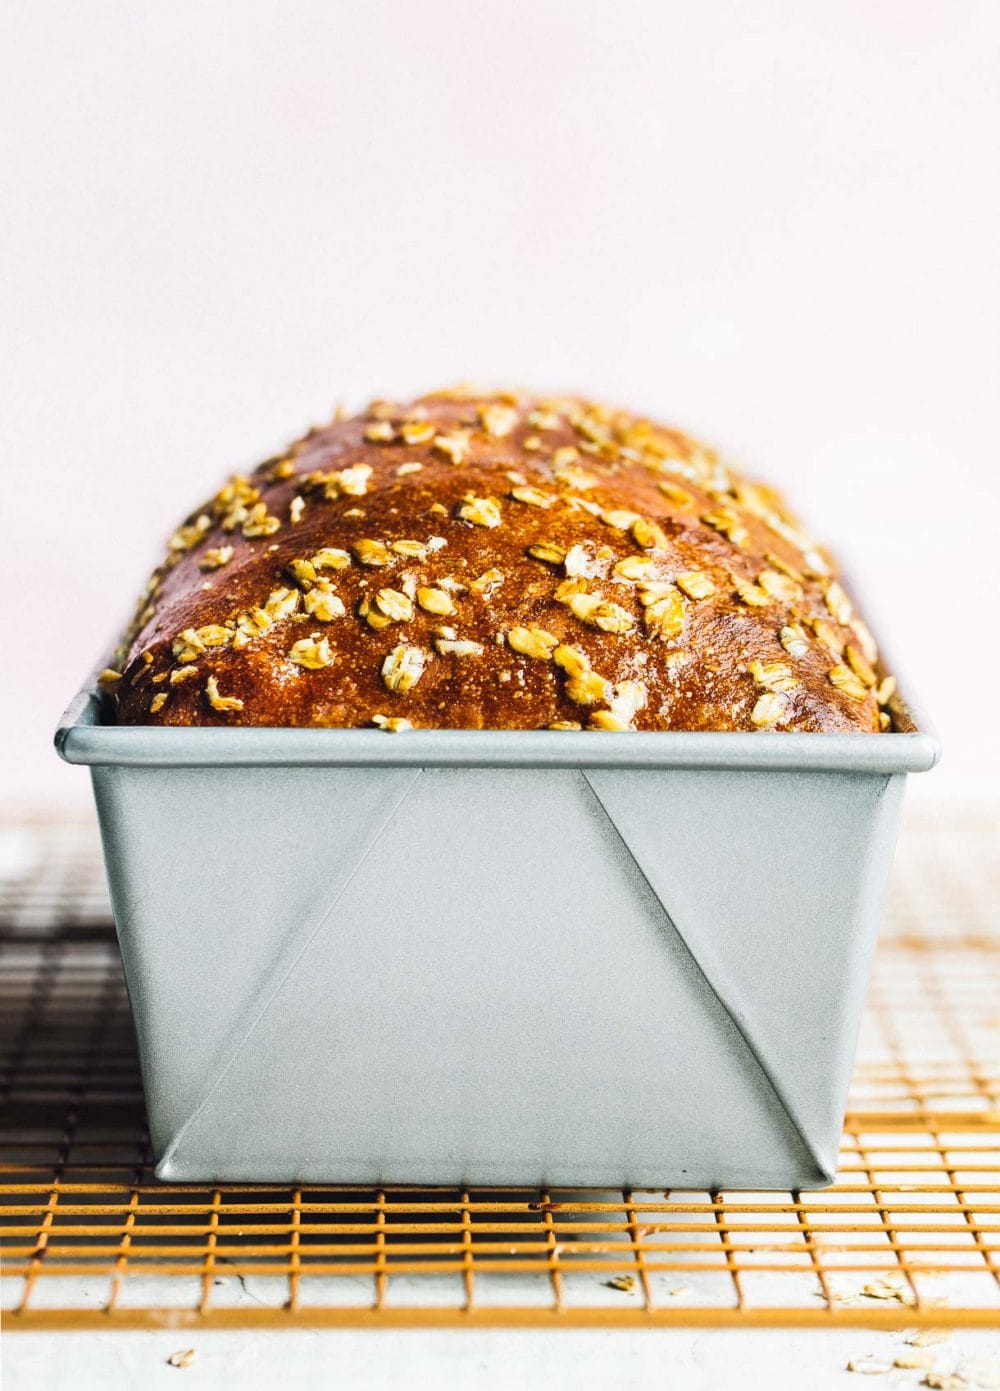
- Bake for 30 minutes at 400 degrees F, until interior of bread is at least 205 degrees F.
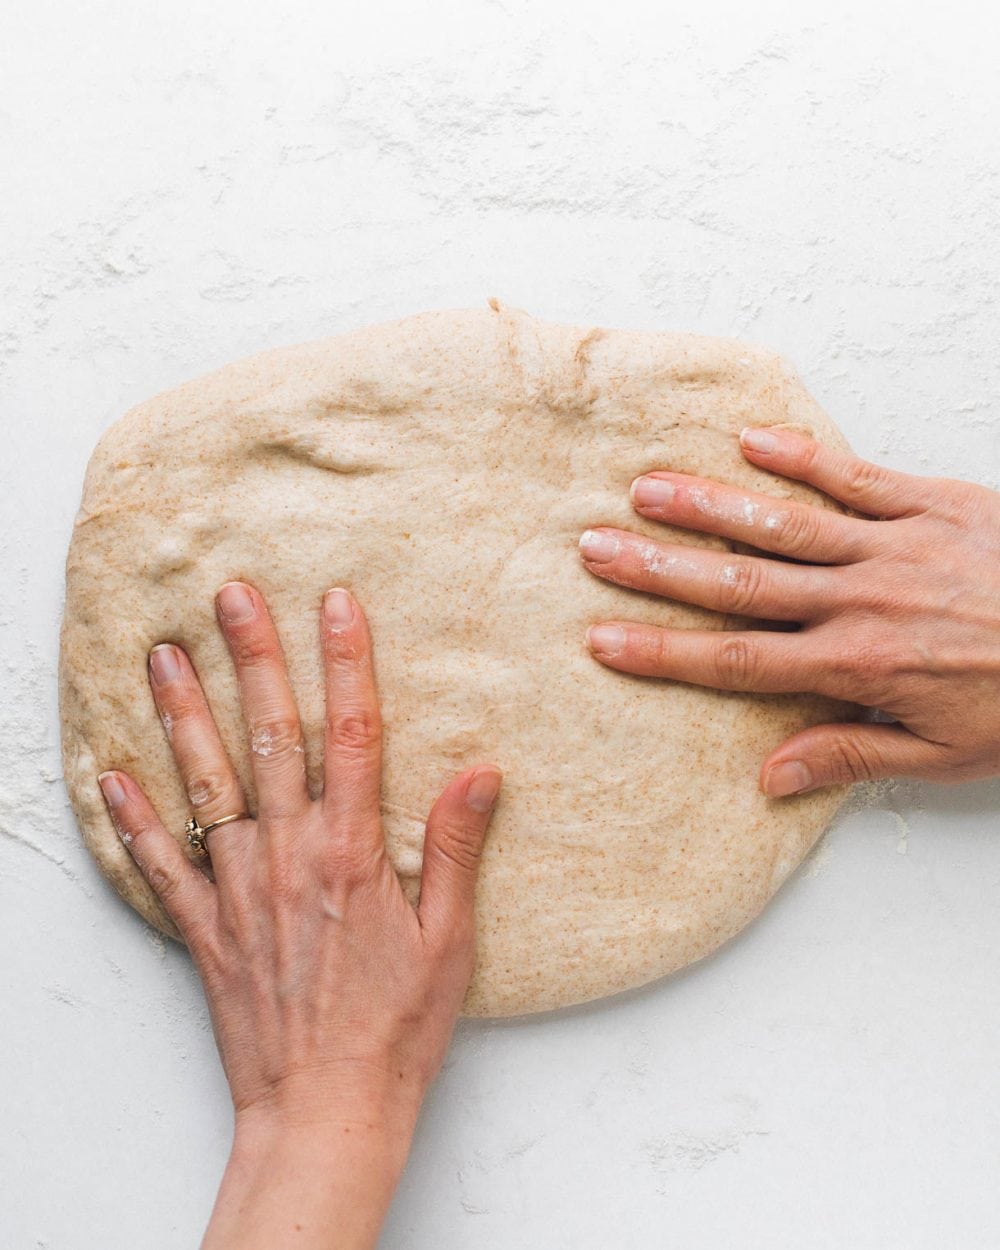
How to Shape Sourdough Sandwich Bread:
There’s good news – shaping sourdough sandwich bread is easier than shaping a round boule of Everyday Sourdough! In fact, I recommend this bread if you’re a sourdough beginner, as the process is relatively straightforward and forgiving. You’re using a loaf pan to hold the bread and give it structure, rather than trying to build structure by building tension with your hands .
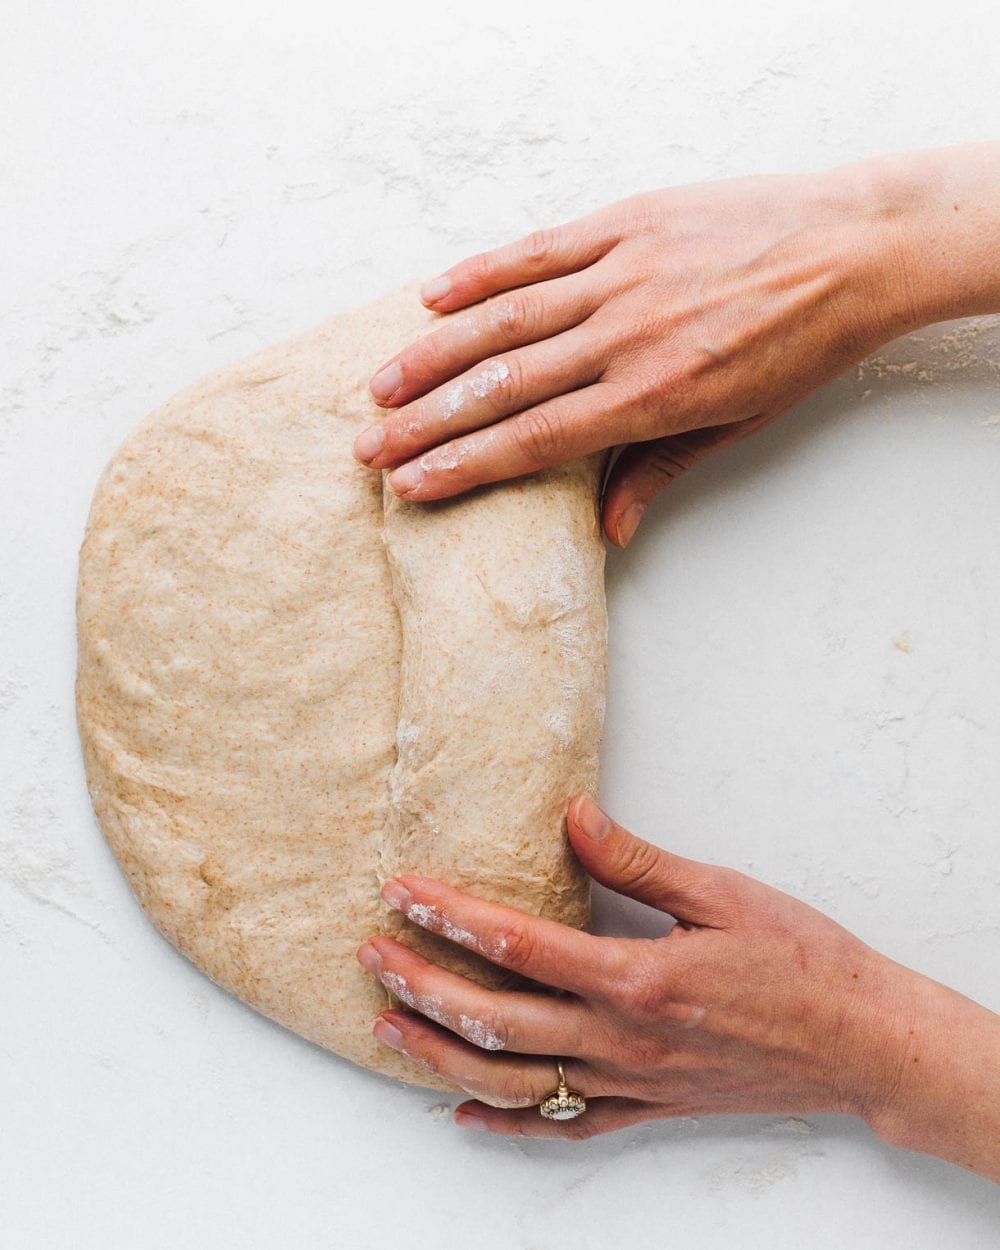
Follow these photos as a guide to shaping your whole wheat sandwich bread.


Temperature is an important ingredient in sourdough baking.
Both the temperature of the LIQUID used to make your dough and the temperature of your HOME (AIR) have a large impact on how fast your dough will rise during the bulk fermentation. By using room temperature milk and storing the dough at around 65 degrees F, the dough rises nicely overnight, taking about 8-9 hours.
*If you use cold milk, your dough will rise slower, which is a way to adjust for warmer than 65 degrees F room temperature.
Yield: 1 loaf
Ingredients
- 70 grams active sourdough starter at its peak
- 20 grams honey
- 340 grams room temperature whole milk
- 35 grams room temperature water
- 190 grams whole wheat bread flour (regular whole wheat works too, ww bread flour is just a little bit stronger in holding its tall shape)
- 255 grams bread flour
- 35 grams all purpose flour
- 8 grams fine salt
- 30 grams softened unsalted butter, cut into chunks
- old fashioned oats, for garnish
Instructions
- Around 8:30pm: In the bowl of a stand mixer, add starter, honey, milk, and water. Whisk with fork to combine. Then add whole wheat flour, bread flour, and ap flour. Attach dough hook and mix on speed 3 of a Kitchenaid until no dry bits appear, about 30 seconds. Let dough rest for 45 minutes, with cloth covering the mixer.
- Add salt and turn mixer on low, speed 2 of Kitchenaid. Add a chunk of butter and once you can no longer see it, add the next, until all butter is in dough. Then turn to speed 4 on Kitchenaid mixer (medium) and mix for 7 minutes. Remove bowl from the mixer, cover with a plastic bag, and let rise overnight in a cool spot, between 65-68 degrees F.
- Around 7:30am, your dough should have increased in size by about 50%. It will have rounded edges and have puffed up, but still look a bit dense. It will not have bubbles or big jiggly like regular sourdough. Dust your countertop with flour and place dough onto it, and let rest for 10 minutes.
- Gently press it into a square-ish shape, popping any bubbles you may see coming through surface. Fold one of the sides inwards about 1/3 of total length of dough. Then begin rolling that side up, until the loaf resembles a log. Use your hands to tuck ends of log in, and gently pull the log towards you to create a bit of tension and seal the seam.
- Use a bench scraper to pick the dough up and place seam-side down in a greased 9 x 5 inch loaf pan. Allow the dough to rest in a warm spot, covered with a plastic bag (that does not touch the top of pan/dough) until the dough has risen to the rim or just above the pan, about 3 to 4 hours. When finished proofing, brush dough with water and sprinkle with oats, if desired.
- Preheat oven to 400 degrees F, with a pan of water that has 2 cups of water in it, placing pan on bottom rack of oven (this creates a steamy environment that the bread loves). Bake bread for 15 minutes, then remove the pan of water. Continue baking for another 15-20 minutes, until bread is golden brown on top. To check for doneness, insert thermometer into center of bread, which should read at least 205 degrees F when complete. While warm, brush top of loaf with a tablespoon or two of butter to keep it soft.
- Let cool in pan for about 10 minutes, then using oven mitts gently tip the bread out. Let finish cooling until completely cool, at least 1 1/2 hours before slicing. Slicing too early while it is warm will result in gummy bread.
Notes
*Bakers Schedule is listed within the post.
*The wonderful thing about this sandwich bread is that it stays soft and delicious for 5ish days! This is achieved by using butter and milk, and sourdough starter. Store this bread in a plastic bag once you cut into it, cut side down on the counter.
Did you make this?
tag @heartbeetkitchen on instagram and hashtag it #heartbeetkitchen
April 22, 2021
Melissa
July 21, 2026
Can this be baked in a covered cast iron pan? If so, do I need to adjust the temperature and times for covered and uncovered?
Amanda Paa
July 21, 2026
Hello! I haven’t tested that, sorry!
Beth
July 9, 2026
This is the BEST wheat sourdough sandwich bread recipe! Absolutely perfect the first time making it, following the exact instructions. Thank you so much for this! 😊
Lori
June 15, 2026
Excellent recipe! I’ve been in search of a light whole wheat sourdough sandwich loaf recipe that is fully fermented overnight with sourdough starter and doesn’t require a lot of babysitting, stretching, and pulling. This one is it! I will even confess that I was very tired the night I made it and skipped dragging out the Kitchen Aid mixer and the extensive kneading and simply mixed everything in a bowl by hand, gave it a quick 1-2 minute knead in the bowl by hand, and then let it rest on my counter overnight in a cool kitchen. (I think proofing in a cool kitchen as recommended is key.) The crumb was outstanding, even without the extensive kneading. This will be a go-to recipe now. Thanks!!
Amanda Paa
June 16, 2026
So great to hear that it worked well with hand kneading! Thanks for making the recipe.
Kathy
June 9, 2026
Just tried this recipe as my first sourdough bread attempt. The recipe must be very forgiving because I thought I didn’t follow the steps exactly but still got a beautiful loaf of whole wheat sourdough bread. I can’t wait to make my next loaf!
Eloise
June 11, 2026
Could I use maple syrup or granulated sugar instead of honey? My son can’t eat it. Thank you!
Amanda Paa
June 11, 2026
Yes, maple syrup works too!
Andrea Hofer
June 1, 2026
What makes this bread so crispy for a grill sandwich? I’ve used many other sandwich bread recipe but they are to soft for grilled.
Naz
May 24, 2026
Can I make this with 100% wholemeal flour ?
Amanda Paa
May 24, 2026
Hi! Unfortunately not. The hydration would need to be adjusted, and without the other flours, it would not be as soft.
Silvia
May 14, 2026
I have made this recipe twice now. The first time the loaf came out flat and dense, but I think that’s because I didn’t use my starter at its peak. It was also the very first time I have tried to make a sourdough bread! The second time it came out really soft and absolutely delicious! My only issue is that it didn’t puff up much in the oven. It’s it supposed to, or does it not get much bigger while baking?
Amanda Paa
May 24, 2026
Hi Silvia! That sounds like an overproofing issue with the dough. As you continue to practice more with sourdough, that will improve!
TC007
April 23, 2026
Hey Amanda, I am just about to make this for the first time and I’m guessing I will be doing it in the 9×5 bread pan as you suggest, but I did wonder if you’ve ever tried doing it in two of the smaller pans, I think maybe 8×4 is what they are? Are? Or anyone else who’s made the recipe try this? I’m just wondering if it can be done and if so, is there a timing or temperature difference for the oven? Thanks in advance!
Amanda Paa
April 23, 2026
Hi Tara! I haven’t tested this in 2 smaller pans. Sorry!
TC007
April 23, 2026
No worries! I may try some time so I can freeze one and have one out, and I’ll try to remember to come back and share how it works if I do!
Andrea Hofer
April 22, 2026
I think i forgot to add the 35g flour. Dough is very sticky, can I add it this morning? Mixed Dough yesterday
Amanda Paa
April 22, 2026
Unfortunately it’s too late to add this morning. I would use lightly wet hands to shape and get it into pan. Then bake.
Andrea Hofer
April 21, 2026
Can I substitute bread flour for all-purpose. I see recipe use tree kinds of flour but I don’t have bread flour
Amanda Paa
April 21, 2026
Hi! Yes that will be fine – just add an additional 5 grams water.
R
April 20, 2026
This is such a fantastic recipe. I baked a fantastic loaf in my 1st attempt.
Amanda Paa
April 20, 2026
That makes me so happy to hear!
Nancy k whitehead
February 19, 2026
Can I make this and omit the honey and not change any other ingredients? I’m looking for a whole wheat sourdough bread that isn’t sweet…..
Amanda Paa
February 19, 2026
Hi Nancy! The very small amount of honey does not make this bread swear at all; in fact you won’t notice it in the end result. It is part of the recipe because it balances the flavor of the whole wheat, and helps with fermentation.
Emma
February 18, 2026
This is such a lovely recipe. I have been able to completely make this recipe dairy free with great sucess, using coconut milk and palm shortening. It also works amazing with 100% fresh milled wheat flour (hard white).
TC007
April 22, 2026
I’m so glad that you shared this information! I was just looking to see if someone had shared how they made it dairy-free 🙂 appreciate you taking the time to share!!
Emma
April 22, 2026
Coconut oil works great too!
TC007
April 22, 2026
Awesome!! Thanks! I am baking mine tomorrow with coconut milk and avocado oil (one of my fave butter subs, but now that I know coconut oil is a good option I may go that route next time and embrace full coconutiness! Ha!
Gayle Mutchnik
January 12, 2026
I am gluten sensitive and I am looking for a sandwich bread recipe that I can put in the refrigerator to
Ferment overnight. Any suggestions?
Elise
January 12, 2026
What would happen if I treated this like a regular sourdough recipe by doing stretch and folds every half hour instead of kneading it in the KitchenAid for 7 minutes? Was the kneading a choice you made just to save time and energy? I’m curious how this affects the loaf.
Laurie
June 16, 2026
This is exactly how I made it. It turned out beautifully.
Duane
November 15, 2025
I used your ingredients—doubled for two loaves. I started with an hour of autolyse with 1:1 ww flour to very warm liquids. Without a mixer I added honey, butter, remaining liquids and bread flour. (200 g of starter because that’s what I had on hand) It came together like a dream! After ten minutes of kneading I gave it a ten minute rest and it was a very moist, very stretchy and well-behaved dough when I had come back to it. I put it in a cool garage overnight for the bulk rise. In the morning I made two balls and let them rest for twenty minutes. Then I formed loaves, popped them in short bread pans and let them rise in an 80 degree oven for an hour. I baked per your recipe.
Amazing! With inspiration from your recipe I have finally dialed in a soft, tasty, user friendly, fully sourdough sandwich loaf. Beautiful crust and soft interior crumb!
Amanda Paa
November 15, 2025
OH, this is so wonderful to hear! And thank you for your notes, it’s so helpful to others.
Michelle Baker
November 6, 2025
LOVE this loaf. I use sprouted wheat flour. I always mix by hand and it turns out perfect. It’s no fuss and I am lazy and actually mix it all together from the get go. Thank you for saving me from purchasing store bought bread for my kids lunches. (;
Amanda Paa
November 6, 2025
Oh, hearing this has given you a better bread for your kids makes my day!
charlotte cerne
November 2, 2025
Could you convert recipe amounts to cups etc and not weight. I bake and hate weighing items . Never have a problem. Seems like a nice soft bread and want to try.
Jessica
July 26, 2025
I just made this for the first time and it turned out perfect! It’ll definitely be in my regular rotation from now on.
Amanda Paa
July 26, 2025
So glad you enjoyed it!
Stacey Parker
July 23, 2025
I am new to bread making. This is exactly what I have been looking for, except that I do not have a stand mixer. Can I still make this without one?
Amanda Paa
July 23, 2025
Hi Stacey! For this recipe you’ll need a stand mixer unfortunately. It needs that for incorporating the butter.
Stacey Parker
July 23, 2025
Hello Amanda. You convinced me! KitchenAid is having a sale on the Artisan Mini 3.5 quart Stand Mixer. Will 3.5 quarts be big enough?
Amanda Paa
July 24, 2025
Hi Stacey! I haven’t worked with the mini, so I can’t say for sure, but using my best guess, I think so!
Sara
July 22, 2025
My daughter is dairy free, could I use the higher fat oat milk and vegan butter? Thoughts?
Amanda Paa
July 22, 2025
Yes, others have done so with success! I think a few people talked about in their comment, if you scroll through.
Janna Ward
June 12, 2025
I made the whole wheat sandwich bread and we love it. I especially liked your written timeline. I was however a little concerned about leaving it out all night on the counter as it contains milk.
Amanda Paa
June 13, 2025
Hi Janna! So glad you enjoy the sandwich bread. And in regards to the concern about leaving out dough that has milk in it, research shows that dough made with milk can rise at room temperature on the counter due to the the yeast’s activity. The yeast in the dough will consume the sugars in the milk before any harmful bacteria can take hold, especially if the yeast is vigorous. Basically, the yeast outcompetes the bacteria.
Angie
May 31, 2025
THIS is the loaf to make if you’re a pb&j, turkey sandwich loving family like we are. All the crusty, high hydration sourdoughs in the world are lovely, but this is literally our daily bread. Haven’t stopped making it since I started–thanks for the perfect soft, mildly soured wheat loaf that appeals to the whole family!
Lori K
May 16, 2025
This recipe is so easy and the resulting loaf absolutely perfect.
Curious if anyone has made this with any seeds included ?
Barb
March 28, 2025
Made this today. Nice texture and wonderful flavor
The instructions were easy to follow.
Thanks for the recipe
Hope
March 21, 2025
Can I make this as a boule instead of load pan? I love the recipe.
Amanda Paa
March 22, 2025
Hi Hope! I haven’t tested that, please let me know if you do.
Milly
March 12, 2025
It is SOO good. I’ve baked bread for the first time in my life and I really liked it. I think I won’t go back to buying bread from the grocery store ever again. But I’d like to know if there’s any way to find the nutritional information for this bread. I tried calculating it here https://foodval.com/ but I’m not sure. Can you provide some information or recommend an app or website where I can calculate it
Rachel
February 6, 2025
After I made your eye sourdough and LOVED it I’m going to try this own. But I don’t have a stand mixer or much experience with kneading bread. How much time would I knead? Any other specific advice for handmaking? Thanks!
Cynthia K
July 22, 2025
Hi Rachel – I don’t know if you figured this out already or not, but the mixer does the work of incorporating the butter into the dough – not the easiest thing to do by hand. Having said that, I have seen some YouTube videos of people doing that, so you might do an internet search for “how to incorporate butter into dough by hand” and see what you can learn. One thing I can guarantee – you’ll have strong arms!
Hannah
February 3, 2025
Would it make a huge difference if I only use WW all purpose and unbleached white all purpose flour? I generally don’t keep any type of bread flour on hand!
Amanda Paa
February 3, 2025
Hi Hannah! When you say “WW all purpose”, do you mean white whole wheat? Or regular whole wheat flour like this?
Barbie
July 23, 2025
Hannah, I just made it with regular whole wheat flour and all purpose flour, no bread flour and it turns out just fine. I do buy a better quality of flour but still all purpose.
Denise Brownell
January 16, 2025
I’ve made this recipe numerous times ….always a nice loaf.
Amanda Paa
January 18, 2025
So glad to hear that!
Pam Branch
November 11, 2024
I love this recipe! I’m a fairly new baker and have not had much luck in my Dutch oven. All my loaves are real hard. I tried this and it’s wonderful! But I can’t find any nutritional information on this. Would it be possible to get calories, carbohydrates, etc.?
Amanda Paa
November 12, 2024
So glad you had success! Here is a free nutrition calculator you can use.
Brettani C Shannon
October 14, 2024
I cannot believe how good this bread turned out! I actually messed up the recipe a little bit. I put the butter in in the first step. I had very low expectations to begin with by the way, because I’ve had no luck baking. But it really turned out beautifully! My whole family loved it. Actually tasted better and better as the week went on! I couldn’t believe it! Perfect texture. And it was so easy!!! I am making it every week!
Amanda Paa
October 14, 2024
Yay, I’m so glad you had success! This is a forgiving recipe, as you mentioned. Happy baking!
Bob
October 7, 2024
I’ve made this recipe at least a dozen times. It’s an easy recipe to follow and is absolutely delicious
Kayla
September 24, 2024
I’ve made this bread multiple times and love it! Do you think I could replace the wheat flour with dark rye?
Amanda Paa
September 24, 2024
Hi Kayla! I’m so glad you like this recipe. Rye flour would not be interchangeable for whole wheat here, as the hydration would need to be adjusted and tested. It would be too wet written as is. You could make my Rye Sourdough Bread and bake in a loaf pan?
Miriam Attard
August 26, 2024
Gorgeous!! I used oat milk & vegan butter as you recommended. Super easy & the result is soft, tasty sandwich bread. Thank you!!
Amanda Paa
August 26, 2024
Yay, so glad to hear that it turned out great with those vegan swaps! Thanks for leaving your notes and making the recipe.
Doug
August 12, 2024
I really like this recipe and have made it “as written” a couple of times, but I just made a double batch and altered the method a bit for my personal schedule and thought I would share my results.
I doubled all the ingredients (except I just used AP flour and AP whole wheat flour, which is what I had on hand). I mixed the dough up around 1 pm and tossed it into the fridge overnight. The next morning I shaped the loaves, and it took a long time (7 hours) for the dough to rise. I baked the loaves at 375 for 40 minutes and they came out… perfect!
Jenny B
August 12, 2024
This is one of my favorite sandwich bread style sourdough recipes, thank you! The only hiccup I am having is during the final rise parts of the top of the loaf start breaking apart. It’s rising as it should but looks like it starts to stretch and break as it gets towards the end of the rise. I have never seen this before so I was curious your thoughts on why this might be happening? Thanks!