Peanut-y Hot Fudge Ice Cream Cake with Oreo Crust
By Amanda Paa – Updated August 14, 2025
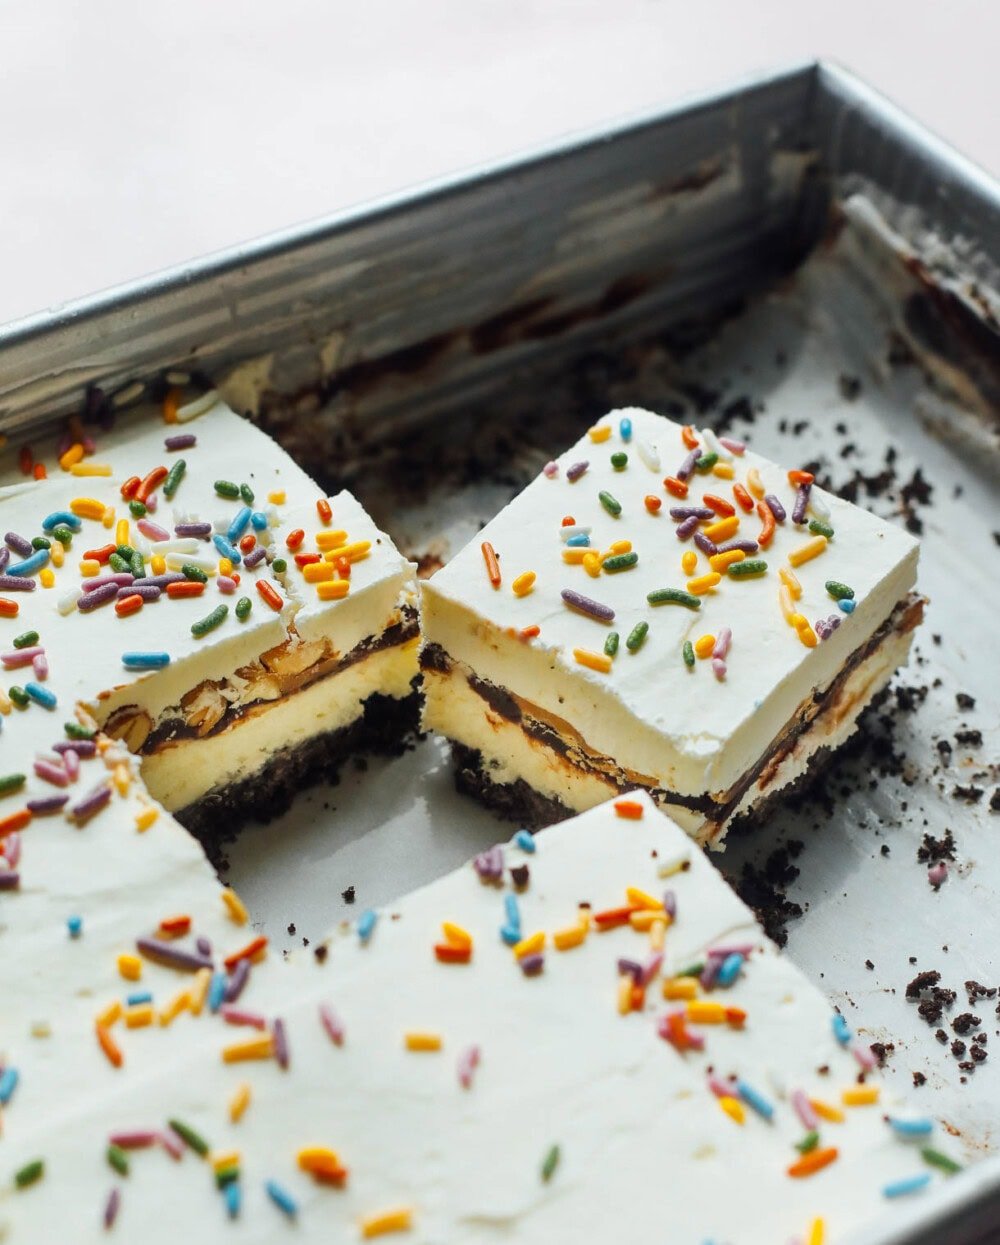
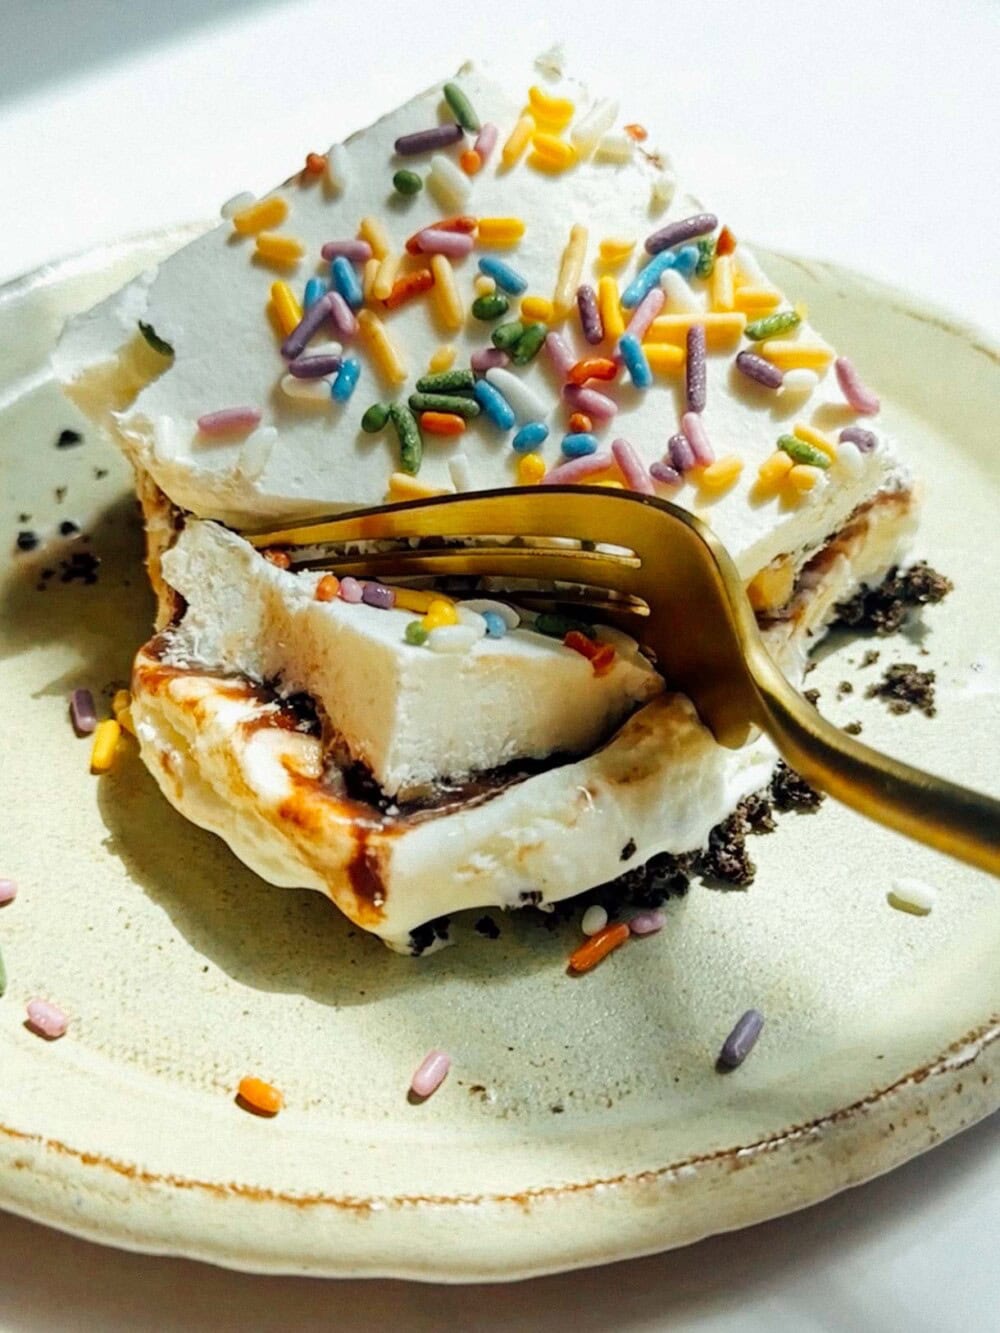
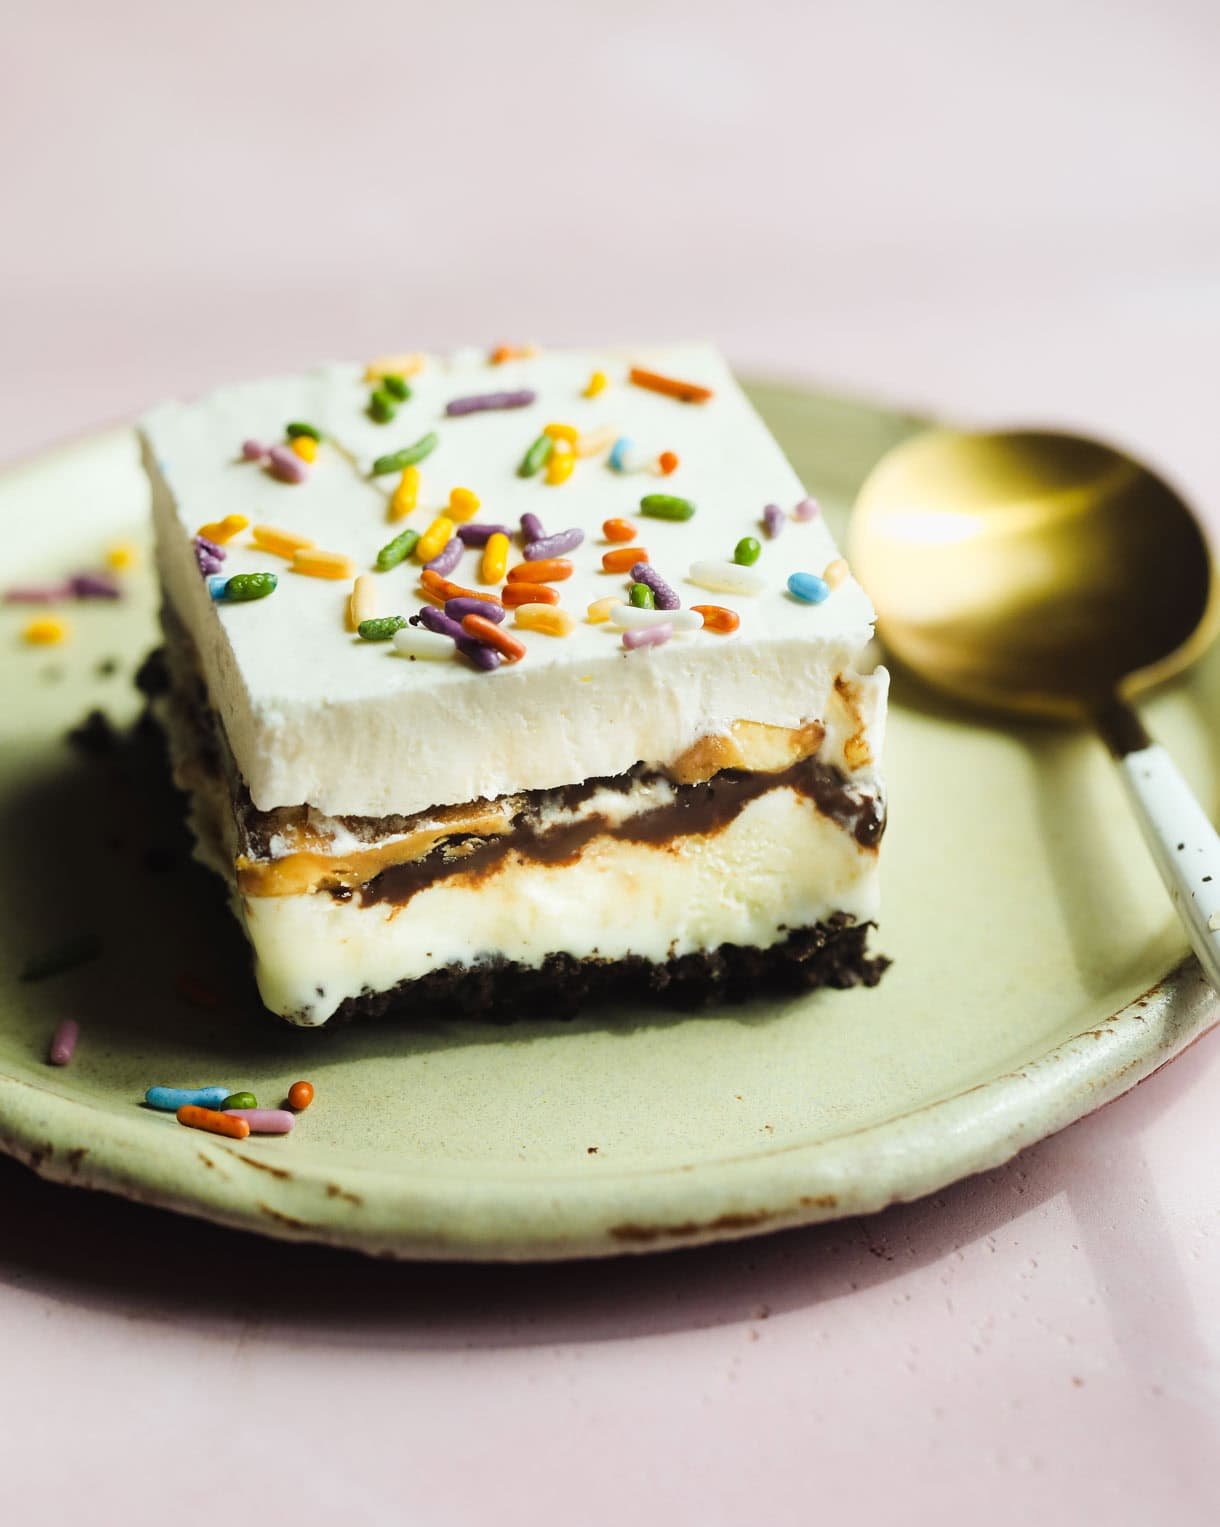
Think of this as the ultimate mic-drop ice cream cake, made in a 9x13 inch pan with layers of goodness! It starts with a buttery Oreo crust that gives just the right amount of crunch under layers of creamy vanilla ice cream, rich swirls of hot fudge, and a peanut butter layer so good you’ll want to eat it with a spoon. Then it’s topped with a cloud of homemade whipped cream. Best part? You can make it several days ahead and pull it out like a total hero when the craving (or guests) hit.
Jump to Recipe
This post may contain affiliate links. Please read my disclosure policy.

This summer we were set to host a family birthday on a blazing 90 degree day. I really didn’t want to turn the oven on, but I also realllllly wanted to have a birthday cake. I thought back to the Buster Bar ice cream dessert (with peanuts, hot fudge, and vanilla ice cream – like the Dairy Queen treat) my mom used to make growing up, which was always so delicious and could feed a crowd.
So I started there and incorporated a few of my other favorite ingredients like peanut butter, duh – and homemade whipped cream to elevate it. A few bites in and my family crowned it the OMG Ice Cream Cake because it’s “oh my goodness”, melt-in-your-mouth, peanut butter and chocolate goodness.
The ratios are right, the sweetness is right, and the cool, creamy, refreshing texture is SO right.
– It starts with a sturdy Oreo crust (I use gluten-free Oreo’s and they work perfectly! No one even knew.), which gives it a nice base and cookies and cream vibes.
– Then good quality vanilla ice cream. I like Tillamook for how rich and custardy it is. Since this is the thickest layer, you really want to choose a vanilla ice cream you enjoy on its own. – I like Tillamook
– A layer of hot fudge. I found this brand which is less processed and less sweet. It has incredible dark chocolate flavor; I highly recommend seeking it out.
– Salted, roasted cocktail peanuts. These are the ones that have the thin skin on the outside. And yes, they go in whole, no chopping. And they are the perfect salty crunch to balance the sweetness.
– A drizzle of melted peanut butter, because everything is better with peanut butter. I like it because it also adds a little saltiness.
– And homemade whipped cream! I add 2 tablespoons of cream cheese to stabilize it, which also helps it stand up to freezing. The whipped cream is barely sweetened with powdered sugar, so it’s like a light and creamy cloud on top.
Think of this as the ultimate summer mic-drop dessert. And the best part? You can make it ahead and pull it out like a total hero when the craving (or guests) hit.
Peanut-y Hot Fudge Ice Cream Cake (9×13 pan)
This easy homemade ice cream starts with a press-in Oreo crust, followed by rich and custardy vanilla ice cream, hot fudge, salty cocktail peanuts, peanut butter, and whipped cream! It's the perfect balance of salty sweet and has both crunchy and creamy textures. It's made in a 9×13 inch pan, so serves a crowd and can be made many days ahead.
Yield: 20 servings
Equipment
Ingredients
- 12 ounces regular Oreos (I use 1 package of gluten-free Oreos and they're great!)
- 4 tablespoons butter, melted
- 1 1/2 quarts good vanilla ice cream
- 10 ounces hot fudge, lightly melted
- 1 cup roasted, salted cocktail peanuts
- 2/3 cup peanut butter, melted and slightly cooled
- 2 tablespoons softened cream cheese
- 1/4 cup powdered sugar
- 1 3/4 cups heavy whipping cream
Instructions
- *I like to make this cake ahead over 2 to 3 days. The active time is VERY short and easy, you don’t have to do much for each step, it just has to freeze a bit in between each one.
- To a food processor, add whole oreos. Pulse a few times, then puree until broken into small, sandy crumbs. Remove cover and add melted butter, stir to coat.
- Line a 9×13 inch pan with parchment paper. Firmly pat down oreo crumbs into an even crust. I like to use the back of a measuring cup to do this. Freeze pan for at least 2 hours.
- When you’re done letting the crust freeze, remove the ice cream from the freezer. Let it thaw about 10 minutes. You don’t want it to be super melty, but scoopable and mostly spreadable. If it gets too melty, the ice cream turns icy when it refreezes. Spread the ice cream onto the crust in an even layer. Then freeze for at least 5 hours.
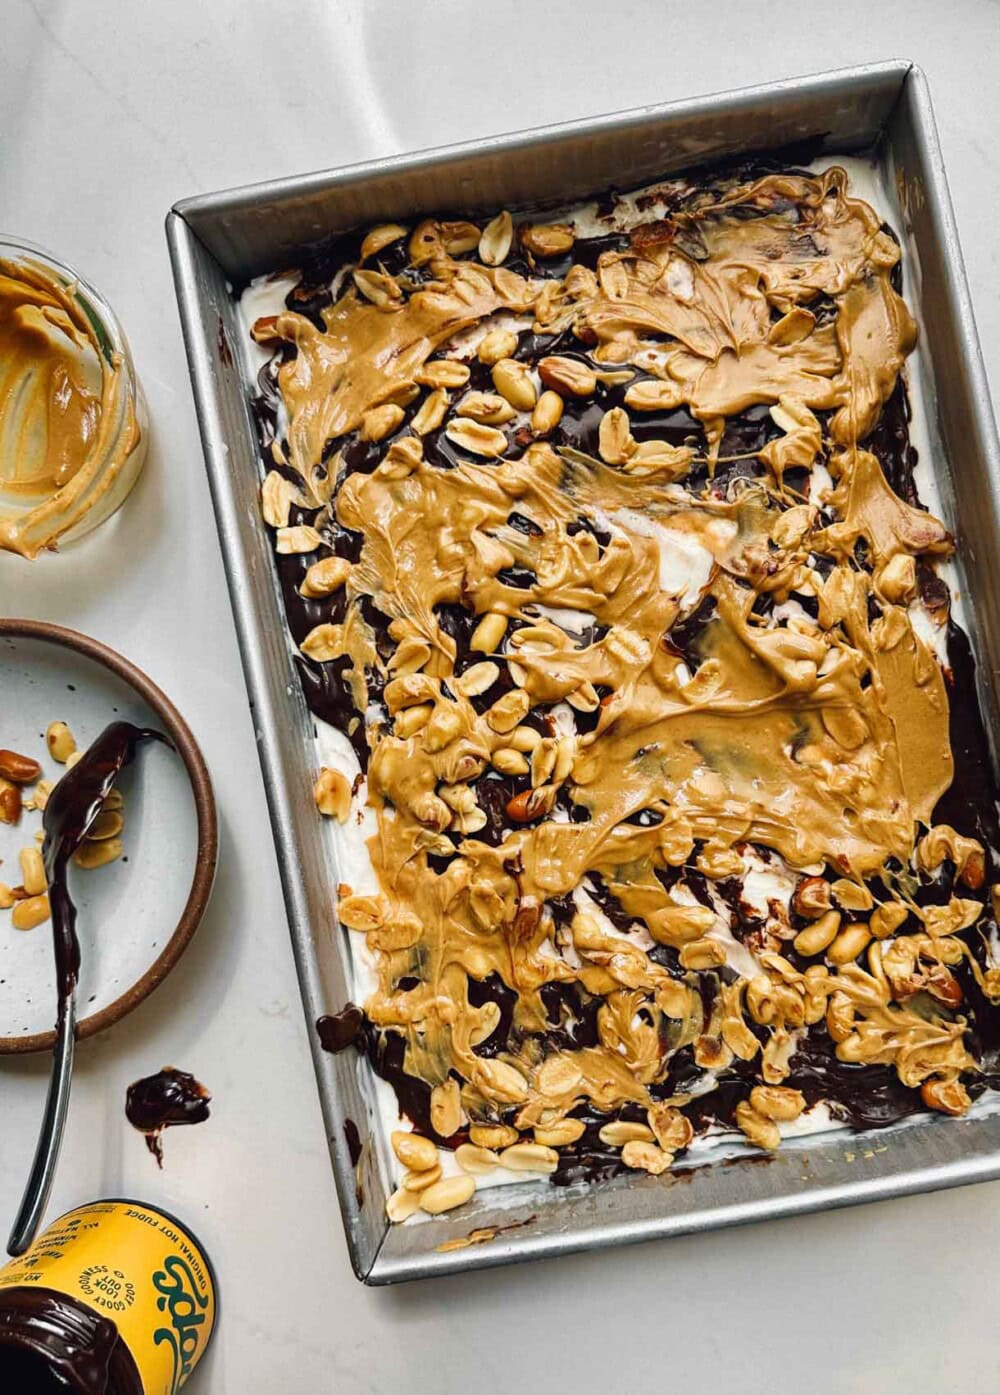
- After that layer is frozen, gently melt the hot fudge in the microwave so it’s stirrable. Let it cool a little, you don’t want it super hot, then spread it over the vanilla ice cream. Top with the peanuts, and drizzle all over with the peanut butter. Gently distribute the peanut butter with the back of a spoon, it won’t cover everything or be totally even and that’s okay. Freeze the pan, covered with foil, for at least 4 hours.
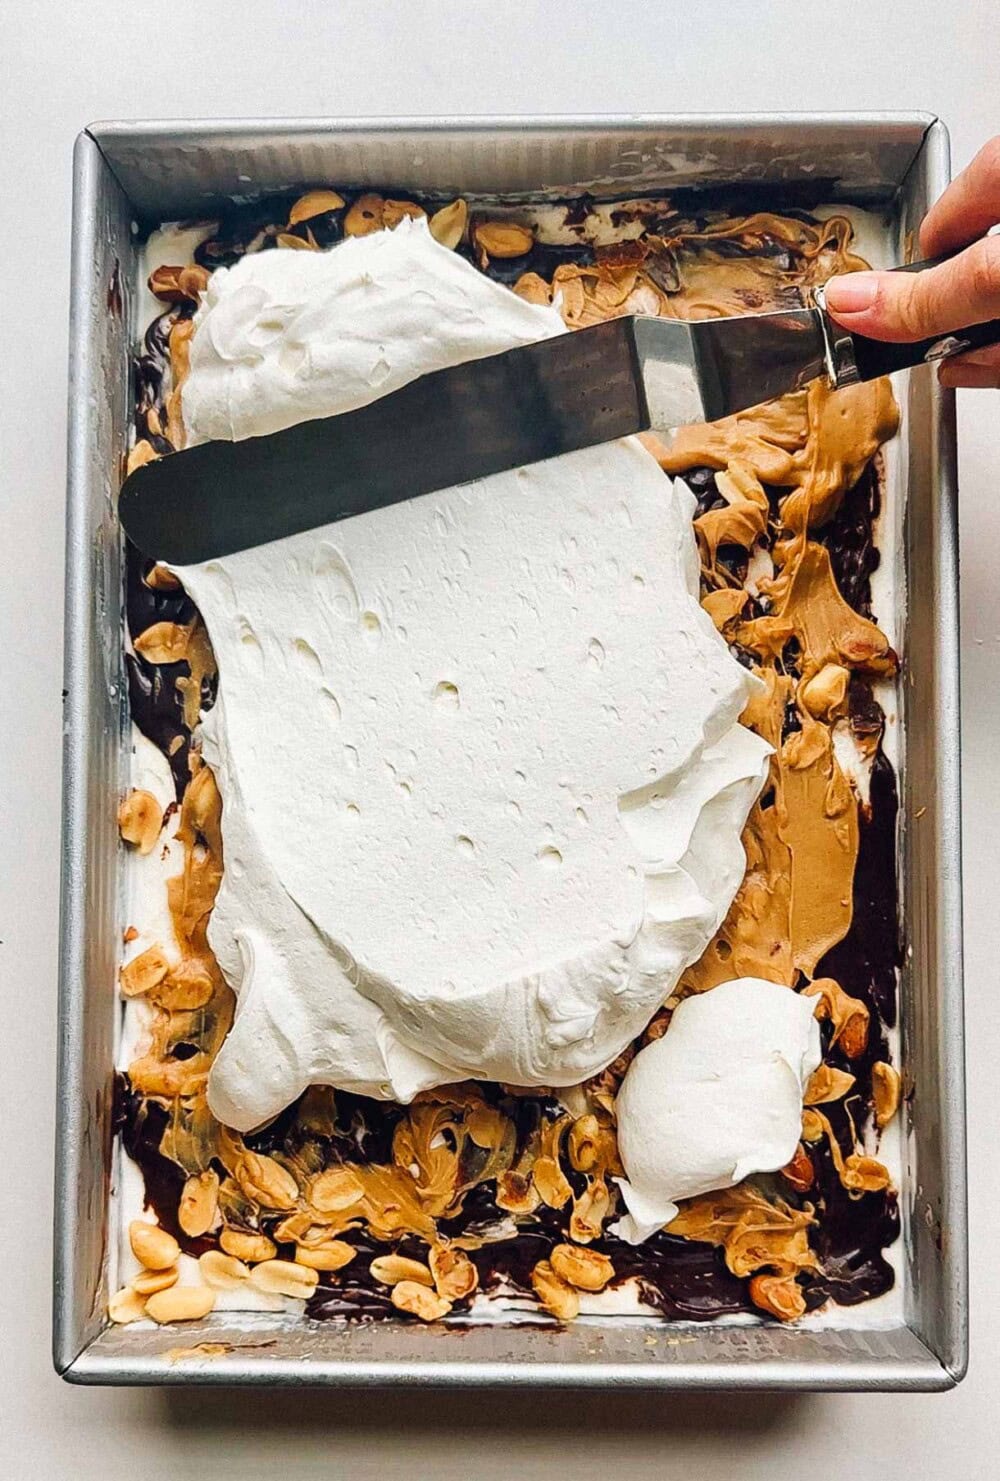
- When you're ready for the whipped cream layer, beat the cream cheese and powdered sugar until smooth. Then add in the heavy cream slowly, while your hand mixer or mixer is going. Whip until you have just stiff peaks. Remove your pan from freezer and spread whipped cream evenly over the top. Freeze for at least 3 hours, up to 5 days.
- 10 minutes before serving, remove pan from freezer so it can thaw a bit to be able to cut. This is also when I add sprinkles to the top just in case they would bleed in the freezer. Enjoy!
Did you make this?
tag @heartbeetkitchen on instagram and hashtag it #heartbeetkitchen
August 11, 2025