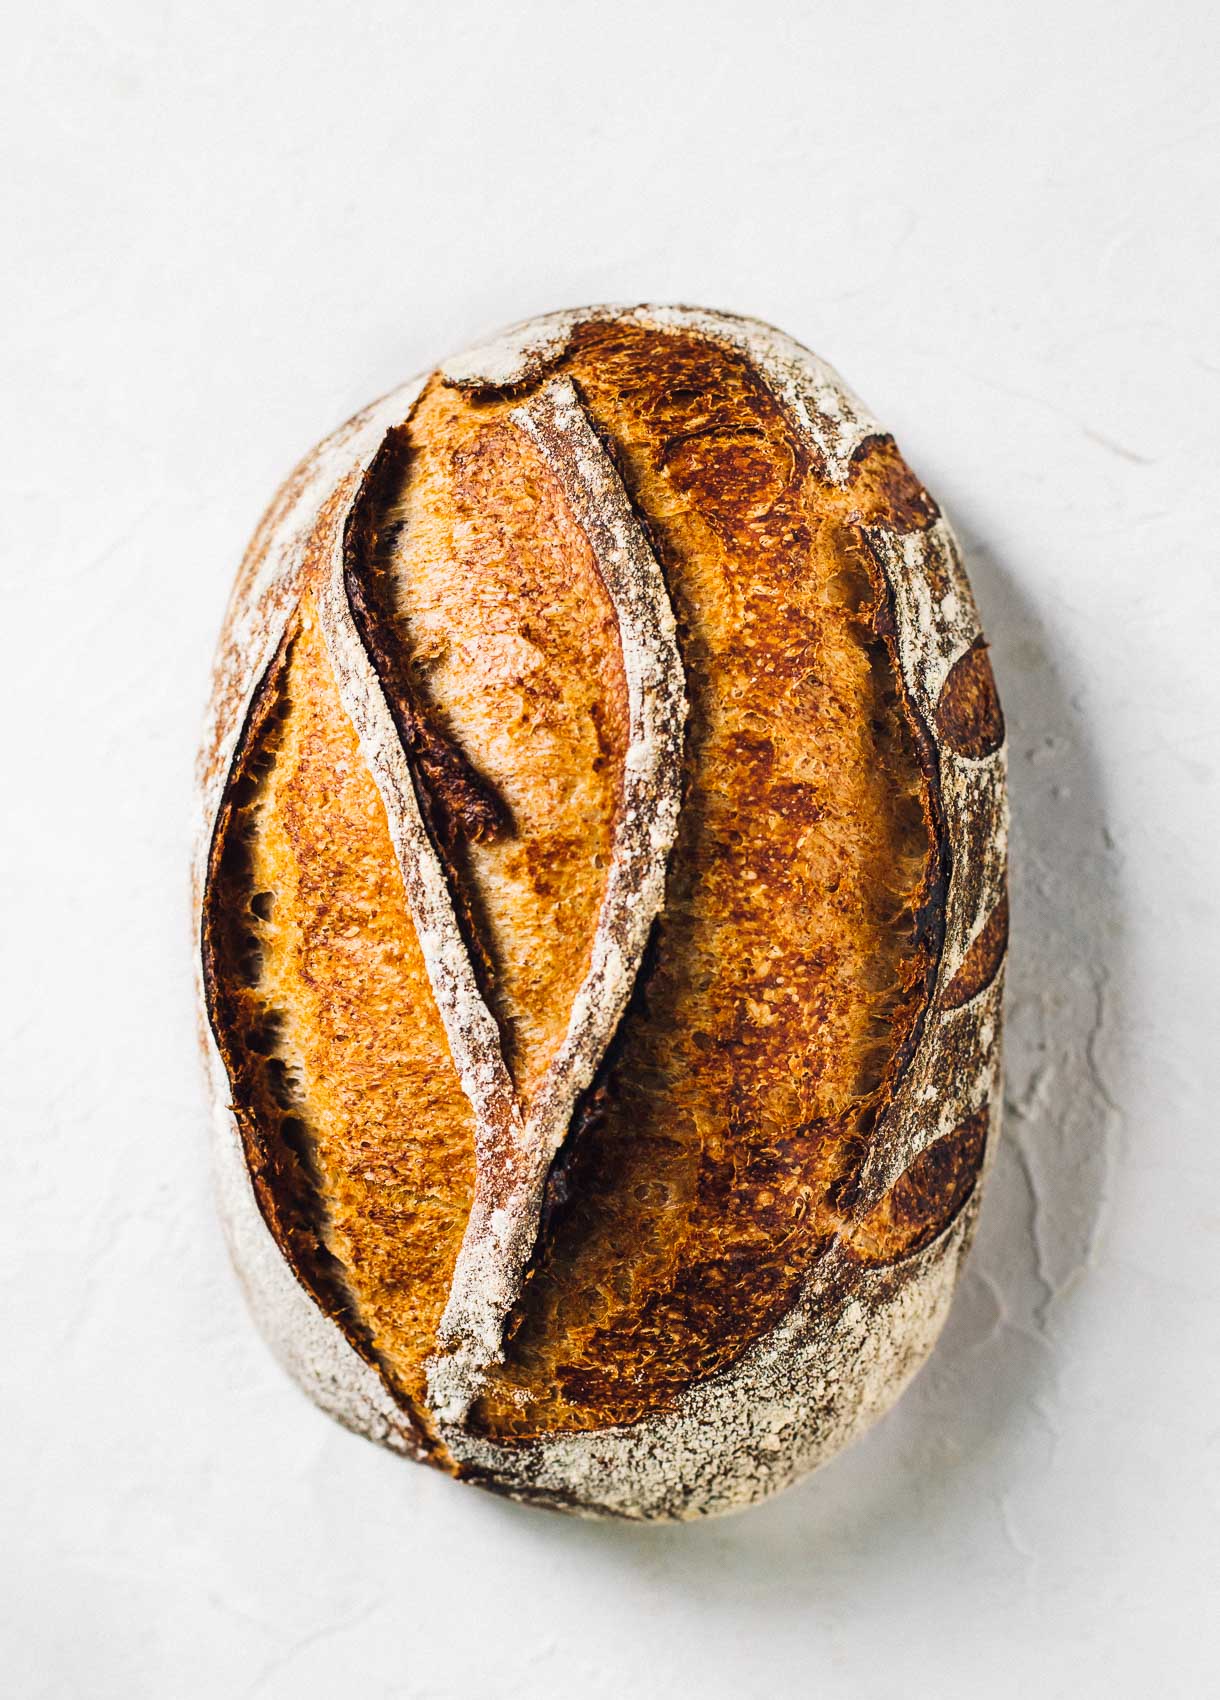
Rustic Rye Sourdough Bread
A light rye sourdough bread with a soft crumb that you can make at home with active sourdough starter. Wonderful flavor and perfect for making rye sandwiches!
Yield: 1 loaf
Ingredients
- 55 grams active sourdough starter
- 280 grams slightly warmer than room temperature water (about 80-85 degrees F)
- 15 grams honey
- 100 grams fine rye flour (also known as light rye)
- 260 grams bread flour
- 40 grams whole wheat flour
- 7 grams fine sea salt
Equipment
- oval banneton (can also use round)
Instructions
- Before beginning, it will be helpful to watch this SHORT VIDEO to see me make this bread, noticing that the dough will be stickier than normal because of the rye flour, but it will come together - you just have to trust!
- Add starter, water, and honey to a bowl. Whisk thoroughly until combined, with a fork. Add flours, and mix together first with the fork to start to incorporate, then with your hands until a shaggy dough is formed, and the bits of flour left just disappear. Sprinkle the salt on top and do not mix in, just leave it on top. Cover with a damp cloth.
- Autolyse: let dough sit for one hour, covered and undisturbed.
- Bulk ferment: Now you will knead the salt that is sitting on top, into the dough for about 2 1/2 minutes. There is no precise way to do this, just think of working the dough through your hands and up against the bowl, push and pull. You will start to feel the dough relax a bit around 1 minute. Then leave the dough alone, covered, for 30 minutes. This counts as your first set of stretch and folds.
- After those 30 minutes pass, perform a set of stretch and folds. Repeat 2 more times.
- Now you will let sit, undisturbed and covered with a damp cloth, for the remainder of its bulk fermentation. You will know it is finished with its bulk ferment when the dough has risen about 75% (just short of doubling) in size, is smooth and puffy on top, with a few bubbles around the edges. It will not be as jiggly as some sourdough you've made before. I find this takes between 5-7 hours, depending on the temperature of your home. If the temperature in your home is above 72 degrees, this will be on the lower end; if it is cooler it will take on the longer end. Always go by the look and feel of your dough to know when it is finished proofing rather than time.
- When finished with bulk fermentation, lightly dust your work surface with flour. Put dough onto the work surface, and pre-shape. Then let sit for 15 minutes on your work surface.
- Then shape your dough using the video attached here as a guide.
- Place dough into your flour dusted banneton, (or flour dusted linen lined banneton) seam side up. (Optional, you can wait 15 minutes after placing it in banneton, and pinch the perimeters of the dough into the center to hold the shape even more, called stitching.) The dough will now go through its final rise. You can do this on the counter, which will take about 1 1/2 to 2 hours at 70 degrees F for the dough to puff up and be jiggly. It will not double. OR you can do the final rise overnight in the refrigerator, with the banneton covered in a plastic bag or with a very damp cloth. You need this for holding moisture in.
- Time to bake. Preheat your oven to 475 degrees F, with your dutch oven preheating inside the oven. When the oven is preheated, flip your dough out gently onto parchment paper and score your dough. If you did the final rise in the refrigerator, take it straight from fridge to scoring. You should score it cold, and DO NOT need to let it come to room temp.
- Then put scored dough into the dutch oven on the parchment, and put cover on. Turn oven down to 450 degrees F and slide dutch oven in. Bake for 20 minutes, then remove cover.
- Turn heat down to 430 degrees F, and bake for 25 more minutes, until crust is golden brown and crackly. Remove from oven, and remove bread from dutch oven and place onto a cooling rack.
- Wait AT LEAST one hour to cool otherwise, the interior will be gummy.