My Everyday Sourdough Bread Recipe
By Amanda Paa – Updated March 5, 2024
Jump to Recipe
This post may contain affiliate links. Please read my disclosure policy.
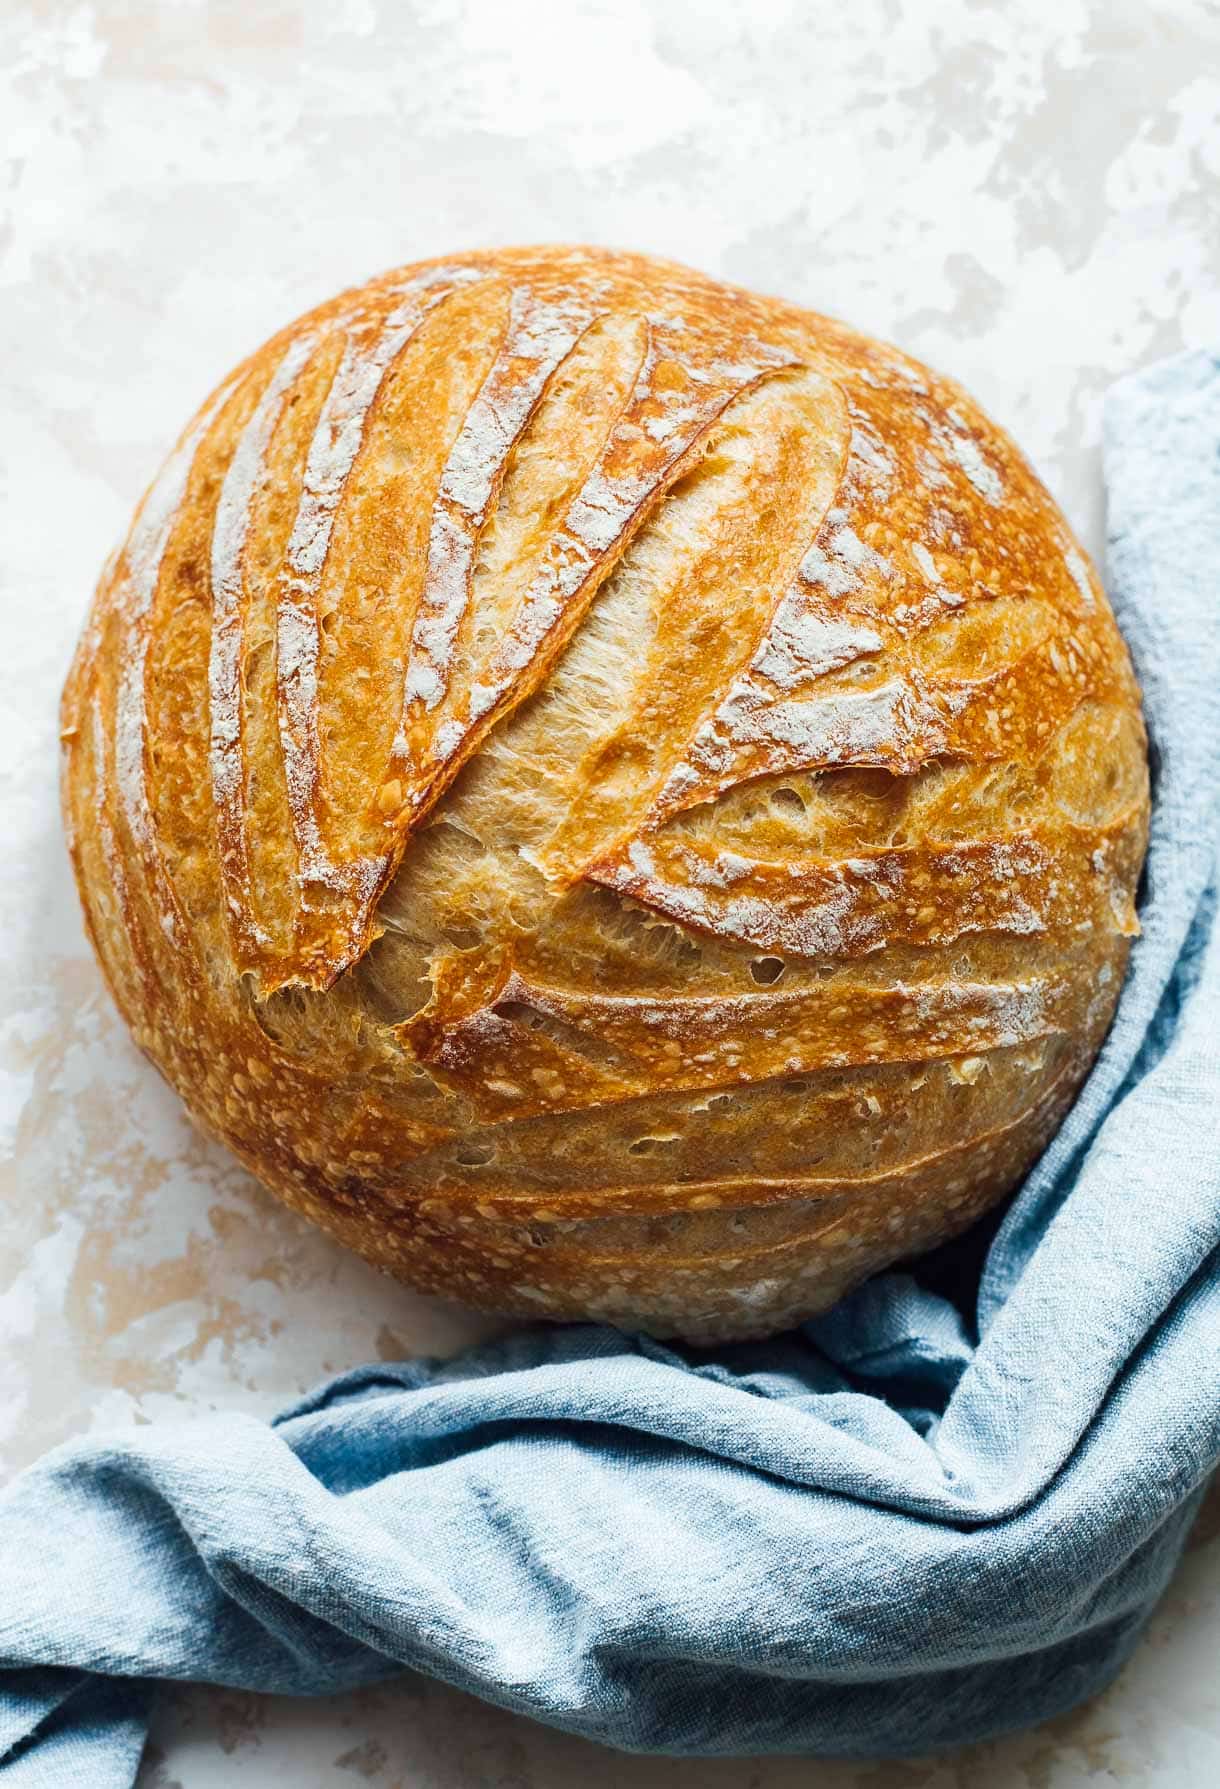
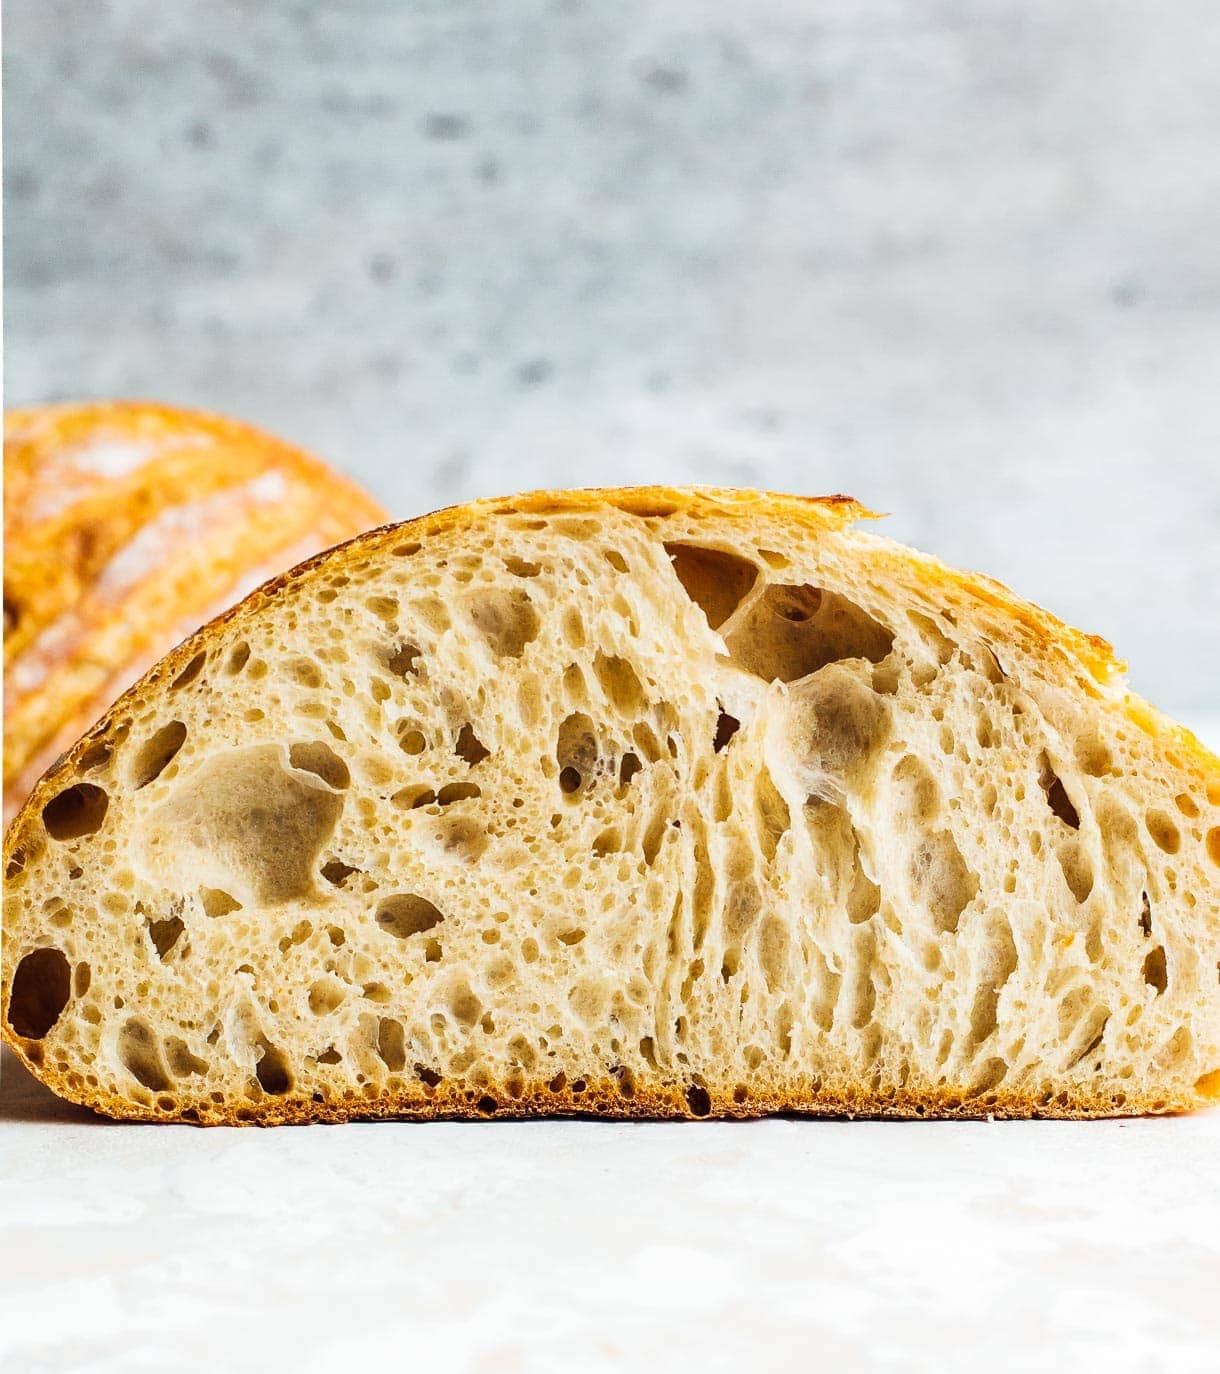
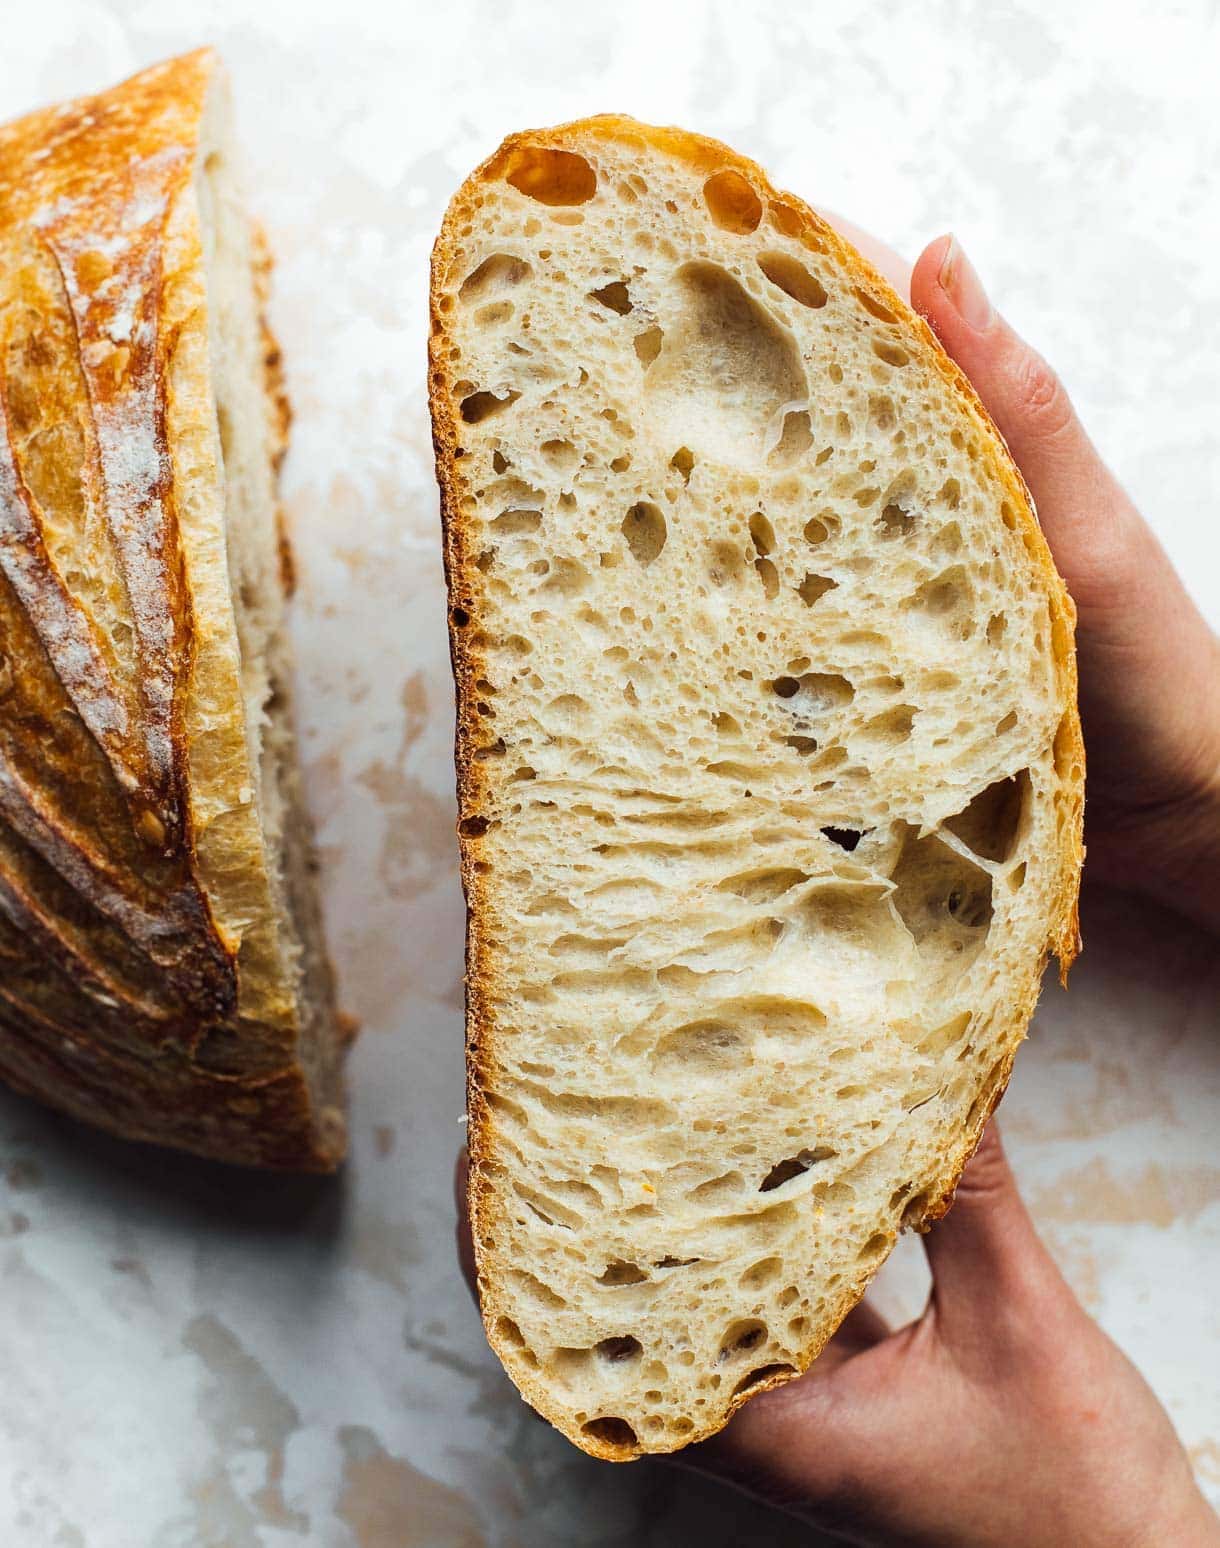
This straightforward sourdough bread recipe is a staple in our house. Made with sourdough starter, this naturally fermented bread has a fluffy, airy interior and crackly crisp crust. All the steps of making the bread are detailed out, as well as sourdough tips for beginners.

Sourdough Bread for Beginners
You know those recipes you know by heart and never have to look up? For me that’s this basic sourdough bread recipe with starter, the one I make every week, that’s completely achievable for beginners too. If you’ve been dreaming of fluffy, bouncy, true sourdough bread, you can make that happen in your own kitchen! I promise you.
Sourdough is all about learning by doing, and every time you get your hands in the dough, each step will make more sense.
I made my first sourdough loaf over 6 years ago, and I haven’t stopped baking. In this post, I’ll coach you through the basic steps and leave you with my favorite recipe. Then you can make your way to whole grain recipes, like my delicious rye sourdough and spelt sourdough recipes.
This basic sourdough recipe is made from mostly bread flour, with just a small amount of whole wheat or whole grain flour to give it some additional flavor and color. This amount is super versatile depending on what flours you have in your pantry. I like to use einkhorn, spelt, red fife, or khorasan.
First things first, you’re going to need an active sourdough starter. I suggest asking a friend who has lovingly fed and maintained their starter or purchasing mine so you can get baking right away instead of spending several weeks getting your started. You’ll be able to use to make sourdough english muffins, sourdough cinnamon rolls, and lots of sourdough discard recipes!
I ship my 13+ year old starter to anyone in the U.S! You can order it here.
While you’re getting started, this post with 5 Essential Sourdough Starter Tips for Beginners that I wrote may be helpful and this Sourdough Starter video. Both should answer many of your questions!
It’s essential for your starter to be healthy and active, so that is has the ability to make your dough rise. If your sourdough has been in the refrigerator, take it out 2 days before you plan to bake and begin feeding it again.
How do I know when my sourdough starter is ready to bake with?
The answer to this question comes from both experience and observing the starter behave, to understand how it reacts to feeding/not feeding, and temperature.
You can just look for these hints that the starter will give you!
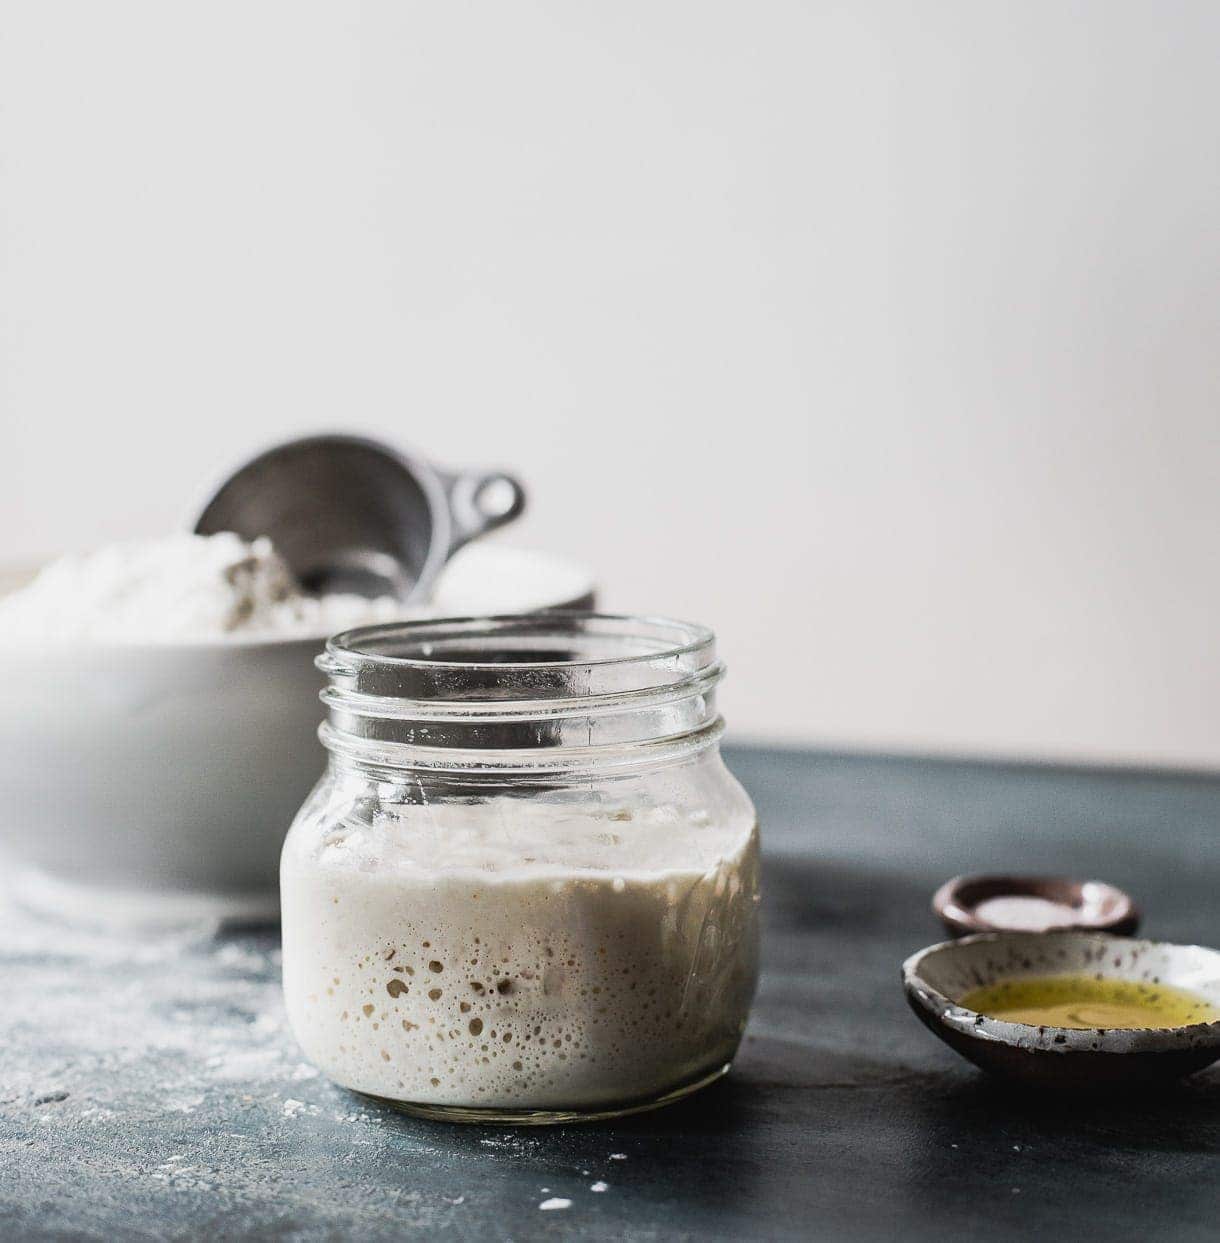
a. It will have at least doubled in size. This will take place over 4-6 hours if the temperature in your house is around 70 degrees. If it’s cooler in your house, it will take a bit longer. I put a rubberband around the jar, to mark the spot it’s at right after feeding. Then, as time passes, you’ll be able to keep track of how much it’s rising.
b. You will see bubbles throughout the sides of the jar, and on top. The top will be a bit poofy and domed.
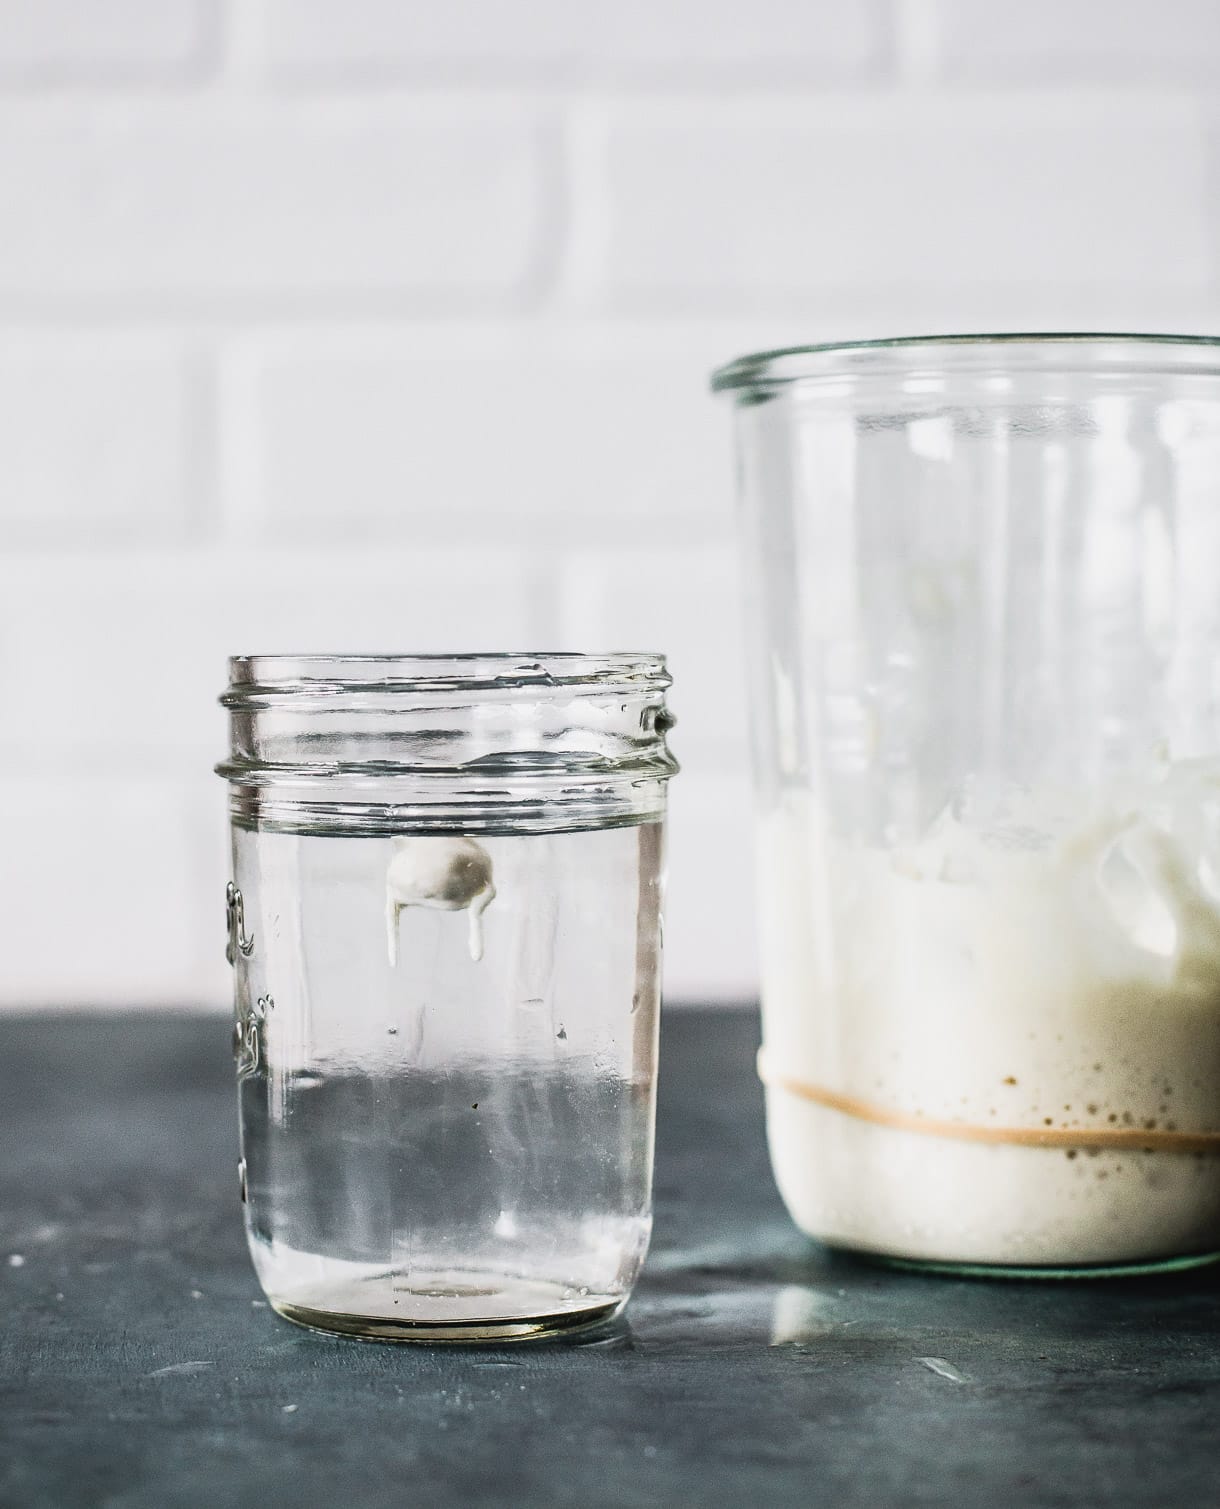
c. The float test is very helpful! When you think your starter is at it’s peak, take a jar and fill with water. Then take a teaspoon of starter – you don’t need a lot – and place it on top of the water. It it floats, you’re ready to bake! If not, you’ll need to wait or go through another feeding.
With the final rise, how do I know when my dough has risen properly and can be scored and into the oven for baking?
There’s an easy test for this stage too, using a fingerprint. Gently press a floured thumb into your risen dough. You don’t need to press down further than 3/4 inch.
If it indents and gradually releases, but still holds a finger shape, you’re ready. If your fingerprint jumps right back up to flat, it needs more time to rise. If your fingerprint indents and doesn’t bounce back at, it is overproofed. That’s okay, just get it in the oven! It will still taste delicious, it will just not rise as well while baking
Once your sourdough starter is ready to bake with, here are the essential steps for baking. You can watch this step-by step tutorial of me making this sourdough bread recipe to help you as well.
- Mix the dough, until shaggy.
- Let dough sit, covered with a cloth, for a half-hour to an hour. This is referred to as the autolyse, which allows the flour to absorb the water, and the gluten strands to develop.
- You will now perform 4 sets of stretch and folds, 30 minutes apart, to strengthen the dough and help it holds it shape in the future. Think of this as sourdough kneading. THIS VIDEO will show you how to do a stretch and fold.
- Now 2 hours have passed, and you will let your dough sit until it is doubled in size and puffy on the top. This is called the bulk ferment, and takes about 6ish hours if the temperature in your house is 72 degrees. It will take longer if your house is cooler.
- After the bulk ferment, the next step is to shape your dough. In THIS VIDEO, I will show you how to know if your bread is ready for shaping, and how to shape it into a round boule.
- Then the dough will sit in a banneton (fancy name for a bread basket) for another 2ish hours for it’s final rise.
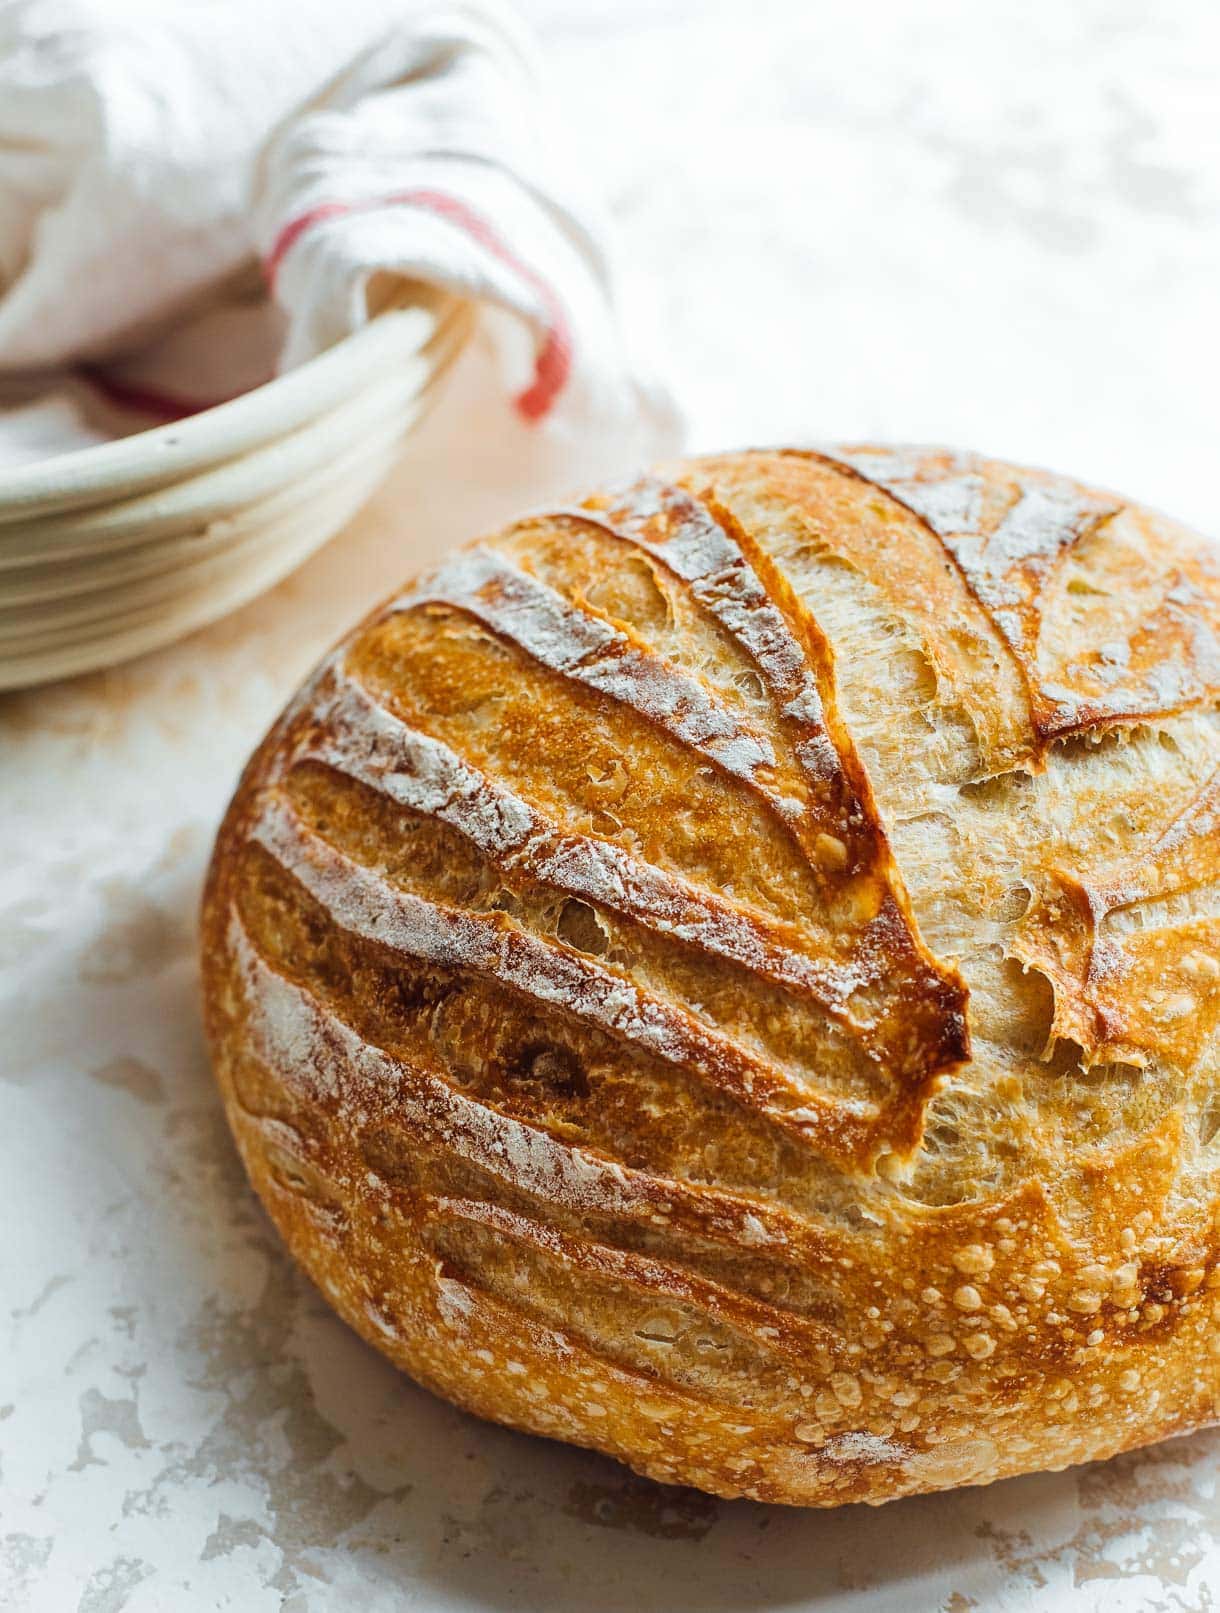
- Then you’ll flip the dough out of the basket, and score the bread – that means using a sharp razor or bread lame to make cuts into the bread so that the steam can escape. You can watch a video of me scoring the dough, HERE. If you don’t score the bread, it will not rise. So make sure you do this fun step.
- Then, BAKE in a dutch oven, and await your golden loaf of sourdough!

This recipe is an adaptation from many recipes and techniques I’ve tried, starting first with Artisan Sourdough Made Simple, The Perfect Loaf, then Tartine, Bake With Jack, and the list goes on. You’ll find what works best for you over time, as well.
And the beauty of sourdough is that no bake with ever be exactly the same as the last, because you’re working with an amazing living culture!
Feel free to ask me any questions you might have, or reference some of my other sourdough resources:
- Sourdough Videos
- Top 10 Sourdough Starter Tips
- Honey Walnut Sourdough Bread
- Whole Wheat Sourdough Bread
- Jalapeno Cheddar Sourdough Bread
Yield: 1 loaf
SCALE:
Ingredients
- 45 grams active sourdough starter
- 305 grams filtered water at temperature around 85 to 90 degrees F
- 370 grams organic bread flour
- 30 grams organic whole wheat flour*
- 7 grams fine sea salt
Equipment
Instructions
- In a large bowl, mix starter and water with a fork, until starter is dispersed. Add flours, mixing with a spatula first. Then with your hand until a shaggy dough is formed, just enough so that flour is not visible.
- Cover with a damp cloth and let sit for 30 minutes.
- Once rested, add salt to top of dough and liberally knead the dough for two minute. Then perform your 1st of stretch and folds. Let rest for 30 minutes.
- Then perform your 2nd set. Let rest for 30 minutes. Then perform your 3rd set. Let rest for 30 minutes. Then perform your 4th and final set. 4 sets of stretch and folds, 30 minutes apart. Here is a video of how to do a stretch and fold. It is easy!
- After those stretch and folds are completed, you will let the dough finish its bulk ferment. This means letting the dough rise on the counter for around 5-6 hours total (from 1st set of stretch and folds) if your house is around 72 degrees. It will take more time if it is cooler, or less time if it warmer. Your dough is finished proofing when: it has risen about 75% (not quite doubled in size), has a glossy top and is puffy, with a bubble or two around the edges of the bowl/bucket. It should jiggle a bit as well when you shake it. These are the signs to look for, rather than going off of time. Time is a general notation because the temperature of water you used and air temperature will be different for everyone.
- Now you'll gently move the dough out of the bowl onto a floured work surface. Let the dough rest there for 10-15 minutes.
- Then, shape the dough. You can watch the video below to learn how to shape it into a round boule.
- Once shaped, use a bench scraper to put the dough into a banneton (proofing basket) that has been liberally dusted with rice flour, seam side of the dough facing up (so the top of the dough is what is touching the bottom of banneton) when it is placed in banneton.
- Cover with a damp cloth, and let rise for a final time, on the counter. This will take about 2 hours, if your house is around 70 degrees. OR you can put the banneton with dough, in a plastic bag or covered with a shower cap (this ensures the dough will not dry out) in the refrigerator and let the final rise happen overnight. The dough can be in the refrigerator for 10-12 hours at this stage.
- Once your dough has gone through its final rise and has risen slightly and is puffy on top, preheat your oven with dutch oven in it to 450 degrees F. You can test to see if your dough is ready by doing gently pressing a floured thumb into the dough. If it indents and gradually releases, but still holds a finger shape, you're ready! If you press your finger in and the indent doesn't move or release, that means it is overproofed (but still bake it!). If your fingerprint jumps right back up to flat, your dough is underproofed (but still bake it!). Let it ferment in half hour more increments, until ready.
- Wait until oven is preheated, then place parchment over the top of your dough and flip over, so that the seam side is now on the parchment paper and you are able to score the top of the dough.
- Score the dough with a bread lame, making sure to go at least 1/2 inch deep in a few spots so that dough can release gases. Otherwise your bread will not rise.
- Place dough on parchment paper into a dutch oven, and put cover on it. Bake for 20 minutes, covered at 450 degrees F. Then remove cover, turn heat down to 430 degrees F, and bake for 25 more minutes, until bread is golden brown and crackly.
- Remove from oven and place load on a cooling rack. Let cool for AT LEAST ONE HOUR before slicing. Otherwise the crumb will be squished and the texture will be gummy.
Notes
*You can also use whole grain einkorn, spelt, red fife, or khorasan flour.
Did you make this?
tag @heartbeetkitchen on instagram and hashtag it #heartbeetkitchen
April 8, 2020
patrick gunn
April 15, 2024
what is 45grams and y do i have to use grams usa is cups
Sherry
April 14, 2024
I’m very new at sourdough baking. I’ve watched a lot of videos. It can be overwhelming. Why do some recipes have olive oil and some do not? What does the olive oil do? I have 6 loaves under my belt is all but I want to learn the best way to make delicious sourdough bread
Rosemary Tadlock
April 7, 2024
First time making this recipe but second time making sourdough bread. Love this recipe and its flexibility as to flavors, refrigeration time and have in the oven now. Can’t wait to taste it because it smells amazing!!
Amanda Paa
April 7, 2024
Yay, thanks for this note!
Cindy Pelz
April 5, 2024
Tried this recipe the first time making sourdough bread turned out very good. Then tried a couple others and came beck to this one turned out best! I keep making every weekend so I can do it by memory, gets easier everytime! Thank you!
Robert disalvo
April 1, 2024
I have made this a bunch and is just awesome! But I was wondering if you can do bulk fermentation in fridge?
Amanda Paa
April 1, 2024
So glad you enjoy this recipe! A bulk fermentation in the fridge will halt the yeast activity and will prevent the loaf from getting a good rise and fluffy crumb. I have tested it and do not recommend this.
THOMAS David SOMERSET
March 22, 2024
Insanely good recipe and bread Great looking, aroma is wonderful, crumb is perfect, taste is addicting and the crunchy crust . Perfect. Thank you so much. Came out PERFECT.
Amanda Paa
March 22, 2024
Great to hear! Thanks so much for making the recipe.
Rosie
March 17, 2024
Thus recipe is great, and my loafs turn out perfect! Just they’re a bit small ;) if I wanted to make a larger loaf by doubling the recipe, how much longer should I bake it for? Thanks!
Julia
March 16, 2024
I’ve seen other recipes say that if doing the final rise in the fridge, it can be in there longer, 12-24 hours. Do you find this is too long for your recipe? Does it have to do with the starter % used? Thanks in advance!
Amanda Paa
March 16, 2024
Hi Julia! If correctly proofed when it goes into the fridge, it will be just fine for up to 24 hours in there.
G
March 13, 2024
Amazing recipe! Made it a couple times and it never fails 🤍
Amanda Paa
March 13, 2024
So glad to hear that! Thanks for making it. 🩷
Mary Stoetzel
March 8, 2024
This was my first sourdough recipe I made. I left my loaf rise in the fridg. over night and seemed like it was ready for baking. However, it didn’t rise like I was hoping. It was delicious tasting though! Thank you for your video’s they were very helpful and will watch again before I make my next loaf.
Diane
March 1, 2024
Thank you for such thorough and detailed instructions I’ve been baking sourdough for a year and have had more unsuccessful loaves than good ones. I really appreciated the videos as I’m a visual learner. My loaf came out great!
Amanda Paa
March 1, 2024
Yay, so glad to hear the videos are helpful! Enjoy your next sourdough bake!
Jenny
February 27, 2024
this tasted delicious but i’m having trouble with my deep score- i am not getting a cut that expands and not getting a good ear, i’m a newbie somewhat but trying to uplevel my skills and trying new recipes (like yours) i love your work and so appreciate your videos and step by step instructions! Where am I going so wrong?? I also tried your rye recipe and it was so delicious too- i’m getting good texture and taste and little airholes but my loaves are flat and i’m not getting a good ear…. hmmmm??? Thank you in advance for any guidance!!!!!!! Jenny
Amanda Paa
March 1, 2024
Hi Jenny! If you are not getting a good ear and your loaves aren’t rise as you’d like, that sounds like an overproofing issue most likely. It could also be a weak starter. Both are common when you’re a beginner so just keep practicing! You can DM me on instagram some photos of the crumb and I can help assess better! @heartbeetkitchen
Jon Madson
February 26, 2024
Very user friendly, especially when your a newbie to sourdough making.
Sharlott Lather
January 10, 2024
It is my first time making the recipe. I was taking one side and stretching and folding over to the opposite side of the dough. Once each direction every half an hour 4 times. I’m actually really new to sour dough making. And loving it. But still don’t know a lot.