Step-by-Step Homemade Kimchi Recipe
By Amanda Paa – Updated April 9, 2024
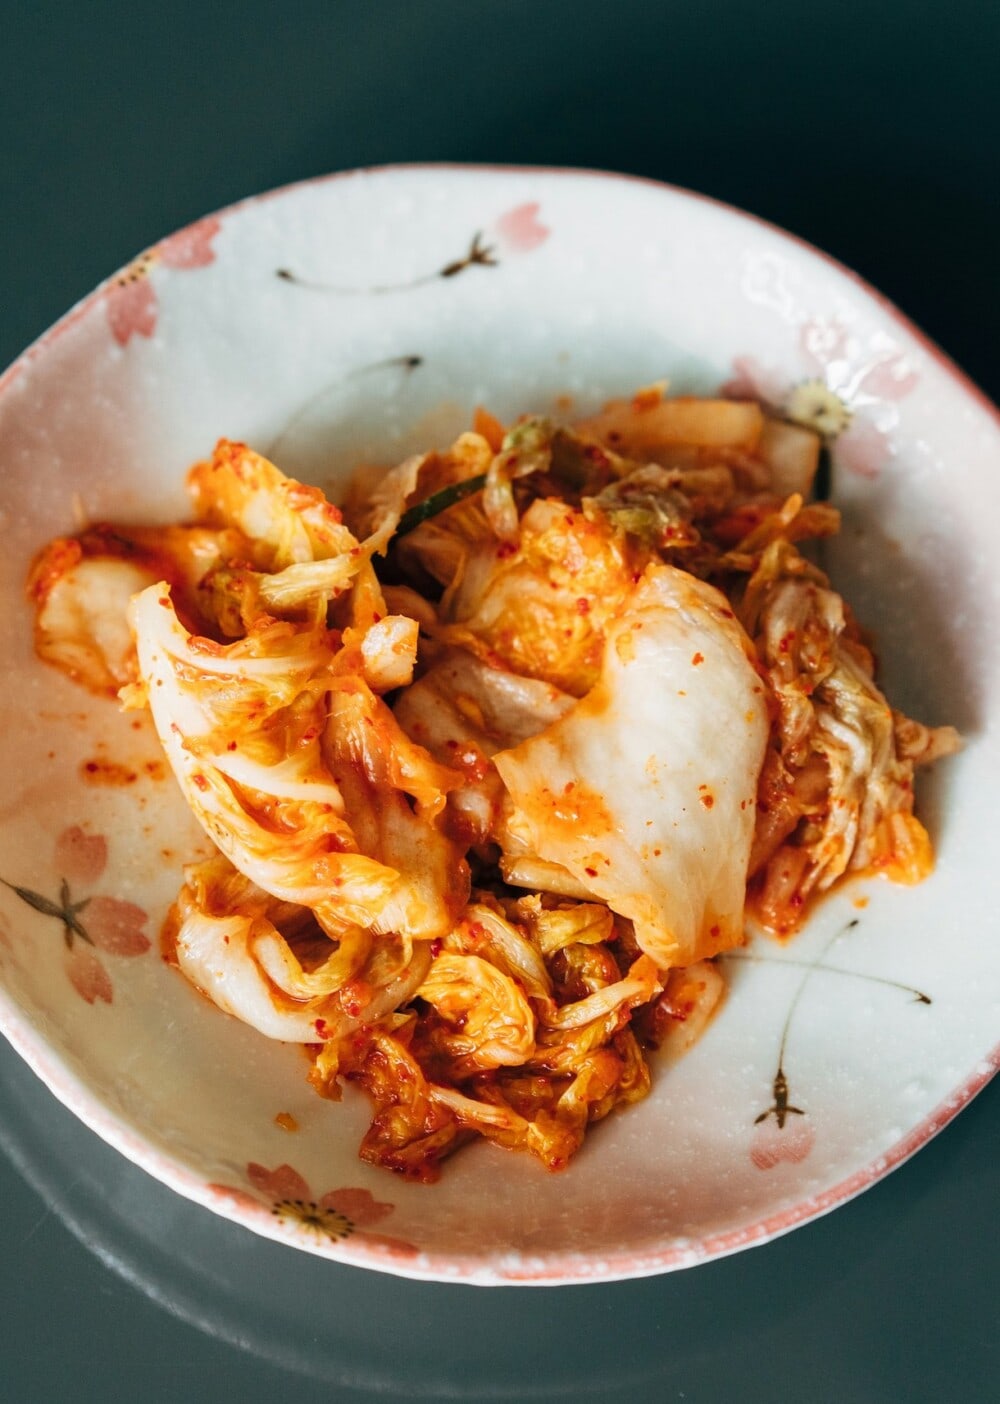
A step by step recipe for making homemade Kimchi, a fermented food made with salted, fermented vegetables! Napa cabbage is the star, along with daikon radish, carrots, and peppers. This is a vegan version, no fish sauce is used.
Jump to Recipe
This post may contain affiliate links. Please read my disclosure policy.

I am a Bohemian girl, through and through. My ancestors came from the Czech/Slovakia area and traveled to Ellis Island long before my time to sow their roots in the wonderful United States. They came from a place called “Paa Town”, so when they arrived here in the US and were asked a surname, they removed town and went with Paa. I sure do get a lot of questions about my last name….it is very unique. If I get married someday, my plan is to change my middle name to Paa so I am able to carry it with me forever.
I grew up in New Ulm, a small, full fledged German town along the Minnesota River in southern Minnesota. It surely is a beautiful place that is packed with history – Hermann the German, The Glockenspiel, Fasching and Schell’s Brewery the second oldest family run brewery in the United States! As a little girl you could often find me wearing a drindl and requesting just a plate of sauerkraut for dinner, maybe a couple of my grandma’s pillowy soft potato dumplings as well. I am still in love with sauerkraut as an adult and recently made my own through lacto-fermentation for the first time. It is so yummy and full of probiotics! I even find myself eating it for breakfast some days.
My adventures in canning and preserving have not stopped there. With all the beautiful cabbages and asian vegetables overflowing at the farmer’s market, I decided I wanted to try making kimchi.
What is Kimchi?
Kimchi is a traditional Korean dish made from fermented vegetables, usually cabbage and radishes, along with seasonings like chili pepper, garlic, ginger, and salt. It’s a staple of Korean cuisine and is known for its distinct spicy, sour, and umami flavors. Kimchi can vary in taste depending on the region and the specific recipe used, and it can be served as a side dish or used as an ingredient in various Korean dishes such as kimchi fried rice, kimchi stew (kimchi jjigae), and kimchi pancakes (kimchijeon).
Beyond its delicious taste, kimchi is also valued for its probiotic properties and health benefits due to the fermentation process, which produces beneficial bacteria that can aid digestion and support overall gut health.It is loaded with vitamins A, B, and C, along with healthy bacteria (lactobacilli).
I looked through several different versions online before I began, and even asked a few of the Asian vendors at the market for some tips. I found this website to have an excellent video on the process of making kimchi! Once I felt like I had enough knowledge to create my own kimchi, I gathered all the veggies and the madness began!
Here is the step-by-step recipe for homemade kimchi:
This recipe is versatile; you can adapt it to include whatever your favorite Asian veggies are and modify the spice level to your liking. The only things that are a must are having the right cabbage and at least one root vegetable in the mixture. Let your creative juices flow!
1. I gathered about 6 1/2 lbs. of napa cabbage and one large daikon radish. Core the napa cabbage just like a regular cabbage. Cut in half lengthwise, then in half again so you have four quarters, then remove the core from the bottom of each quarter. This picture is the napa cabbage chopped into about 1 to 1 1/2 in pieces and the daikon radish julienned. As you can see, kimchi has a much chunkier texture compared to sauerkraut.
2. Place into large bowl that you will have enough room to cover with brine and submerge the mixture. Dissolve 4-5 tablespoons of sea salt into about 10 cups of filtered water to create your brine. Pour over
cabbage and daikon, then press down with plate that barely fits inside container so that brine rises above mixture. I used a heavy pot filled with water to keep the plate in place and the mixture fully covered.
3. Let this rest for about 8-12 hours. In the meantime, I julienned 5 carrots and 1 green pepper and thinly sliced 2 leeks including green parts.
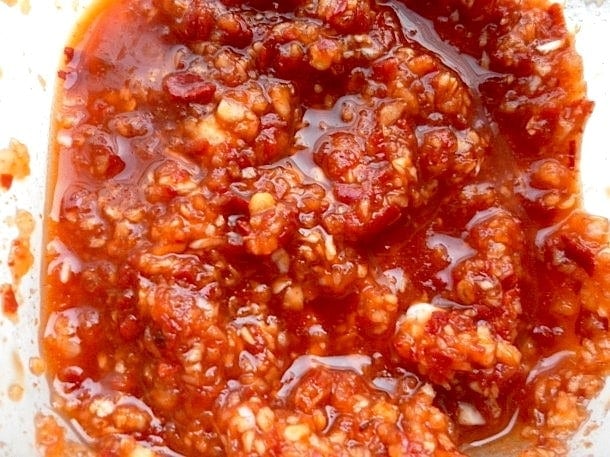
4. To make the paste above I pureed the following in a food processor:
-4 cloves of garlic
-3/4 tablespoon of dried, ground alpeppo pepper
-1 1/2 tablespoons of freshly grated ginger
-1 tablespoon sugar
-2 tablespoons gluten-free soy sauce or tamari (which is naturally gf)
-1/4 cup filtered water
5. Once I had let the cabbage/daikon mixture rest in brine for about 12 hours I drained all of the brine off into a separate container to keep in case I needed a little extra after packing the jars. Then I squeezed all of the brine out of the mixture. To this I added the additional veggies that I had chopped.
6. Then for the fun part – I poured the paste on top of the mixture and thoroughly worked it in, coating every inch of it! It is a good idea to wear rubber gloves for this part because of the strength of the peppers.
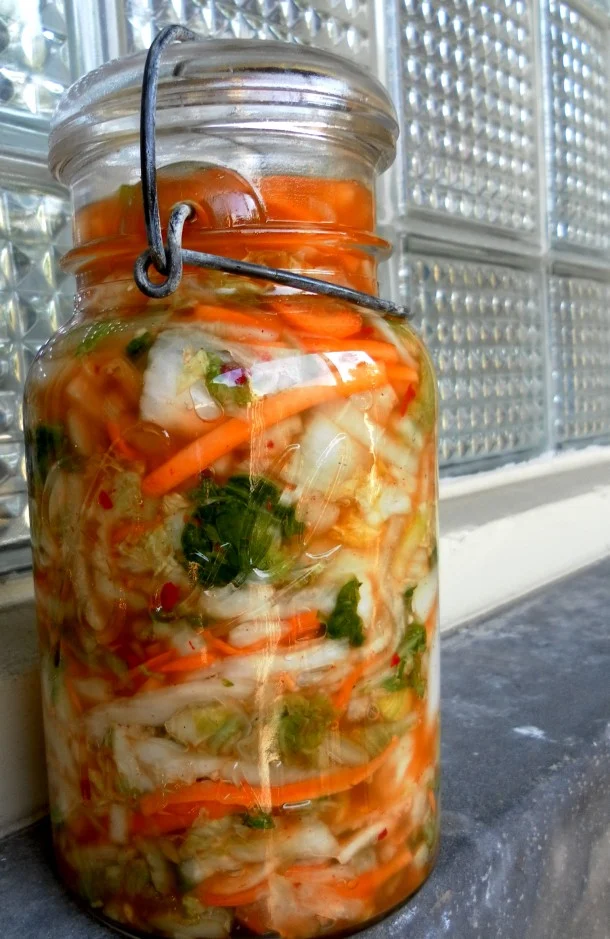
7. Finally tightly pack into a crock or glass jars (I like to use THESE) so the brine rises above the top of the kimchi and put cover on. If you are not getting enough brine from pressing the kimchi down, feel free to add some of the brine you drained off.
8. Let ferment on the counter for about 1-2 days, (if room temperature is around 70 degrees F), depending on how you like it to taste. Some people put it in the refrigerator right away because they like a milder version, however you will not get any of the probiotic components by doing this. I taste mine every 12 hours or so to make sure I like how it is coming along. Be careful when opening the jar though because the live bacteria will cause lots of bubbles and fizz!
9. Once the kimchi meets your taste standards, place in refrigerator, where it will last 4-6 months and continue to slowly ferment.
How to Eat Kimchi
Kimchi is great as a small side dish or condiment on a tasty burger. Need other inspirations to how to use it? Check out these kimchi recipes, everything from kimchi pancakes to fried rice.
- As a Side Dish: Kimchi is often served as a side dish alongside main meals in Korean cuisine. It can be enjoyed on its own or paired with rice and other side dishes.
- In Rice Dishes: Kimchi can be mixed with rice to create dishes like kimchi fried rice (kimchi bokkeumbap) or kimchi rice bowls. Simply fry cooked rice with chopped kimchi and other ingredients like vegetables, meat, or tofu for a flavorful and satisfying meal.
- In Soups and Stews: Kimchi is a key ingredient in many Korean soups and stews, such as kimchi stew (kimchi jjigae) or tofu kimchi stew (kimchi jjigae). T
- In Noodles: Kimchi can be added to noodle dishes like kimchi ramen or kimchi udon for an extra kick of flavor and spice.
- In Pancakes: Kimchi pancakes (kimchijeon) are a popular Korean appetizer or snack made by mixing chopped kimchi with pancake batter and pan-frying until crispy.
- In Sandwiches or Wraps: Kimchi can be used as a flavorful and crunchy filling in sandwiches, wraps, or burgers. It adds a unique twist to traditional sandwiches and adds a punch of flavor.
- As a Topping: Kimchi can be used as a topping for dishes like hot dogs, burgers, tacos, or pizzas to add a spicy and tangy element to these foods.
Yield: 10
SCALE:
Ingredients
- 6 1/2 pounds napa cabbage
- 1 daikon radish
- 5 carrots
- 1 green pepper
- 2 leeks
Kimchi Paste
- 4 cloves of garlic
- 3/4 tablespoon of dried ground alpeppo pepper
- 1 1/2 tablespoons of freshly grated ginger
- 1 tablespoon sugar
- 2 tablespoons gluten-free soy sauce or tamari which is naturally gf
- 1/4 cup filtered water
Instructions
- Core the napa cabbage just like a regular cabbage. Cut in half lengthwise, then in half again so you have four quarters, then remove the core from the bottom of each quarter. Chop into 1 inch pieces. Julienne the daikon radish, meaning very thinly slice into sticks.
- Place the vegetables into very large bowl or food grade bucket that you will have enough room to cover with brine and submerge the mixture.
- Dissolve 4-5 tablespoons of kosher salt in about 10 cups of filtered water to create your brine. Pour over
- cabbage and daikon, then press down with plate that barely fits inside container so that brine rises above mixture. I used a heavy pot filled with water to keep the plate in place and the mixture fully covered.
- Let this rest for about 8-12 hours on the counter.
- In the meantime, julienne 5 carrots and 1 green pepper, core and seeds removed. Thinly sliced 2 leeks, including most of the green part except the very top, which can be tough.
- To make the paste puree the paste ingredients in a food processor until smooth.
- Once cabbage/daikon mixture has rested in brine for about 12 hours, drain brine off into a separate container to keep in case I needed a little extra after packing the jars. Squeeze the vegetables to get extra brine out, and mix in the additional veggies.
- Put rubber gloves on your hands. Pour the paste on top of the mixture and thoroughly work it in, coating every inch of it!
- Finally tightly pack into a crock or glass jars so the brine rises above the top of the kimchi and put cover on. If you are not getting enough brine from pressing the kimchi down, feel free to add some of the brine you drained off.
- Let ferment on the counter for about 1-2 days, (if room temperature is around 70 degrees F), depending on how you like it to taste. Some people put it in the refrigerator right away because they like a milder version, however you will not get any of the probiotic components by doing this. I taste mine every 12 hours or so to make sure I like how it is coming along. Be careful when opening the jar though because the live bacteria will cause lots of bubbles and fizz!
- Once the kimchi meets your taste standards, place in refrigerator, where it will last 4-6 months and continue to slowly ferment.
Did you make this?
tag @heartbeetkitchen on instagram and hashtag it #heartbeetkitchen
August 25, 2011
Gaye
November 16, 2020
I made kimchi just last week following a recipe by a Korean lady on youtube. She said you could use honey as a sweetener instead of sugar. She also used a pear in her recipe. Not as a sweetener substitute if was just part of her recipe. And as a sub. for the pear she said you could use a sweet apple of your choice. As a sugar substitute she said you could use artificial sweetener such as Equal. 1/2 pack of Equal is what she used and her family before her used. For the kimchi that is not for long term she said brown sugar was ok to use. Hope that helps anyone that needs it.
NORMITA
June 7, 2018
ALSO CAN WE USE SOMETHING OTHER THAN SUGAR LIKE SWEETENERS? I AM DIABETIC AND ON LOW CARBO. TY
Sarah
January 11, 2018
Is there any substitute for carrots? I am allergic and I can’t seem to find a kimchi recipe without them. Thanks!
amandapaa
January 11, 2018
Hi Sarah! If you aren’t able to use carrots, I would suggest one medium sized, peeled and shredded sweet potato. You’ll still have sweetness, but also something that holds up like carrots.
Sarah
January 11, 2018
Wow!!! What a GREAT idea. Thank you so much!
Billy
October 25, 2017
This looks delicious! I love Kimchi – I’ve never made it at home but I would love to be able to have my own homemade Kimchi to share with my family. Thank you for sharing!
jana
May 28, 2017
when you leave it on the counter, do you put the lid on tight or do you lave it open?
amandapaa
May 30, 2017
Hi Jana! No lid, just a cloth with a rubberband to secure it. You want some air to get it, but keep out bacteria at the same time.
David Lawson
April 16, 2017
I saw another Kimchi recipe where they used a finely chopped apple in place of the actual sugar. Do you think the natural sugar of the apple would be sufficient for the fermentation process?
amandapaa
April 16, 2017
hmm…. i’m not certain about that. i would ask a fermentation expert.
Cameron
January 14, 2017
Could you leave the sugar out?
amandapaa
January 15, 2017
hi! no, the sugar is crucial for the fermentation process. it is what helps to feed the bacteria, and it’s such a small amount.
Debbie A
August 1, 2016
what would a substitute for the alpeppo pepper be? I have never seen that in stores here.
thanks
amandapaa
August 1, 2016
hi! a good substitute would be cayenne pepper.
NORMITA
June 7, 2018
WOULD JALAPEÑOS PICKLED ?
amandapaa
June 10, 2018
Yes, you could jalapenos! For your other question, I haven’t tested this recipe with other sweeteners.
NORMA NEVAREZ
June 10, 2018
THANK YOU FOR UR RESPONSE!♡